Sunday, June 10, 2018

Feed Your Soil Not Your Plants

We hear this over and over again.  Don't worry about what you are feeding your plants... feed your soil instead.  And we all do our best but how often do we get a report card to see how we did?  This year, the ninth year of this garden, I've taken back the half previously managed by the neighbors.  So now I get to see how well they have been feeding the soil.  Out of twelve beds, I am resting four.  Two of theirs, and two of mine.  I planted buckwheat as a cover crop.  I prepared all four beds the same, and planted the seeds on the same day.


The photo above shows the difference in the beds today.  The one on the left was theirs.  The one on the right is one of mine.  The buckwheat in my beds is thicker and taller.  So what did I do differently than they did?
  • I did not till the soil (disturbing worms and upending the micro-organism layer)
  • I did not use synthetic fertilizers (Miracle-Gro is salt based which leaches natural nutrients out of the soil)
  • I added a balanced organic fertilizer each spring (but not this spring since they are resting)
  • I added compost as a mulch layer after planting and in preparation for winter

I think it worked.


But - no body's perfect.  Whenever you plant a consistent crop over an entire bed, you will see areas which needs some attention.  I've seen this before.  The buckwheat on the end of this bed is not as vigorous.  The soil needs some attention.

Now that the main gardening work is past, we can turn our attention to tweaking past projects.  For instance the dry creek bed.  The line between the lawn and the rocks was too complicated making a corner that made the mower stop and turn sharp ripping up the sod in the same place over and over.

Original mowing line from last year
Friday I cut a new smooth line, stripped the sod out and we put in a load of #2 stone and a few boulders.  I have two day lilies that were sitting around, and an ornamental grass that need to be dug into the rocks.
New mowing line
I'm happy with my idea to bury fiber pots into the rock.  The perennial plants did well and came back strong.  I've examined the pots that held annuals that had to be replaced, and there are areas in the pot wall that have broken through so the pot will eventually disintegrate into the ground.


There are always pots sitting around that need to be dug in!  Below in the heavily shaded wooded area, four helleborus in fiber pots shielded from clumsy deer hooves by a canopy of wire that need to be placed.


Back in the garden, I have tomatoes set.  The plants with wires jabbed into their stems have shown no ill effects from their surgical procedure.


Cucurbits are terribly sluggish.  The cantaloupes below were seed in the cold from the first of may and transplanted into the bed two weeks ago.  I always plant two seeds together in case one decides not to live, and they are still deciding.  The second seeds are just now germinating.  The cucumbers aren't any larger or more vigorous.  But one of these days I'm sure they will take off.  If we get some consistent sun.


The buckwheat is just about to bloom.


Wednesday, June 6, 2018

Bedding Plants

Bedding plants is a term you don't hear as often anymore and which always seemed a little elusive  to me.  I guess you put bedding plants in a flower bed, right?  But don't you put all plants in a flower bed?  Why are annuals called bedding plants and perennials aren't.   Then I stumbled across it in a context where it suddenly made perfect sense.  Why would we refer to annuals as "bedding plants"?  Because of the Victorian love of formal gardens and a style of gardening called "carpet-bedding"


From The English Garden:
An informal English Cottage Garden
Bedding schemes were seen as the height of style in the mid- to late 19th century. Any gardener with a semblance of horticultural ambition took pride in his ‘bedding border’, often inspired by a growing number of paint-by-number designs in emerging gardening magazines. The practice of ‘bedding out’ goes back to the 17th century, when formal parterres were filled with greenhouse-raised flowers in spring and summer. But it was in the Victorian era that it reached its zenith, stimulated by an abundance of newly discovered exotic bedding plants such as heliotropes, pelargoniums, petunias, verbenas and salvias, raised in state-of-the-art conservatories and greenhouses.

To create these intricate formal designs you had to have a dense, compact plant that grew and bloomed consistently: marigolds, wax begonias, coleus, dusty miller, verbena, salvia.  You didn't need the tall cottage garden plants like hollyhocks, snapdragons, lupines.  You weren't creating a flower border or garden you were creating a flower "bed" and you needed bedding plants.  

Elenor Perenyi writes in her book Green Thoughts that "they quickly became the basis for the only really hideous gardening style on record.  In England it was called carpet-bedding because the low growing plants could be packed into patterns like those of an Oriental rug-but also be made to spell out mottoes, depict clocks and maps, even the human face."


Actually I like the style.  I think it is creative and artistic.  It not only requires a lot of planning, but also a lot of upkeep.  If I were an English gardener employed by a large estate, I might also pass my time making pictures with flower.  I might even do it with my lettuce.  But then I could never pick my lettuce!

Lettuce plants laid out in a carpet bed design


Monday, June 4, 2018

Water Weed Wait - June Status Report


I've always said the June in the garden is boring.  It's a great time to go on vacation!  Everything is planted.  Nothing is ready to pick.  The only thing you can do is water, weed and wait.


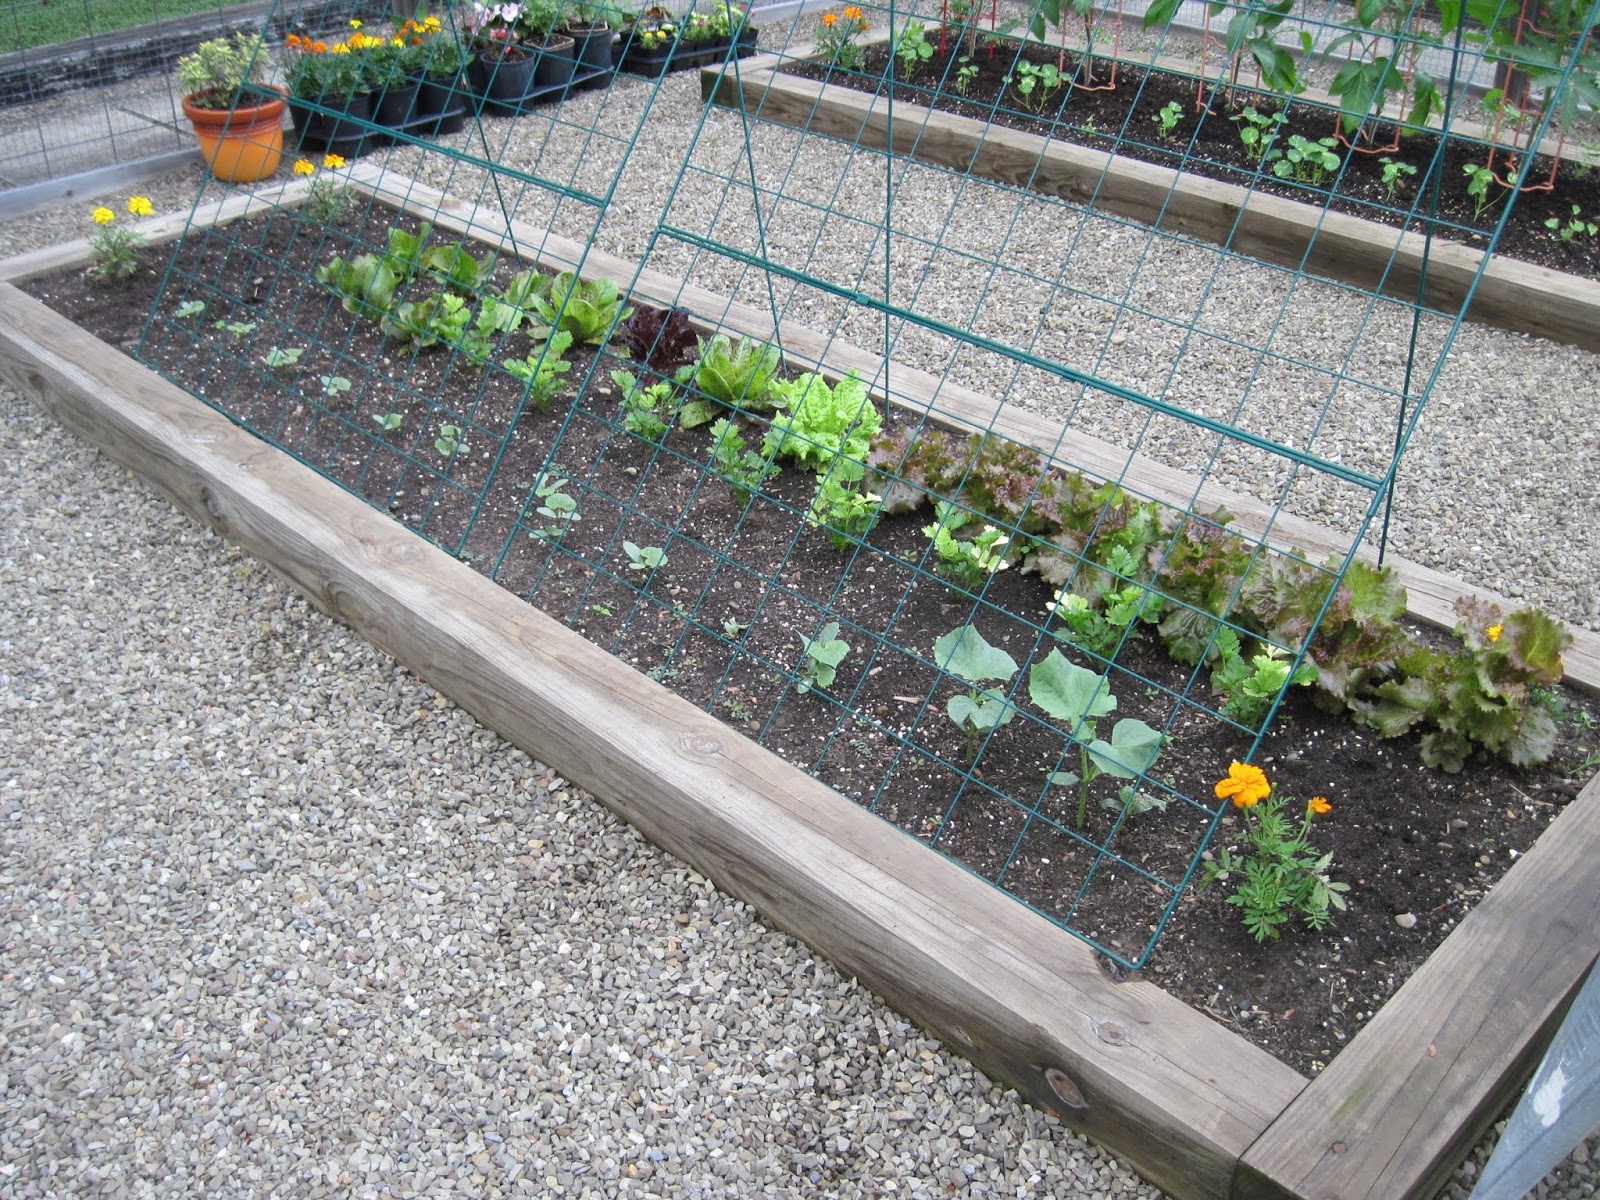
I've been watching this garden on my way to work.  They have rallied after their raised beds disintegrated and come back with a bigger plan and a fence.  Their posts don't look very sturdy.  But their tomatoes are in.


Our next door neighbors have planted their garden.  All looks well.  I'm waiting for my tigerlilies to bloom.  I think they will look stunning against the black background.


This is what I'm calling my "pickle garden"  I've planted pickling cucumbers (usually I only do slicing) and dill.  The dill has been very sluggish to come up.  I planted three different times in May, and then again the middle of last week.  I finally have some dill seedlings coming up.


Our clematis vine is putting on a great show.  This fall we are going to have to put a cattle panel on the fence because the little store bought trellis is no longer adequate.


I've tidied up the compost pile.  This is where I keep a lot of my extra perennials stored so it usually looks like bargain day at a greenhouse with all sorts of mismatched pots sitting around.  The spare Rising Sun Redbud tree is in a pot.  There are also 2 daylilies in fiber pots waiting to be planted and three porcelain vines and three Siberian Irises sitting on the back wall.


Every bed of the garden has something growing.


Under the wire cloches are cantaloupe seedlings.  I planted those in the cold frame the first week of May and they only decided to come up May 25th.  I had originally thought I would try them in containers again.  But I had an open bed that I didn't have any urgent plans for so I transplanted them and then covered them to keep crows from snipping them off.  That will give them the best chance to produce something this year.


This is my spare tomato bed.  It was originally destined for bush beans.  But a few bush beans go a long way and there is still plenty of time to grow more so the beans went down one side, some spare lettuce down the other and the three spare tomato plants down the middle.  I can plant more bush beans after the first cucumbers.  Bush beans are never a rush.  As long as I get them seeded by the end of July they will be fine.  I'm sort of beaned out anyway.

Blue Beauty, Absinthe and Lenny and Gracie's Kentucky Heirloom

Maestro peas starting to form pods.


Usually my second variety of peas is Wando.  But Wando grows about 7 feet high, and last year I had to anchor the extra tall pea fence to keep it from blowing over.  So this year I tried varieties that should be easier to manage.  On the left is Penelope and to the right is Burpeanna.  The Penelope were planted the day after the Maestro (Apr 14th and 15th).  Maestro is a  61 day pea (bloomed around 45) and Penelope is a 59 day pea and they are not living up to their description because they are already a week behind the Maestro bloom date and showing no signs.  They have not yet bloomed.  The Burpeanna had a poor germination rate.  They are a 63 day pea.  I believe I planted them May 5th so they should be three weeks behind the Penelope.


The Buckwheat is coming along nicely


Second planting of lettuce and bed prepared for the second planting of cucumbers in early July. There is a little oak leaf lettuce volunteer which I left to grow.


The first planting of cucumbers and lettuce with some celery and radicchio also.


Of course the main focus of the garden is the tomatoes :)  These are my main tomato plants.  They are hip high now and blooming.  I've side dressed them with worm castings and planted Nasturtium beside them to provide a ground cover to prevent splash up when it rains.  I've removed the bottom layers of leaves.  


You can remove the leaves all of the way up to the first blossom if you want, but this early in the year that is a little extreme.  I am going to try something new this year.  It is well know that copper is the main ingredient of tomato disease fighters.  You can spray it on.  Dust it on.  Old timers used to drop a copper penny in the hole when the seedling was transplanted or insert it into the tomato stalk.  


Of course pennies don't have as much copper in them now as they used to, so copper wire is the easiest source.  So when the tomato stalk is at least the thickness of a pencil, you are supposed to jab the copper wire into it.  OUCH!  right?  Well I tried it.  I still had two spares unplanted anyway, so the risk was not absolute.


I didn't do all of my plants.  For one thing, it seemed a bit of a risky operation, even on a cool rainy day.  But I did three of them and they seemed to take it just fine.  Since this is an experiment, I have to have a control group.  In a row of six plants, I inserted the wire into three plants.  Three out of four of the same variety.


Other odds and ends.  I did put in some potato plants.  And the only reason I did was that I had some potatoes in the house that were sprouting all over the place and I didn't have the heart to compost them.  I've always had good luck with using grocery store taters as seed potatoes.  The front row is red and the back row is russet.


And on the patio I put some spare lettuce plants in pots.  I started seeing these in nurseries last year and wanted them but refused to spend the money.  I stuck them here where the east sun and the west sun is blocked completely.  I used Miracle Grow Moisture Control potting mix and they have taken off and surpassed nicer transplants that went into the garden beds a week or two before.  You just can't beat that Miracle Grow soil.  As much as I hate to admit it, considering it's ties to Monsanto, it really is a great product.  This spring I also started with several bags of Espoma Organic Moisture Mix and I can't say I'm all that impressed with it.  I don't enjoy working with it.  It is heavy and soggy right out of the bag, and so far the plantings have not shown any great growth.  I did use it for my tomatoes when they were in gallon pots and you can see those results were great.  But in my large planters - not so much.  I'll probably try at least one bag again next year.

Tuesday, May 29, 2018

An Heir and a Spare

This is the time of year when I am either so busy gardening or so busy sitting and enjoying my garden that I don't take time to blog.  Blog ideas come and percolate, and then by the time I get around to computering, they're gone.

The vegetable garden is in.  Perennials have been added or replaced.  The landscaping has been edged and mulched and the annuals inserted where needed.  Because we mulch so heavily each year, I usually plant my annuals in 6 inch peat pots before placing in the landscaping.  Many of them will just be nestled into the deep mulch.  Sometimes a small amount of soil will have to be dug out to level the pot.  On occasion, depending on the location and the annual I will plant directly into the soil.  This does not seem to inhibit the plant's growth.  I have a parsley plant in a peat pot who is on it's third year and thriving.  Having the rim of the peat pot also helps when I water because if the plant is on a slope in mulch, most of the water will run right off.  The pot helps catch the water.


I always buy a spare six pack of marigolds
Leftover Sunpatiens and begonias also get potted up.
When I'm all done with planting annuals, I pot up the leftovers in gallon pots.  Sometimes I have intermediate annuals hanging around in 4 inch pots.  It's nearly impossible to keep a 6 pack of root bound annuals watered, so if I have leftovers, or a few sub-standard plants, instead of throwing them out I put them in 4 inch pots to grow for a couple of weeks until I find a spot for them.

What were once scraggly coleus and portulaca plants shelter in the
partial shade of the wash basin beside the spare tomato plants.
Despite the fact that Marigolds are pretty hardy and almost fool proof to grow, they do take a beating from slugs, especially in certain areas of our landscaping.  Whenever one gets devoured, I have pinpointed a slug population which can be killed, and then the marigold replaced with a spare.  So I buy an extra 6 pack, pot it in gallon pots right away, and then if nothing needs replacing by July, I have nice large plants ready to add to any spot which might needs some color.


I always plant twice as many tomato plants than I need.  The first planting went in last week.  Three of the spares caught up well enough that I will also plant them, especially since they are odd varieties:  Blue Beauty, Lenny and Gracie's Yellow Kentucky Heirloom and Absinthe which is a green tomato. The Lenny and Gracie I tried a couple of years ago and never got a transplant.  That was the year I only planted Kentucky Heirlooms.  Now I have two healthy, stocky plants that I can't choose between.


This year four of my beds are resting with a green manure crop.  I chose buckwheat because it has a white flower which should bring in a lot of honey bees and other pollinators.  The seeds had been in the ground a few days when we got a nice warm rain and the next morning I had a whole crop of buckwheat!


Another of my beds is devoted to cutting flowers.  This photo is from last weekend too.  Down the center are dinnerplate dahlias which are about 6 inches high now.  They are supposed to grow to 44"+ so I constructed very stable supports from tomato ladders and bean poles held together with cable ties.  Down the sides are snapdragons and zinnias.  Besides the nursery transplants I seeded two varieties of zinnias and calendula.  Zinnias are another vigorous seed where you plant them one day and after the first rainfall everything pops up.  Just like that.  The past week has been great growing conditions.  I have plants popping up everywhere.  Instant gratification.  The darn peas take three weeks in the spring.  Not three days!


Whats in the ground:
Tomatoes (4 varieties)
Cucumbers (both slicing and pickling)
Peas (3 varieties)
Lettuce and Radicchio
Celery
Bush Beans
Cantalopes
Potatoes (Red and Russet)
Various Herbs

Everything is small but green.  Now its just a matter of watering and waiting.


When your whiskey barrel falls apart and leaves behind its rings,
make a garden sphere for free! 


Wednesday, May 16, 2018

Everything but the Gate


The pictures speak for themselves.  5 Weeks in the making.
You can get around the outside edge of the beds, especially to the right, but the wide open center allows more room for a wheelbarrow.  In fact, you can sit on the ledge to the right and weed which is pretty convenient.


Fresh empty soil is so inviting
The beds are three feet wide ion the inside measurement so you can reach across without much trouble


 The beds are 14 inches deep at the center.


Just waiting on the gate to be hung and gardening may commence.


Thursday, May 10, 2018

New Project - 2018 Progress Report

Over in the neighbor's garden annex, construction is still underway.  The fence is complete using Hog Panels from Tractor Supply with 1" square welded wire clipped to the bottom two feet to keep bunnies and woodchucks out.  When standing on the ground level, the fence is over 5 feet high so I'm not worried about the deer hopping over on a whim.  If we don't finish the garden, we could probably house elephants. 


The fence was a challenge to build.  The first post hole broke the post hole digger and required a quick trip to the parts store.  The seventh post hole struck water.  This has happened to us several times.  Twice the tractor has sunk to the axels in the mud hole created in under ten minutes.  That's how much water we can hit.  They are gushers.  The seventh post, a 6"x 6"x 8' floated right out of the hole.  But it's in there now


Some people may say this garden is over built.  Just like the first one.  So why do we go to all of this expense and effort?  Because we don't like doing things twice.  Take for instance this little garden on my way in to the office.  I snapped this picture this morning.


This unfortunate little raised bed garden was constructed about 4 or 5 years ago.  They didn't fence it so they had to cover things with wire and netting.  They didn't make paths so they had to mow or trim in between.  By last fall the beds were bulging and beginning to come apart at the seams and when the snow finally melted, a couple of them popped apart spilling soil all over the lawn.  Now it's a complete do-over.  The only part still useful is the cold frame there on the corner bed.  There are a couple other little raised bed gardens on my daily drive in various stages of disrepair.


On the other hand, my garden is eight years old this month and still requires very little work to maintain.  When spring roles around all I have to do is walk out there and poke some seeds into the soil and I'm in business.  Twice we have brought in additional gravel to level low spots.  Two of the rails need to be replaced because the wood has twisted.  And one of the gate posts needed plumbing up a couple of years ago.  Other than that its just as sound now as the day it was finished and I expect it will still be another ten years from now.  The Garden Annex should last as long.  No do-overs.

Next job is to put in the 6"x 6"s that will define the beds.  They will be pinned down with re-rod and the gravel will be shoveled out down to soil level.  Then there is a big ugly pile of top soil and compost to sift through.