Sunday, August 1, 2010

Yes You Can ~ Bread and Butter Pickles

Since I have a fairly large (and expensive) garden, and I'm all about eating locally and being self sufficient, it is inevitable that I will have to can something. So far, my repertoire includes tomatoes and sweet pickles. I made a batch of sweet pickles back in 2007. We still have two jars in the cupboard. But Tim insisted that this is a pickle year.

The neighbor, Shelly, made dill pickles a couple of weeks ago. Yesterday they pulled their spent cucumber vines, accumulating about 18 pounds of cucumbers. Shelly eyed the pile with a marked lack of enthusiasm. "Look Shell'. More cucumbers! Yay!" I could tell Shelly was not up for another round of pickling. She was pickled out. " Tell, you what, in good neighborly fashion, I'll make these into sweet pickles, and we'll swap sweet for dill." The cucumbers were handed (perhaps shoved?) in my direction. The deal was done. So today was sweet pickle day!


I have collected a few Ball Blue Books from between the wars. They are very informational, full of recipes and advice (it would have never occurred to me to pickle walnuts), but mostly I love the illustrations. See how the steam curls wistfully behind her? And she's smiling! This must be FUN.


The 1916 recipe for sweet gerkins begins... "Scrub two hundred cucumbers with a small brush, put them into a stone jar, and cover them".... wait... did they say TWO HUNDRED? That must be one heck of a stone jar! Actually, I do have a stone "jar" (large CROCK) big enough to hold two hundred small cucumbers. But just for kicks, lets see what the spice packet I bought at WalMart says. 15 - 17 pounds. Good, that's what I have. 15-17 pounds of misfit cucumbers.


Now this is where my collecting comes in handy again. You don't want pickling lime or boiling vinegar in your aluminum pans. So, every large lidded piece of graniteware I have is pressed into service. Most of the sliced cukes fit in the large stock pot.


The rest... well the rest of them ended up in a slop pot full of lime water. I guess collecting pieces with their original label renders them useless for canning.


I like to use either Pickle Crisp or Pickling Lime to ensure that my pickles are crisp. If I were using actual pickling cucumbers, or small hard ones, I might skip this step. But when you're using a hodge podge of regular old burpless slicing cukes... better safe than sorry. I'm a little low on Pickle Crisp (hard to find these days) which can be added to the jars before they're processed, so instead I soaked the cukes in lime over night.


Pickling and canning is pretty simple in theory. But, it's a strategic nightmare. How do you get 10-12 quart jars hot, keep them hot, get the lids hot, cook your brine AND have burner left for processing? Not possible. I started with the pint jars anyway. They're easier to find homes for, and fit in the fridge better. I don't think I ever need a quart of pickles at one time anyway. Here I have 2 pots of sterile jars, the graniteware full of brine, and tucked in behind, a small sauce pot for the lids. The canning bath is out on the driveway on the turkey fryer! Tim is manning the fryer. He has a drink in hand, his CD player, and a lawn chair.


And so the fun begins. Or in other words: Havoc ensues.

Because you can easily follow the canning instructions in whatever book or spice packet you choose, I'll just give you a couple of helpful hints.

  • A watched pot never boils. 4 of them take 4 times as long.
  • Keep all boiling water in case you need to add to the canning bath.
  • Keep a sauce pan at the turkey fryer in case you need to bail some out when switching from pints to quarts.
  • Rubber dish gloves give adequate protection to grab most boiling objects for a moment.
  • Keep stuffing, more slices WILL fit in that jar.
  • You will run out of brine before you run out of slices, but prepare a few extra jars, lids and rings just in case. (since my cukes were such a hodge podge I sorted them as I sliced and pickled the most likely suspects first. Leaving the large {possibly bitter} seedy portions for scrap.)


For the next hour I put the camera safely out of harms way. I cheerfully stuffed and simmered and bailed and added water. Water did boil. Not much mess was made. Tim hovered on the edge asking how much longer. After an hour and a half he became impatient. We had a lively yet good natured debate over whose idea this was (his) and he declared himself cured of pickle making forever.

I waited with bated breath for each of the lids to pop telling me that this was not a colossal waste of time. I even pickled a couple of jars of yellow zucchini as an experiment. Because, Lord knows, we always need another use for zucchini.


And it all turned out perfect. Perhaps not picture perfect, but I'm still smiling.

Saturday, July 31, 2010

I know what you did last summer...

So while I've been gardening, I'm sure you realise that my husband must be building things in the background. He has been working on landscaping the garden into the lawn. Thanks to the generous donation of these used patio pavers by my step-father, we have a lovely walkway along two sides of the garden.

This makes it nicer to get back and forth to the neighbors, and to our far side yard.


And then it turns towards the garden shed. Between the garden shed and the garden, we are planning a perennial vegetable bed for asparagus, rhubarb, horse radish etc which will surround the chicken run to be built on the coop side of the shed. Along that bank, is where the infamous line of stumps are buried. And wouldn't you know...


Right where Tim wants to put a set of steps... an overturned stump! And what's this? A cavernous void under it... Hey Honey, Look! A Root Cellar!


Tim always talks about all the money he's buried in this property. He's not talking about cash in Mason Jars. He's talking about tons of fill, hundreds of yards of gravel, thousands of feet of drain pipe and fittings, dozens and dozens of yards of topsoil to top it off. So here he is again, burying money in a big hole.


He always wants to know why I persist in taking all these pictures. Well, first and foremost, they are a great record of where everything is so we don't dig something up... like a stump. Or a drain line. But they are also a great record of how difficult this stuff can be, why it takes so long, and why he feels so tired at the end. Inevitably, sometime early winter, he will ask me "what did I accomplish this summer?" Then he will start wondering why his big garage has not been wired. Why his 1954 Ford car and truck are not running. Why the gas pumps he collected have not been restored, why the railing aren't up on the front porch... it goes on and on.

So, I will get out the pictures to refresh his memory about all the work this guy does practically single handedly. In the past 7 years, not only has he remodeled a one hundred and sixty some year old farm house from below the ground up to the top of the chimney. But, Honey, remember when this...


Looked like THIS?


Have you forgotten the 143 large evergreens you cut that year? Or the 143 stumps you pulled with your backhoe?


Do you remember how big some of them were? (no we didn't bury this one)


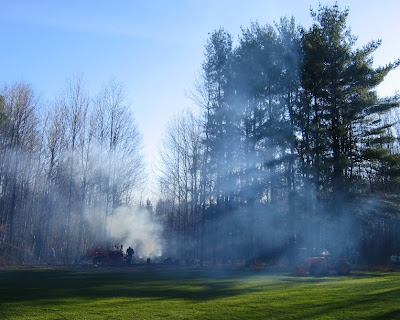
How about the long lines of branch piles waiting to be burned?


Or the brush fire of 2005 that burned for 7 weeks straight without having to be relit?


And for 2010 ~ Do you remember when this....


Looked like THIS?


And last year when the chicken coop was still up on blocks, and the tank wasn't buried?


And the most telling points are the ones I don't get on film. Like this past Thursday when he went to get the railroad ties to start his project. He had put a 220' roll of no-climb horse fence on top of them. Rather than fling the fence off into the driveway, he carefully placed it in the tractor bucket, and oh so gingerly began to curl the bucket. At which point, the roll of fence jumped out of the bucket, bounced off the pile of ties, and landed on the far side in a thicket of poison ivy.

Tim climbed back into ivy, and flung the roll of fence off into the driveway. Then he loaded up one tie. Which was home to a nest of bees. Which stung him. Shortly thereafter, he found the stump.... Poison Ivy, Bees, Stump. All in a day's work.


So, yes Dear, you have, against great odds, accomplished something this summer. You've made your wife very happy.

Thursday, July 29, 2010

Barlow Jap Reviews 2011


The reviews for PaPaw's tomato are starting to roll in. Each year, "Camochef" plants over 100 tomato plants of many many varieties, then keeps the internet-based tomato freaks entertained with his vivid descriptions of his tasting experience as he rates his varieties in order of preference. Last year the Jap tomatoes finished #6 in his ratings which was quite an honor. So far this year it is #2, but the fun and tasting has just begun!


Camo's 2010 Taste Test-Barlow Jap
This Pink Oblate tomato was one of the first to show green tomatoes on the plant and plenty of them. They are ranging from about 9 oz. to 12oz. so far but many out there that look larger. Once you slice into this tomato, the first thing you notice is how meaty it is. This is a solid tomato without many seeds. It has a thin skin and a small core, both good characteristics in my book. Still it is reasonably juicy. The first bite reveals the somewhat sweet taste that is quite refreshing to a person like myself. This tomato tastes very good without adding a thing to it, but a little sea salt improves its flavor even more. Grabbing the bear and adding some Zatarains, I found myself almost overwhelmed by the wonderful flavor. The texture is perfect, the taste unbeatable by almost all others so far. It doesn't have that winey taste that DDR has but it's very close to being the perfect tomato. I think it would be a wonderful tomato in sauces, but this was gone much to soon. It's going ahead of the Tarasenko6 in taste, slipping right behind the DDR, for now. This finished the year last year in the #6 position, it's at #2 right now. This is another highly recommended tomato, especially if you favor a slightly sweet taste. Would be great in salads, on sandwiches, or just eating out of your hand with juices running down your chin! Many will recall this being "Too Many Tomatoes" Grandfather's tomato from WW2, it's a keeper! Will always have a spot in my gardens! If you get the chance, give it a try!


Camo
I'm sure we can do better than 6th this year. I know the Japs are being grown by more people this year than last so I'm interested to hear what others say about them. I've already eaten my first Jap and it was pretty good. Not the best ever, but there are more on the way! Time to get back to perfecting my tomato sandwich building skills!

Monday, July 26, 2010

What's Growing ~ Bush Beans


Bush beans are one of my favorite garden crops. There is nothing that can compare to fresh picked green beans or even the ones you freeze yourself. Canned beans just won’t ever compare. Tim’s Uncle Lloyd, who now lives in South Carolina, says one of his friends once told him “That’s the thing about Northerners, they under cook their green beans.” You’re darn right we do! They should squeak when you bite them. And we under cook our corn on the cob too… or you Southerners over cook yours, depending on your point of view. But that’s a topic for another day. Every time Lloyd comes to visit, I make him green beans and corn on the cob. He seems to prefer the Northern cooking methods. If not, he’s too Southern to say otherwise.


The bush beans are just now coming on strong. And this is where I must make my first mention of “gardening for the old and myopic”. I prefer yellow or purple beans. Why? Because I can see to pick them. This is doubly important in bush beans because they’re low to the ground, and they look a lot like stems. Plus the yellow Goldmine beans from Burpee are just beautiful creamy beans.


And the Purple Queen… I’ve rarely seen a more gorgeous vegetable. Those purple pods look like frosted art glass hanging against bright green leaves. They’re simply stunning. The only problem with purple beans is when you cook them they turn boring green. The water, however turns a brilliant green. I’m talking lime jello green. It’s rather shocking.


My favorite green variety of bush bean is Blue Lake 47. I’ve tried a few others such as Contender and Tenderpick, but Blue Lake has the yield and the quality that I’m looking for so it’s the one I go back to year after year. This year I also planted Isar yellow filet bean. It will be a little while before they produce, so the jury is still out on that one.


I start planting the bush beans in mid-May, and keep planting a row every week or two until I run out of space or beans. I’m planning to plant another row or two in the coming week. I’ve found that the Goldmine variety, if you leave them alone when their first crop is over, will rally again the end of August and produce a nice second crop. That is if the weather is milder and they don’t burn up and dry out before then, and you are kind to them when you harvest the beans and don’t break the heck out of the plants. It’s also important to keep them picked and not let any get too mature or the plants will just plain quit.


Green Bean Facts:
  • Beans are one of the longest-cultivated plants. The common bean has been cultivated for six thousand years in the Americas.


  • Beans were an important source of protein throughout Old and New World history, and still are today.

  • There are over 4,000 cultivars of bean on record in the United States alone.
    Most of the kinds commonly eaten fresh come from the Americas, being first seen by a European when Christopher Columbus during his exploration of what may have been the Bahamas, found them being grown in fields

  • Fresh green beans are very low in calories and contain no saturated fat; but are very good source of vitamins, minerals and plant derived micro-nutrients.


  • They are very rich source of dietary fiber

  • Green beans contain excellent levels of vitamin A, and many health promoting flavonoid poly phenolic antioxidants such as lutein, zeaxanthin and beta carotene in good amounts.
    They contain good amounts of vitamin-B6 (pyridoxine), thiamin (vitamin B-1), vitamin-C. and minerals like iron, calcium, magnesium, manganese and potassium which are very essential for body metabolism.

  • Snap beans got their nickname from the snapping sound they make when being broken.
    String beans are called that because most varieties used to have a long fibrous string that ran along the seam of the bean. Botanists found a way to remove the string and in 1894 the first successful stringless bean plant was cultivated.

Sunday, July 25, 2010

And the Rain Rain Rain....

....Came Down Down Down.


When will this ever stop? Last year we had the fewest sunny days ever. This year, we're surpassing rainfall records. June had twice as much rain as average (around 8 inches) and July is hot on her heels. The thing is, it may only rain occassionally, but it comes down in inches per hour. The humidity kicked in almost two weeks ago. It's never pleasant to wake up to 93% humidity.

Today is one of those all day rains. And we don't need it. Thursday night rainfall: 1.5" Friday night rainfall: 1.125" Saturday afternoon rainfall: 1" (in 45 minutes, plus three tornados). Sunday morning rainfall: thus far 1.125" and still raining. We went out to do a perimeter check on all the drains, and to make sure everything that should be upright still is. I picked two zuchini and made sure the cucumbers weren't getting out of hand. The beans can wait until the deluge let's up. I know the tomatoes are. They have gone into a holding pattern, even the cherry size stubbornly refusing to ripen without sun.

I took these picture yesterday morning when it was sunny, and raindrops were still a bit of a novelty.


Thursday, July 22, 2010

The Garden of Good and Evil

"The half-hour before midnight is for doin' good. The half-hour after midnight is for doin' evil. . . . Seems like we need a little of both tonight."

~ Minerva
Midnight in the Garden of Good and Evil

I believe I may be giving the impression that gardening is just a walk in the park for me. It's time to fess up a little. Why tonight? Because tonight I realised that I went and missed the ripening of the first slicing tomato. Ummmmm ...Duh?


Well heck, it's at least three weeks early! Thanks to the super growing powers of my raised bed, paved, hotter than normal, growing Utopia.
Towards the end of our wine drinking/gardening hour, I happened to notice from another angle, that the Black Krim had a ripe tomato. Actually an over ripe rotten tomato. To be fair, it was jammed in the ladder and covered up with heavy foliage. But still... I knew it was there. I just wasn't paying attention. In my defense, I think this one was not just ripe to the point of rotting, but was affected by Blossom End Rot like about 15% of the fruit on this plant have been. I saw that it had a dark spot last weekend, but I gave it a chance of survival. It failed. I pried it out unceremoniously with scissors, and gave it a proper burial.


The trick to having a "green thumb" is not merely possessing some majikal power afforded by knowing the secrets of what to plant and when and where and next to what. The other half is being aware of what can go wrong, spotting it before it gets out of hand, and not only knowing what the solution is, but having the supplies on hand to address the situation immediately. This is my seventh year of gardening. I am finally progressing past the point of Dumb Luck, and am slowly making headway into the territory of Experience.


My Grandmother once was examining an oil painting. She said "It looks almost perfect until you get your nose right in it." My Uncle quipped from the background "Most paintings do look better before you put your nose in them." And so do most gardens.  They may look great from a distance... if you squint... but get your nose right in there and count the weeds and it's a different story.  So, here, in no particular order, is an up close and unflattering glimpse of the garden problems I'm facing this year, and what I am doing to solve them.


Blossom End Rot: Affecting mostly the Black Krim (I've already tossed half a dozen) and now this one on the Amish Paste.
Solution: Calcium. I've worked a small amount of Bone Meal into the soil around each plant, and until I discovered that the ripe one had lost the battle, I hadn't seen an new occurrence in over a week.


Magnesium Deficiency: Indicated by loss of color in the leaves. At first only two plants side by side were affected, but I've noticed some minor loss of color in the second bed as well.
Solution: Epsom Salts (Magnesium Sulfate) One tablespoon per gallon of water. Magnesium and Calcium actually work in conjunction with one another (sort of like Vitamin D being necessary for the absorption of Calcium) , so what I did was sprinkle a bit of bone meal beside the plants, and water it in with the Epsom Salt solution.

Powdery Mildew: YUCK! The bane of cucurbit aficionados everywhere. I've lost entire crops to this crap, and while my cucumbers have always survived, some years they look like heck before they're done.

Solution: Dilution of Baking Soda or Hydrogen Peroxide or Milk sprayed on the leaves. I actually bought Serenade spray which has been working well. It stinks. But it works. The trick is to spray weekly BEFORE you see signs of mildew. Here you can see a small round spot on the left, and then a larger area of mildew on the right. Remove the worst affect leaves and dispose of them.


This has been a big problem for us in the past. It get's on the Lilac and the Irises and completely killed the squash and pumpkins in 2008. The past week and a half it has been very humid. It started on the neighbor's crookneck squash, and although I sprayed the heck out of everything when I found it Sunday morning, and had already been spraying mine as a preventative measure, it is slowly spreading.


Sunburn: This is on the Incredible Edible Undead Tomato. It has several fruit on the top of the plant which are sunburning because it is out in the open, on it's own, in a pot. The fruit on it's lower branches are shaded by leaves and doing fine.

Solution: I could construct some sort of shelter with shade cloth to filter out some of the sun, but I have plenty of tomatoes in the regular rows, and with their massive foliage, they aren't having any trouble, so I'm letting these unfortunate individuals go.


Poor Germination: The third planting of bush beans did not germinate well, and those which did germinate damped off. In this row, only two survived, and I had to plant in between with another variety. The two large plants are Blue Lake, the smaller fill ins are Isar filet beans planted two weeks later. And then three weeks later to fill in the Isar which didn't germinate on the fill in planting.

Solution: Besides the re-planting... better luck next time. I had some trouble with this same packet of Blue Lake seeds in 2008 and these are leftovers, so I certainly can't complain.


General Dishevelment: This is the summer squash and Borage bed.
Solution: Hey, it's late in July. Some stuff is starting to look a little old and worn out. The zuchini plant is growing to the left, and the Borage, which needs a lot of support, is breaking and leaning right and just wearing out. The Borage is so top heavy with flowers, even though I carefully placed stem supports each time I knew it was going to rain, they still broke down. Next year they will be in grow through grids. This bed is about done. The one zuchini is producing very well (and may be spared), but the other two squash plants aren't setting any records so I will be pulling them out and planting peas and carrots for fall. I have enough squash (ok, TOO much) with the plants in the second bed anyway.


Japanese Beetles: This year they are a minor problem. We have about 2% of the number we did last year. Last year they all but destroyed the five Linden trees we planted, along with the Porcelain Vine and half of the Black Berries.
Solution: We put down Milky Spore last fall and again this spring so about 80% of our yard has been treated. I also have a Bag-A Bug trap up, I am seeing NOWHERE near the numbers we had in the past when I would have 3 or 4 traps up, and have to empty them every few days. These three met their end with the Drop and Stomp method. I mean they were on the Borage. The Holy Grail of Companion Planting. The stuff that is supposed to cure all pest problems. The nerve.

But all's well as ends well. I went in to finish dinner, but as I was boiling water for beans, I came down with a sinking feeling that in my angst over the lost Krim, I had neglected to check the Jap I knew was about ready. I ran back out and sure enough, it was ripe and ready...


MMMMMmmmmmmm...................

Tuesday, July 20, 2010

What's Growing ~ Ornamentals

Right now, EVERYTHING is growing! Each meal is based on what we have most of, and with the neighborhood swap going on, we are enjoying things we did not get to plant ourselves like potatoes, and things that are delayed a bit, like green beans and cucumbers. Thankfully, Tim has been paying attention and has been turning away zucchini!


But this post is about the ornamentals. The stuff I plant for companion benefits and to fill in the green spaces. In fact, one bed was devoted completely to ornamentals because it was too late to plant peas or potatoes and because I had the seeds sitting around. This is my Painted Lady Pole Bean Christmas tree! It's gorgeous. The hanging tags on the top wire in the background are to give the fence the illusion of being taller to keep the deer from trying to jump in. Since the garden is much classier this year, we just couldn't use the knots of orange marking tape like we used to so I printed some vintage seed packs and laminated them for flags.


It's just covered with brilliant red and white flowers which attract hummingbirds and bees and truly makes it look like it is covered in Christmas lights, an illusion that is hard to capture on camera.

The Painted Lady is an heirloom pole bean named after Queen Victoria which is tasty enough if the beans are picked when they are small and tender. Or you can let them mature and pick them as dried beans. The beans themselves are also ornamental. If you pick them before they dry, the are pink speckled with purple. After they dry, then turn more of a tan with chocolate markings.

I also planted some Sweet Peas in with it because I didn't have a place for them either. The many colors of the peas just adds to the Christmas ornament effect.


In between the two bean poles is an artichoke which is developing. I expect there will be more than one choke on the plant, and since I don't really like eating them, they will be allowed to develop into the giant pink thistle flowers. You can see around the edges that the artichoke is nestled in red clover that I planted for a cover crop and to set nitrogen in the soil. The clover hasn't bloomed yet, but soon it will be covered in red flowers which ought to get the honey bees excited again!


My favorite ornamental is the Alaska Nasturtium which is a variegated bush Nasturtium with a wide range of colored flowers. Nasturtium is a very useful companion deterring aphids, squash bugs, and striped pumpkin beetles, and improving growth and flavor. Deters woolly aphids, whiteflies, cucumber beetles and other pests of the cucurbit family. Great trap crop for aphids (in particular the black aphids) which it does attract. I put them in each of my beds for good measure.
Nasturtium leaves have a peppery flavor and are good in salads. The flowers are also edible, but I think they're just too pretty to pick. Especially because they don't really taste like much. They sure will dress up a salad bowl though if you need a colorful garnish.


With all these flowers cascading throughout each bed, we are keeping the honey bees busy, and they are doing their thing for the cucumbers too. Sometimes I reach in to pick something and I can actually feel a breeze from all the little wings.


Besides all the humming birds and bees and beneficial insects, we have garden cats. This is Vivian Marie. She comes out to the garden with us each evening to chase locusts and cabbage moths. She loves the warm pavers and the first thing she does is give her back a good scratch on the rough surface.


And I have a Barlow Jap ripening. We've been eating Sungold cherry tomatoes for a week, but this is the first large tomato to begin turning. It's even ahead of the early Scotia tomatoes which is a surprise. Maybe my habit of saving seeds from the first fruit to set and ripen each year to avoid cross pollination is selectively developing it into an earlier variety. That would be cool!


And this picture has nothing to do with gardening, but I thought is would be fun to share anyway. On the way back from the horse barn this past weekend I saw this cow watching traffic, and I just had to turn around and get her picture.