Showing posts with label When we're not gardening. Show all posts

Sunday, April 2, 2023

A Tale of Four Chairs


Remember how I said that I routinely run into these Eastlake style chairs?   Our table seats six people when all of the leaves are in it.  The seventh chair, being ruined, had resided in the attic since before we arrived.  We do have a side table and an empty spot in front of a window.  We have room for eight chairs,  I once saw a complete set of eight.  My husband and I are what collectors call "completists".  We want the whole set.  It was actually my husband who said he thought I should find an eighth chair to round out our set.


It is surprising the number of chairs you run into when you are actually looking for chairs. The nearest Antique Mall has about three dozen that I never noticed before. The Monday night auction house in the next county hauled a few dozen old project chairs out of a barn last week.  Somewhere in Northwestern PA there was a person who got it in their head to repair chairs.  And the project outlived them.  From the vague online photos I saw that one or two may be exact matches for our seven dining chairs.  To the average person, these all sort of look alike.  

Can you spot the one I'm looking for?


How about here?
As a newly minted ChairNerd I should round out my set of eight. Right?  Especially when a golden opportunity such as this presents itself.  A couple of years ago my husband was looking for a pair of oak arm chairs like you see in courtrooms, bank offices etc.  We checked this auction house's auction pics, and there were the perfect chairs.  And as I told him then I repeated now:  "when you send out a request to the Universe for chairs.  And the Universe gives you chairs.  You don't mull over whether you really need chairs or not.  You just go get the danged chairs."

 So off we went.  They were running two auctioneers in two rooms so my husband and I split up.  I figured I could get one or both chairs for under $10.  Chair #1 was in a lot of a dozen which appeared to have solid seats (after a hundred years they are all at their breaking point). We had to pay $7.50 for choice. Mission accomplished.  Chair #2 was in a pile of a dozen chairs in various states of ruin.  My husband paid $2 for choice on the ruined chairs.  

Chairs #1 and #2 are exact matches for our seven

And by the time he met back up with me and told me what he had been up to, he had also paid $1 a piece on single chairs #3 and #4 because he "felt sorry for them" and didn't want them to go on the burn pile with the other unwanted chairs.  

Chair #3 is very similar but has a perfectly round seat
#4 we call "Plane Jane" because she doesn't match anything

Chair #3 may be made of Black Walnut and has a round seat that is and inch and a half wider than our chairs.  Maybe good for larger people to save our "good" chairs?  I think I will try a different weaving pattern on it.  Plane Jane is going in our garage sale free to a good home.


And so it begins...

Tuesday, March 21, 2023

Gardening Day One

 Today the March snows have melted and the sun was shining.  It was the perfect day to spray the apple trees with dormant oil to take care of any creepy crawlies.  They will soon be budding out.  I pruned them quite hard last spring and they have put on a lot of new growth.  You can see below that there are many upright water sprouts in this one tree that need to come out.  That could be a sign of over pruning, but the tree did well otherwise.  Maybe it is due to last summer's drought stress.  This tree is in the drier of the two spots. The Gala sapling I planted last spring survived the winter well and looks like it will be the first tree to push new leaves.


The spring flowers are doing their best to brighten things up and there are even a few honey bees out and about.  I spread Milorganite fertilizer on all of the crocuses to discourage the deer.

Crocuses

Winter Aconite

This past Saturday I started some seeds indoors under grow lights.  Normally I would have been sowing peas, lettuce and carrots out in the raised beds this past week.  As part of my lower stress plan this year I am putting that off until April, which was just as well because last week was snowy and blowy and nothing like spring gardening weather.  But it is time to get the peppers started and it would be a good idea to have some lettuce transplants ready to go out.  To fill out the pepper tray I am trying some Celosia and Coleus.  I will also be seeding Celosia and Coleus out in the could frame next month along with the Marigolds and other annuals but I want to see if I can get some further along than I did last year.

First Flame Celosia and Tomb Thumb butterhead lettuce babies were awake this morning

Twenty years ago last Wednesday (beware the Ides of March) I moved into this shabby old farmhouse.  This extra chair was in the attic then, and there it stayed for lo these many years.  Baking away in the extremes of the attic, it had become as dry as an old chicken bone.   Knowing it was up there in its ruined state actually bothered me more than that one ugly chair we had at the table.  I feared if something wasn't done with it, the next people would maybe just throw it on a burn pile.


Someone must have tried to stand on it many years ago because it has a lot less wear and tear on it than the others do.  I don't know how long ago the previous owners had purchased these seven chairs.  It could have been sitting up there a mere ten years before I got here, or it could have been up there thirty years or more.  Either way, it needed a bath and it needed a lot of furniture polish.


Even if it has only been up there twenty five, thirty years or so, that's a few thousand less sittings than the others have endured.  Thus it is really in pristine condition.  Today it is almost ready to rejoin its mates.  Happy Anniversary olde chair.


Tomorrow I may get to tying it off and putting the finishing strip on it.


And then I'll see how it sits!

Tuesday, March 7, 2023

One Ugly Chair

 You know those things you've ignored for twenty years.... when you are retired, you kind of run out of excuses.  I've always got a list going of projects that need to be done and I've been working through them lately as winter is sure to be over soon and gardening will consume most of my time.  The dining room drapes was a big one, but there are always more.  Wash the sheers, clean the oven, dust the ceiling fixtures.  One thing that gets done once a year is I put all of the dining chairs up on the table and wipe down the rungs.  They don't get too dusty but they could always use a little oil.

Our dining table was here in the house when we got here.  It was the previous owners' mother's.  I date it to at least 1910 or older depending on whether she got it new or used.  It is American Chestnut, with a variety of leaf widths from a few inches to over a foot wide.  Its covered in character marks like burns and knife slips and I absolutely love it.  

The chairs are walnut with a burl inlay and date maybe as far back as 1890.  They are a common Victorian style and I run into very similar ones all the time when antiquing and once saw a complete set of eight which were dead ringers for these chairs.  For one hundred (or 130!) year old chairs they are extremely well preserved.  They creak and groan a bit but they are sturdy and all of their joints are tight.  However one of them has a dirty little secret.


All of the chairs have seat pads to protect them, but this one also had a piece of cardboard under the pad.  We always kept it on the far end which is hard to squeeze into and if we get that many people at our table, either my husband or I would sit in it mostly to protect it from further harm.   When we arrived twenty years ago, he took the time to weave it together with string and did a very fine job.  And guess what?  We have another one just like it stashed in the attic.


A couple of weeks ago when I cleaned and oiled the chairs I noted that two more are beginning to tear.  I made mention of this at the dinner table and my husband asked me  "What are you going to do about it?"  Well, what I had planned to do was nothing.  I figure they've lasted this long they'll probably outlast me, and with seat cushions you don't actually notice the condition of the seats.  Years ago I got a quote on how much it would cost to have someone else recane them for me.  Back then it was a dollar a drilled hole plus materials.  Now that doesn't sound like much until you start counting.  72 holes.  A quick Google trip through caning websites tells me the going rate is now between $2 and $4 a hole.  Plus materials.  Let's call it a 150 bucks a chair on the low side.  But I'm retired now and when you are retired you are supposed to pick up new hobbies right?  Like hand caning chair seats.  Hmmm.  What if I just fixed them myself?  

Now there are at least two kinds of caned chairs.  There is the kind where you buy a sheet of woven cane, cut it to size, and wedge it into a channel and secure it with a spline.  These are not that kind.  These are "hand caned".  Sort of like basket weaving in a tight space.  How do you even do that?  Inquiring minds want to know. I turned to my usual How-To information source: YouTube.  There were some very informative videos with links to online stores.  Before the day was over I had made up my mind and a simple caning starter kit for one chair was on its way.

My garden snips come in handy
That's a scary first step - cutting out the old seat.  
Now we are past the point of no return.

It doesn't look it, but that's a long reach way down inside those legs.

 Another chair lends a hand propping up my work and using an awl, I break through each loop of cane.  Just this level of inspection shows me that these chair seats were works of art.

Again with the awl, I pry the old finishing strip up and the remaining cane comes out easily

A rat-tailed file cleans the holes out
There is a hundred years of dirt and mildew in there.

All cleaned and oiled and ready for a new seat.
One hour in...
The chair already looks better.  These really are pretty little chairs.  They weren't really built for the modern day person's frame but they sure are well made.  They have withstood the test of time.
Steps one and two are easy and fun.  Step three involves just laying down one more layer with no weaving involved.  The pegs hold the loose ends and train them into the hole.  I could do this all day!
The first three steps just involve lacing the cane across and minding your holes so everything is evenly spaced.  It is sort of like those sewing cards I had as a kid.  It took a couple of hours of crouching over the chair.  I started to get tired and my lower back spasmed.  About six rows into the fourth layer, which involves actual weaving in and out of two closely spaced layers, my cane snapped and so did my patience.  Shit just got real.  There are obvious stopping points in this project where you need to regroup and compose your thoughts.  I had just found the first one.

 I moved everything from the dining room out to our workshop and took a day off to rest my back and organize my brain.  Returning refreshed, I worked through the next eleven rows in about half the time that the first six rows took.  Since that day I have found a caning needle made of spring steel which should make the intense step four much less painful.
Step 4 involves weaving through steps two and three.
My fourth layer is not as flat as I would like it to be.

The day after step four I took another break. This could not possibly be the way factory workers mass produced these chairs!  There had to be some tricks. I began digging deeper into YouTube videos and caning websites.  Turns out there is more than one way to skin a cat.  I ordered some tools and waited for them to arrive.  
Dental pick, Shell Bodkin and a wire caning tool

The new tools made a BIG difference.  The first videos I watched taught you to weave in a very basic way using only an awl and your fingernail.  Other caners whip through it with needles and picks, with reckless abandon even breaking and replacing canes in the process (not my sort of thing). And they soaked their canes for a much shorter time.  Armed with my simple yet revolutionary wire caning tool, a shell bodkin and a dental pick from my husband's tool stash, I set aside my simple awl and the needle nose pliers I had resorted to, and started on my first diagonal quicker and with less frustration but still carefully and methodically.

Its not perfect.  I can see my shortcomings,
but I catch my actual errors before they are irreversibly woven in.

Close up after step 5
Still a ways to go before those holes become octagons.
 At some point you start to wonder how you can get any more cane into the pattern.  The edge holes must fill up sometime.  The seat gets stiffer with each layer.  But the cane is flat and lays in with only a little wriggling and fighting.  The canes, like any natural substance, have variations.  Now and then you will get one that wants to shatter or twist or shred, others are pliable, smooth cane that goes in like a dream and you feel like you are flying through it.

Step 6 complete. Twelve hours of weaving.
Ready for binding (to cover the holes) and tying off.


Nice little octagons.

Much like needlepoint, of which my MaMaw taught me a little when I was a child, you have to be mindful of what is going on underneath and try to make that look just as tidy as the top work.  This is where I know my lack of experience shows.  My one remaining error is under here in a loose loop.  I had a lot of ends to tie.  I have been cutting the 15 foot strands of cane in half which makes it easier to weave, but gives you twice as many ends to tie off.  There is a way to hide many of your ends without knots and I plan to try that method on the next chair.


A wider strand is sewn over the holes to finish it.
This looked a lot easier on YouTube.  I was right to think the holes were filling up.

This has been the most instantly gratifying and useful skill I have ever taught myself.  Even more so than the time YouTube helped me rebuild the carburetor on our 1930 Ford.  I have two more chairs at the table that need to be done and the totally ruined one that is stashed in the attic that I have a spot for.  I am eager to start the next one so I can do even better than I did on my first chair.   I have spent fifteen hours over three weeks only working on it on days when I could set aside four hours to get into the project. 

When people have asked what I've been up to lately, it is so satisfying to show them a photo on my phone and have them say "where did you learn to do that?"  The chair looks pretty spiffy sitting at the end of the table in a place of honor, and it should be useful for another hundred years or so,


And finally..... I sat in it!

Thursday, February 2, 2023

Surviving Winter - Best YouTube Channels

 Here we are in the depths of winter.  The best we can do is plan and dream.  I am still over a month away from starting even my earliest seeds.  I have received all of my essential seed orders and am now just indulging in an occasional order to build my inventory and enjoy a tiny bit of retail therapy.  I am putting off buying new supplies just yet but I did go to the Dollar Tree and buy a dozen wire waste baskets which I use to shelter seedlings.  Up to now I have only used the short version which are fine for new transplants but this time I scored the tall ones which will be excellent for protecting larger plants and supporting row covers.  I even tried a little winter sowing with some leftover snapdragon seeds in a milk jug just for an excuse to put my hands in soil.  

This is my second winter of retirement and I am not having any trouble staying busy.  The weather has been mild but dismal and we are currently going through a bright but cold snap.  I am having to carefully monitor the temperature of my stored dahlias in the basement bulkhead, but it is worth it to see the sun again.  For the past week or so I have been working on updating our drapes.  I put an Audible book on, make myself a latte and putter slowly through through measuring, ironing, hemming and stitching.  I know just enough about sewing to frustrate myself and do it often enough that I believe (erroneously) that I will remember how to work the machine. Just when I work out all the kinks and get good at it again I come to the end of my project.  I am having to shorten the lined drapes from the top which is simple enough but the door treatment I created from scratch including hanging new hardware.


This is beautiful fabric which is nice to work with and I am very happy with how it turned out.  After taking down my old faded, unraveling calico attempts from almost twenty years ago I was determined that the finish on this panel would match that of the beautifully made panels that I got from the now defunct Country Curtains.  You can still get these drapes from Vermont Country Store who bought out the business from CC.   I purchased these exactly five years ago when CC was going out of business (at a 30% discount no less) and am just now getting around to hanging them.  Which is a shame because they do so much to update and brighten the room.  Next I need to freshen up the curtains on the living room side.  First I am going to try rehanging the existing panels by changing them from gathered rod pockets with a header and hold backs, to adding rings and letting them hang straight.  If that doesn't freshen them enough I will add lining and if it still doesn't help I have swatches on order.


Now enough about my drapes, and back to gardening.

When I don't have an active project, I could while away the hours watching documentaries on YouTube.  I pay for a subscription so I don't have to watch the ads and I get many, many hours a week of entertainment for less than 50 cents a day.  For starters, there is virtually unlimited music options.  I usually begin my day with a workout video. I could spend hours studying the socioeconomic affects of climate change in the year 536 A.D.  or the reason why the color blue was the last one to be named.  Each week I spend a little time in the world of Tolkien thanks to the many excellent channels devoted to in depth study of all of his works.  And if you just need a simple pick me up there is nothing better than watching funny animal videos.  Quirky cats and baby goats will brighten anyone's day and anyone who has trained horses can feel relieved that they never had a truly uncooperative horse.  

Of course my main interest is gardening.  So here are my Top Five YouTube Gardening Channels to get you through to spring.  The main reason I like all of these channels is that they are gardening (for the most part) in zone 5 or just on the edge, as I am, and they focus on outdoor gardening and vegetables, the things I am most interested in.  They also take a lot of time and effort to edit their videos making them very enjoyable to watch.

#1 Garden Answer:  Garden Answer is actually the number one English speaking garden channel on YouTube by number of views.  They garden in eastern Oregon in the high desert which has recently been reclassified from zone 5b to zone 6a.  This husband and wife team started YouTubing as a hobby because he wanted to edit videos and ten years later they have both quit their day jobs and also employ full time garden help and an excellent video editor.  They work their butts off and put a great deal of their YouTube proceeds back into making daily content which ranges from landscaping, planting an orchard, extensive vegetable gardening, a cut flower garden and seed starting just to name a few.  Sometimes the videos feature her families garden center so you can see behind the scenes of what it is like to run a large nursery and garden center.  I like to live vicariously through them and would never want to plant on the scale they do. Here is an example of one of their project videos which involves designing a formal English garden around their (very expensive) glass greenhouse. I found them first when looking for raised bed gardens similar to mine.  This channel is so popular because of the wide range of content and down to earth friendliness of the couple.  She is out there almost every day with her hands in the dirt getting things done.  I watch it daily because I don't want to miss some fun little project or tidbit of useful information. They also have a second channel where they answer viewer questions each week.

#2 Susan's in the Garden:  Susan's is a much smaller, low key channel.  She gardens in the Pacific Northwest Spokane Washington, zone 5b.  Susan has a raised bed garden much like mine and she has the same mindset towards pest protection as I do.  She has a good volume of content and also covers some perennial gardening and bird watching. She has put out a couple of excellent books The Vegetable Garden Pest Handbook and recently The Vegetable Garden Problem Solver Handbook which is still in the preorder stage and will be released next week.  I get a lot of ideas from her for dealing with climate and pest challenges and I am really looking forward to this latest book.

#3 The Impatient Gardener: Erin gardens in zone 5b Southeastern Wisconsin within a (literal) stone's throw of Lake Michigan.  Once again, she has a raised bed vegetable garden almost exactly like mine and I've learned a lot about growing Dahlias from her.  She is also very good at testing and recommending tools. She still has a day job (at a sailing publication) but she has a very practical approach to both landscaping and vegetable gardening, puts out a lot of good content and takes a lot of time editing.

#4 Huw Richards: Huw gardens in England so a little milder climate then mine and he also likes to grow all the traditional, sustainable English root crops like Jerusalem Artichokes and various beets which aren't of a lot of interest to me.  But if you want to spend some time in a traditional English vegetable plot, his videography is excellent and can transport your mind to a beautiful place.  He posts about once a week and does well keeping content going in the off season. I first found Huw when I was studying up on growing potatoes in grow bags.   His overall gardening philosophies match mine very closely.  He practices no dig and waters with collected rainwater and has product lines that ship to the US and books.  Plus, he's just so darn cute.

#5 Gardener Scott:  Scott gardens in zone 5b in Colorado.  What I like about Gardener Scott is his scientific approach to growing conditions.  He has a lot of good, basic growing content and would be excellent for a beginner vegetable gardener to follow and get off on the right foot.  The content can be a little dry and rudimentary but every now and then I pick up a good tid bit.  It puts me in a good mind set for gardening.

Honorable Mention:  I follow these channels religiously, but they don't apply to my gardening as directly as the first five do.

    Gardening with Creekside is a landscaper, nursery and grower in zone 7 Dallas, NC.  Their channel focuses more on varieties that do well in the hot southern climate and vegetables are just an occasional side line.  They put up a video a day through the week and I skip the ones that focus on what they have to offer for sale at their nursery.  But I do enjoy seeing new varieties and some of her care tips translate very well to what I have going in the landscape.  What interest me most about their channel is the production end of things.  They start with plugs from Proven Winners, and grow them out to a saleable size.  They are increasing the production side of their business and recently purchased a machine that fills the containers automatically.  When they vacation they often visit other growers so you get to see some of the behind the scenes of what goes into getting annuals and perennials to your local retailer.

    Charles Dowding is another traditional English gardener without the modern charisma of Huw Richards.  Still he offers great insights to composting and no dig gardening.  He presents projects in a complete start to finish video as opposed to a daily Vlog update and does a lot of comparison experimentation to support his theories. He has decades of practical growing experience and if you can lower your blood pressure enough to follow along at the pace he talks, there is a lot of good information to be had.

So those are my top gardening resources that I visit daily to get my gardening fix.  Seeing what everyone else is doing in their gardens helps keep me on schedule without having to give it too much thought.  Now I have to get back to my drapery adjustments.

Tuesday, September 8, 2020

And a River Runs Through it.

We live on the wide, level top of a large hill.  Our house is on a small raised area and there is decent grade in every direction, but we still have flooding issues.  Our back lawn, which traditionally had two boggy spots along the tree lines where the sun rarely shone, had, in the past five years, turned into an unmowable swamp.  

We don't know what happened to change our lawn into a swamp.  We have a couple of theories.  Maybe when we hooked up to the city water and left our water well unused, we stopped moving the water out of the water table.  Maybe that winter when it was -30 for two weeks and the frost was 48 inches into the ground, the shale ledge fractured opening up new springs?  Whatever it was, it was fast and dramatic.  And it has caused a lot of misery.


There comes a point in June when you figure you are just going to have to chance mowing for the first time, before you have to resort to the brush hog.  In some areas you can get through, and others are softer than they look.  A whole section of lawn felt like a waterbed.  

The sod layer ballooned up away from the hard grey clay below.  There were areas of the backyard that were left unmowed almost all last summer.    I had to put tall boots on to access my cold frame which sat on the patio with the open side to the lawn.  Sometimes the pressure of the mower deck alone would rumple up sections of sod like an area rug that isn't stuck down right. 


To the west of my garden, there was a strip of lawn where the mower has been getting stuck for decades.  When we chose the spot for our garden, we also decided this would be a good time to put in a driveway along that terrible wet spot to get past the garden and back to an area we use for staging materials, storing equipment, and burning brush.  The construction of this driveway only moved the wet spot a little further east.


There would be standing water along these RR ties all year.  When we got a hard rain, the driveway itself would be ankle deep in water.  During really hard rains (I'm talking an inch an hour for more than one hour) the water would back up into the raised bed garden.

The first thing we did last spring was to put a dry well into that sunken wet spot, and we dug across the driveway to connect a drain pipe from the drywell to the overflow pipe from our rainwater collection system.  This pipe runs the center of the wooded area, picks up the water from half of the next door neighbor's downspouts, and runs out behind their barn and into the woods.  Now the driveway, and the section of the lawn to its northwest, stays dry and does not hold water.


The next thing we did was turn the worst part of the swamp, directly south of the garden shed, into a gravel pad.  If you can't mow it... build on it.


We laid down road stabilization mat over the grass, and bordered the area with RR ties pinned into the ground.  Then we began adding #2 washed stone.  A lot of stone.  Loads and loads of stone.  We filled it eight inches deep to match the top edge of the ties.


The plan is to build a greenhouse here.  And add some storage.  With a shady porch to sit under and admire our hard work  The hard part is deciding how to do this.  It would be great if I could choose a picture off of Pinterest, put it in my shopping cart, and have UPS deliver it tomorrow.  But we all know there is a lot more planning and hard work that goes into it than that.  Also this building project will incorporate rain water collection and eventually solar power.  All ambitious ideas.

Here are some of the ideas we are batting
around as we search for the perfect solution

So for now, the gravel pad sits empty.  And dry.  Very dry!  It is beautiful in its dryness and its potential.  And the best part - when we first mowed the backyard in early May, we didn't get stuck.  We didn't even leave a rut.  Not even a muddy stripe!  That means we diverted a lot of water.


But now that there is a road stabilization mat under all of that gravel, water will run off of it instead of soaking into the sponge that was pretending to be lawn.  And we needed to get that water 60 feet downgrade to that drywell at the edge of the driveway.  What we wanted, was rocks.  A whole lot of rocks.  Something that would not have to be mowed.  Something like the Dry Creek Bed nearby.  What we needed was something along the lines of a Rain Garden.  And we really do like rocks.  There is so much beauty there if you look.  Every time I walk through our man made riverbed I marvel that such a wide variety of material all ended up in one gravel bank to be harvested for our landscaping.


And so it began.


This space is half as wide as it is long.  So at some points of its development it began to look more like a landslide than a riverbed.  But we kept working on it.  This main drainage project spawned a lot of side projects.  I wanted tall grasses and plants that attract butterflies, so I took advantage of late season sales last summer and bought carloads of grasses and transplanted them into fiber pots.


Which led to digging SIXTY holes.  Moving the stones aside, cutting into the road fabric.  Burrowing into the nasty, hard, nearly pure clay.  The fiber pot and potting soil method I used on the last dry creek bed has proven quite successful.  The daylilies, irises and grasses thrive and grow bigger each year as the pots disintegrate and the roots find native soil below.  When the grasses are filled out, they add a lot of texture and as they mature they will add height making the winding creek bed itself look narrower.  I plan on adding some low shrubs as well.


Connected the drainage project was the Firepit project.  The fire pit located itself in a deep void that developed from driving the tractor back and forth over an area where a stump had been deteriorating underground.  The tree that belonged to the stump that made the fire pit is now a counter top in my kitchen.  When a hole develops, we put it to use!  We have had several fires, both last fall and early this spring.  The west side becomes shaded around 1pm so we've put a variety of chairs around it.  These chairs have been moved so many times before they found a home!  And they're HEAVY.  And awkward.  They used to have to be moved every time we mowed the lawn.

See all of those little orange flags on the chairs?  Those are to keep the birds off.
The flags look a little silly but trust me, I'd rather look at silly orange flags than scrub bird poop off of the chairs every day.  And there was a lot!  And some of it was berry purple.

The last thing we did was add a walkway and finished off the south edge of the gravel pad where it joins the lawn.  We need to keep this area accessible and undeveloped until we build whatever it is we are going to build.  It is easily reached by the driveway making construction relatively easy.


This spring the creek still looked a little bare.  
I've kept adding plants, and now it looks much more interesting.  We get a lot of butterflies which love the three butterfly bushes I planted


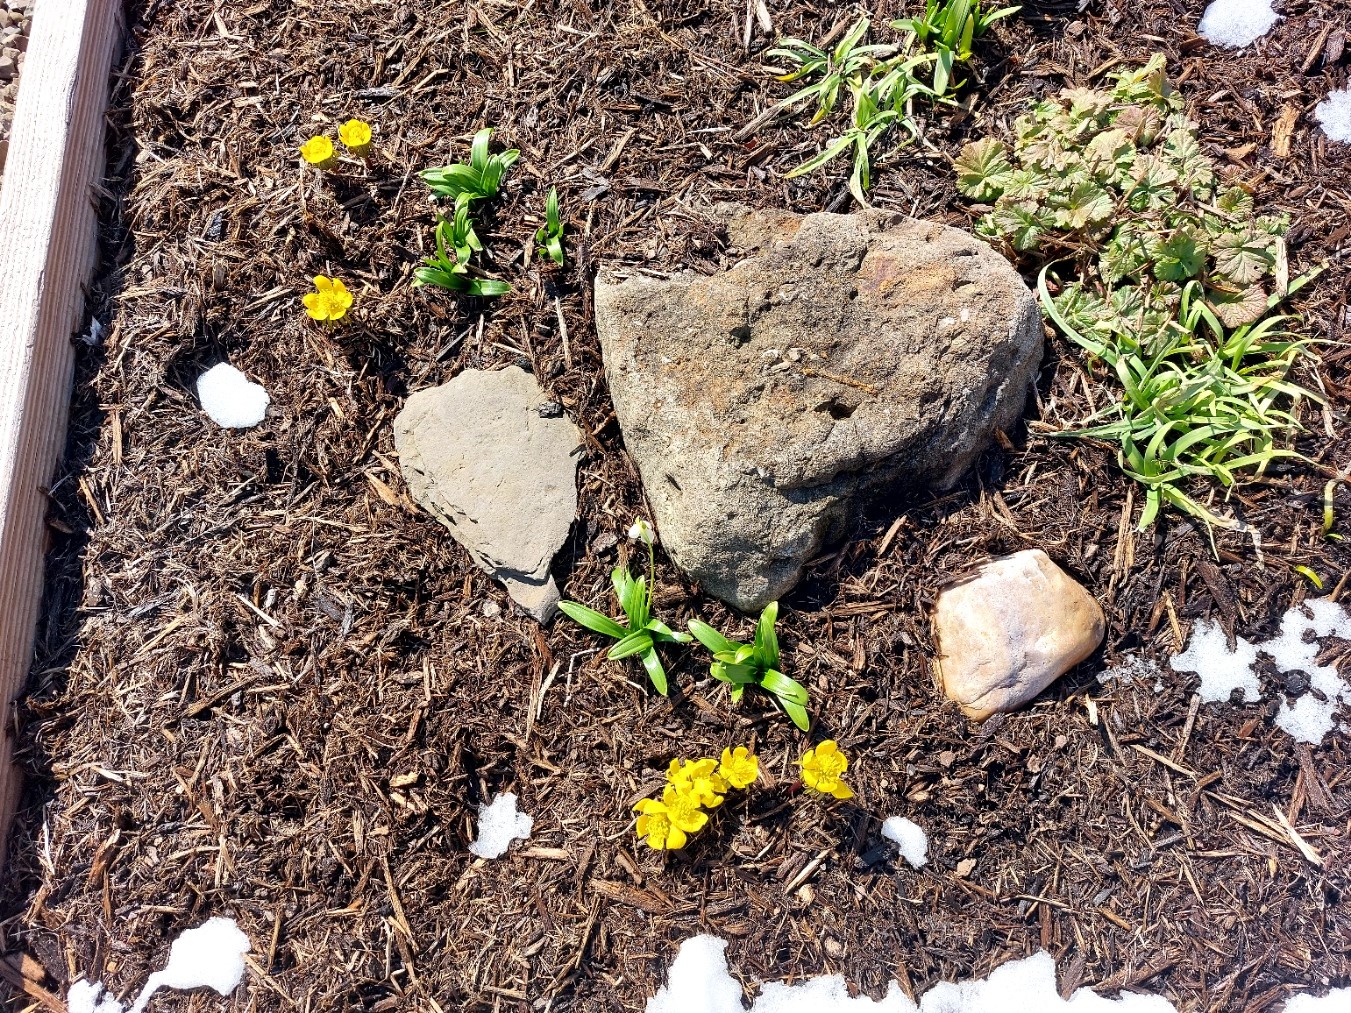
As most things do, this project has evolved in its own way.  Without any thought being put into it, the color scheme has gravitated towards purple and yellow.  There is no shortage of yellow or orange day lilies that need to be divided so I've added some of those, and in a few weeks I will transplant black-eyed susans and salvia.  


Growing up I spent many many hours playing in the creek.  Now I have one running through my own backyard.  And yes, when it rains, the water does run down the center towards the drain. There is something very peaceful about the creek bed with the swaying grasses and the dragon flies.


Above is my favorite view of the dry creek bed.  It is a nice transition between the structure of the garden and seating areas and the natural areas beyond.  It is full of fossils and quartz and flint.  The rocks themselves are worthy of landscape arranging and the plants only enhance their beauty.  

We live in the Great Lakes region which was covered by the Laurentide Ice Sheet until about 14,000 years ago.  That glacier pushed a lot of rocks across Western NY.  It isn't unusual to find boulders the size of a stove not far under the surface of your lawn or pasture.  The rocks are worn smooth by waters and ice.  I wonder how far some of them have traveled before they were deposited together in a creek bank to lay buried for thousands of years..

Eventually, all things merge into one, and a river runs through it. The river was cut by the world's great flood and runs over rocks from the basement of time. On some of those rocks are timeless raindrops. Under the rocks are the words, and some of the words are theirs. 
~Norman Maclean, A River Runs Through It