Showing posts with label Raised Beds. Show all posts

Saturday, April 1, 2023

Preparing the Raised Beds

 This morning we got bonus weather.  After breakfast it was sixty degrees and sunny.  Not a cloud in the sky.  I got the compost pile sifted, even though it was really too wet to be a pleasant job.  The sifted material went on top of the shredded corn stalks.


This bed below, which will be planted with flowers, has almost no organic material left in the soil.  I put the rough siftings which contained a lot of shredded leaves from the lawn mower on that.

It will need to be raked a little at planting time, but the leaf component will make good mulch.
The compost tube got dumped.

The buckwheat stems were removed from the beds and put in the empty tube.

The bed is prepared for peas to be planted over the next couple of weeks.


And then the weather started to turn so we came in for lunch.
Right now we have a wicked front coming through gusting 70 mph.  The outdoor lights are on, and the house is groaning a bit.  This should wash everything clean and blow any loose leaves out of the compost.  I'm pretty happy with what I got accomplished during my bonus morning. 

Wednesday, May 19, 2021

Amending Raised Bed Soil

 This is the time of year when I do some work on my raised beds.  No matter what soil you start with, beds will need to be amended because of the intensive nutrient requirements year after year.  If you have an open, old fashioned, in the ground garden you can add virtually unlimited quantities of compost, leaves or aged manure and till it into the soil.  

If you have an enclosed bed there is a limit to the amount of material you can add before the material and water will begin to spill out.  Over time you will lose soil volume through compaction and removal of old plants but this is a slow process. For this reason I start with more nutrient dense additives such as slow release fertilizers, blood meal, bone meal etc.

I am also a firm believer in not turning my soil as you would if you were tilling in large amounts of compost.  I'm not a strict "lasagna" gardener where you layer new material on top of old and never disturb the soil, but I avoid mixing up the layers of microorganisms and destroying earthworm tunnels.  One of the advantages of raised beds is that you do not walk on and compact the soil, but this does not mean the soil does not compact over time.  You do not want your water running off to one side of the bed.  You want it to percolate right down through.  So your soil structure still needs to be loose enough to do that.  And root systems and earth worm tunnels just aren't enough.

The answer to compacted soil is a fork of some kind.  I've done this with a four tine digging fork, but the broad fork is much much quicker.  I go though the bed, driving the fork in about six inches deep and pulling it back to crack the soil base.  How deep I go depends on how compacted I'm finding the soil.  This doesn't have to be done every year.  Every two or three years should be enough.


You end up with a bed full of holes which are perfect for integrating soil amendments into the soil.

  I mix up a batch of whatever materials I think this bed needs based on its most recent performance and the crop that is going into it next.  In this case I am adding worm castings and Garden-tone.  I am planting butter beans in this bed.  I know everyone always says that beans and peas like poor soil.  Well, tolerating poor soil is not the same as preferring poor soil.  I've had great results in the past planting bush beans into worm castings and a balanced fertilizer.  The only crop I have never fertilized is peas.

Using a scoop I spread the mixture over the bed and level everything with a bow rake.  If there is room in the bed, I finish off with a layer of my own compost.  And the bed is ready to plant.


Thursday, June 21, 2018

Check out these carrots

This year I tried carrots in large landscape pots full of potting mix to give them deep, light soil and let them reach their full potential. It worked. I did some thinning tonight as a test run. 


It worked. I did some thinning tonight as a test run. 


My raised beds are open on the bottom but the tilled soil is 10-12 inches deep and in the past I've had carrots reach that depth and stub off. Plus potting soil made them super easy to pull.  Side note: after I had carefully sprinkled my carrots seeds onto my soil, and covered them with a light layer, a raccoon got into the garden one night and felt up all my pots and made mountain ranges out of my smooth soil.  I just smoothed it over and they ended up pretty well distributed.

Tuesday, June 19, 2018

The Collective Unconscious

This year I have joined several gardening groups on Facebook.  All day long I can look at photos of people's beautiful gardens and discuss the finer points of gardening.  On the other hand my Facebook feed is bombarded with an international array of pests and problems, to the point where I dream at night that I have tomato horn worms!

"Joe Gardener" has a Facebook page which attracts a lot of master gardeners 
with great set ups and a wealth of knowledge.
His was one of the gardens I used as inspiration as we planned our garden
I've also come to realize that there are a lot of people who jump feet first into gardening with absolutely no idea what they're doing.  They grab a used bucket or maybe an array of recycled containers, fill it with dirt and start putting in tomato plants.  Then they start asking about ideas to keep the rabbits, chipmunks, squirrels, deer and raccoons from destroying everything and for help identifying diseases.  Now that's not necessarily a problem, we all learn by doing but maybe buy a comprehensive garden reference book and flip through it once or twice?

The Big Book of Kitchen Gardens is a good start
Throughout the day I send instant messages to my co-worker with some of the really funny ones.  We both grew up out in the country and obviously take for granted a lot of farmer common sense that does not get distributed in the city.  For example, cow manure is good, don't water the garden EVERY day until it wilts from exhaustion and more importantly how to tell the difference between Indian strawberries and poison ivy!

Just so we're clear:  This is wild strawberry
and this is poison ivy
But besides seeing enough poor soil, blossom end rot and powdery mildew on a daily basis to give any gardener an extreme case of paranoia, I also pick up a lot of random useful information to stash away for future use.  Interesting facts like although tomato horn worms blend in with your tomato stems, they also glow under black light making them easy to hunt in the dark

Tomato Horn Worms under black light
Reading about everyone else's challenges day by day, and seeing all of the bad things that can happen, makes me very grateful for my well constructed, nearly pest free garden. I stop to reflect on what has made me successful as a gardener.  Certainly there is some inherited aptitude and collective gardening unconscious (in Jungian psychology the part of the unconscious mind that is derived from ancestral memory and experience and is common to all humankind, as distinct from the individual's unconscious)
There is upbringing since I learned to transplant seedlings about the same time I learned to write my name.  There is my tendency to be curious and read extensively about whatever subject interest me at the time.  There is the fact that I live out in the wide open rural countryside where pests have to travel a bit between gardens.  And I think a lot of it has to do with the structure and management of the garden itself.


Look at my garden and tell me what you don't see.  You don't see native grasses, "weeds", trees or shrubs up against the fence.  You don't see an untended field full of insects and critters.  You don't see other houses or gardens nearby.  What you do see is wide open gravel paths which discourage creepy crawlies and allow good airflow and sunlight to rule the garden, and you see a very sturdy fence.  I think a lot of critters walk by, glance in and think "parking lot".  That's one luxury of living on acreage in the country.  Lack of space is not a problem.

Of course the Facebook world is not solely populated by beginners.  There are a lot of accomplished gardeners there to help the newbies and to debate the minutia of gardening knowledge.  One such fellow posted on a couple of groups asking if he should mulch his vegetable garden and if so what material should he use?  After about an hour he announced that he had learned two different approaches to it.  "Absolutely NOT" and "Absolutely YES".

10 Proven Uses for Epsom Salt in the Garden
For every dozen people who swear that Epsom Salts are the key to green plants, there will be someone who can scientifically debunk the myth.  Companion planting - new age liberal hocus pocus.  Planting by the moon - archaic mumbo jumbo.  Compost tea - hogwash.  Pruning tomato suckers - why bother.  Eggshells, Coffee Grounds, Banana Peels - ineffectual

So what is the answer?  Just listen and learn and practice some good old fashioned trial and error.  And don't lose sleep over someone else's horn worms.

Wednesday, May 16, 2018

Everything but the Gate


The pictures speak for themselves.  5 Weeks in the making.
You can get around the outside edge of the beds, especially to the right, but the wide open center allows more room for a wheelbarrow.  In fact, you can sit on the ledge to the right and weed which is pretty convenient.


Fresh empty soil is so inviting
The beds are three feet wide ion the inside measurement so you can reach across without much trouble


 The beds are 14 inches deep at the center.


Just waiting on the gate to be hung and gardening may commence.


Thursday, May 10, 2018

New Project - 2018 Progress Report

Over in the neighbor's garden annex, construction is still underway.  The fence is complete using Hog Panels from Tractor Supply with 1" square welded wire clipped to the bottom two feet to keep bunnies and woodchucks out.  When standing on the ground level, the fence is over 5 feet high so I'm not worried about the deer hopping over on a whim.  If we don't finish the garden, we could probably house elephants. 


The fence was a challenge to build.  The first post hole broke the post hole digger and required a quick trip to the parts store.  The seventh post hole struck water.  This has happened to us several times.  Twice the tractor has sunk to the axels in the mud hole created in under ten minutes.  That's how much water we can hit.  They are gushers.  The seventh post, a 6"x 6"x 8' floated right out of the hole.  But it's in there now


Some people may say this garden is over built.  Just like the first one.  So why do we go to all of this expense and effort?  Because we don't like doing things twice.  Take for instance this little garden on my way in to the office.  I snapped this picture this morning.


This unfortunate little raised bed garden was constructed about 4 or 5 years ago.  They didn't fence it so they had to cover things with wire and netting.  They didn't make paths so they had to mow or trim in between.  By last fall the beds were bulging and beginning to come apart at the seams and when the snow finally melted, a couple of them popped apart spilling soil all over the lawn.  Now it's a complete do-over.  The only part still useful is the cold frame there on the corner bed.  There are a couple other little raised bed gardens on my daily drive in various stages of disrepair.


On the other hand, my garden is eight years old this month and still requires very little work to maintain.  When spring roles around all I have to do is walk out there and poke some seeds into the soil and I'm in business.  Twice we have brought in additional gravel to level low spots.  Two of the rails need to be replaced because the wood has twisted.  And one of the gate posts needed plumbing up a couple of years ago.  Other than that its just as sound now as the day it was finished and I expect it will still be another ten years from now.  The Garden Annex should last as long.  No do-overs.

Next job is to put in the 6"x 6"s that will define the beds.  They will be pinned down with re-rod and the gravel will be shoveled out down to soil level.  Then there is a big ugly pile of top soil and compost to sift through.

Wednesday, April 18, 2018

New Project 2018

Well Spring, we're going to go ahead without you!

We did finally get two nice days in a row and I got a lot done.  The raised bed garden is prepped and ready to go.  Two rows of peas and some carrots seeded.  Three flats of lettuce seeded in the cold frame.  Over-wintered plants spruced up, potted up, trimmed up.  And I've started on the landscaping.


March is usually the best time to start cleaning up and mulching the landscape.  You don't have to work around foliage.  You can see the dandelions that are hiding in clumps of perennials.  The soil is soft.  I'm a month late, but everything still looks like March.  This past weekend I scooped all of the puffball fungi out of various areas, raked the myrtle bed, the snow on the mountain bed and the chameleon plant bed to clear out all of the pine needles, oak leaves and dead stems from last year.  I dug out a few things that I'm tired of. Then I mulched the areas with the most daffodils because in a few weeks they will be in full bloom and it will be too late.

As I mentioned in my last blog post, I will no longer be sharing my garden with the next door neighbors.  I need more room to properly rotate crops and rest the beds without struggling with planning and the constraints of succession planting.  But don't feel bad for the neighbors.  We are in the process of designing and building a garden in a spot which is out of the way for us, but very convenient for them.  If the neighbors tire of gardening (why would they?) then I can still use it for planting field pumpkins or an asparagus bed or raspberries or something.

Site of the Garden Annex
This plot of land used to be a brushy wooded area, but it is also in between areas which have been developed and over the years it has become lawn by default.  It is behind the mulch bunkers, and beside the drainage ditch, and near the neighbor's barn.  And because of this, it has become relatively flat and mowable.  It has full afternoon sun from mid-morning to sunset.  It is well drained and sheltered.

When the mulch bunkers were built, the area was cleared and the bunkers were leveled with loads of bank run.  This elevated the bunkers above the future garden plot, and created a slope that needs to be leveled.  The bunkers themselves were built from 2x6 lumber reclaimed from a temporary bridge that the town highway department removed.  They had been nailed side by side like a butcher block and asphalted over.  A lot of asphalt seeped between the boards giving them this ugly drippy effect.


When we completed the water project two years ago, there was a patch of tiger lillies left over from the days when our frontage was open ditch and woody wilderness.

The tiger lillies were filled in between two tree stumps. 
Before we dug up the stumps, we salvaged the lillies

We scooped them out with the backhoe and plopped them onto a pile of top soil in the woods until fall when we planted them along the back of the bunkers.  We figured they would grow tall and fill in and disguise the ugly drips.  Which they did.  But now fenced from the deer they will take over fast.

Tim carved out the bank in front of the lillies and began placing railroad ties along it to form an elevated bed.  The entire garden area is going to be higher than the surrounding driveways, so he is placing RR ties all the way around it and will fill in with gravel.


To make the mulch bunker look a little more attractive, I scraped all of the brittle tar drips off and Tim sprayed it with rubberized undercoating.  That neatened things up considerably.


If this area ever dries up again, we can finish laying out and measuring so we know exactly what is going to fit in here and we can make a materials list.


We are now in a holding pattern waiting for dry weather.

Thursday, January 1, 2015

Raised Bed Planning

To Raise or Not to Raise:  That is the question

Recently one of my gardening/blogging friends asked me “is there anything about gardening in raised beds that sucks relative to growing in rows in much larger plots?”  My first response was “Potatoes”.  But it’s a valid question and one I’ve given thought to over the years.  If I had a Do-Over, what would I do differently?  Today is New Years and with that (and this stack of mail order seed catalogs) the 2015 garden planning begins.

Every action has an equal and opposite reaction.  It’s Newton’s Third Law of Physics.  There is no such thing as a completely positive experience.  There is always downside.  Always.  I love gardening in raised beds.  I hate trying to put potatoes in them.  There.  That’s my equal and opposite reaction.  Not that it’s a deal breaker.  It just has its limitations.  Honestly, the best way to grow potatoes is in pots.  Or a stack of old tires.  But even that has drawbacks.  So first, let’s revisit the positives of gardening in raised beds.

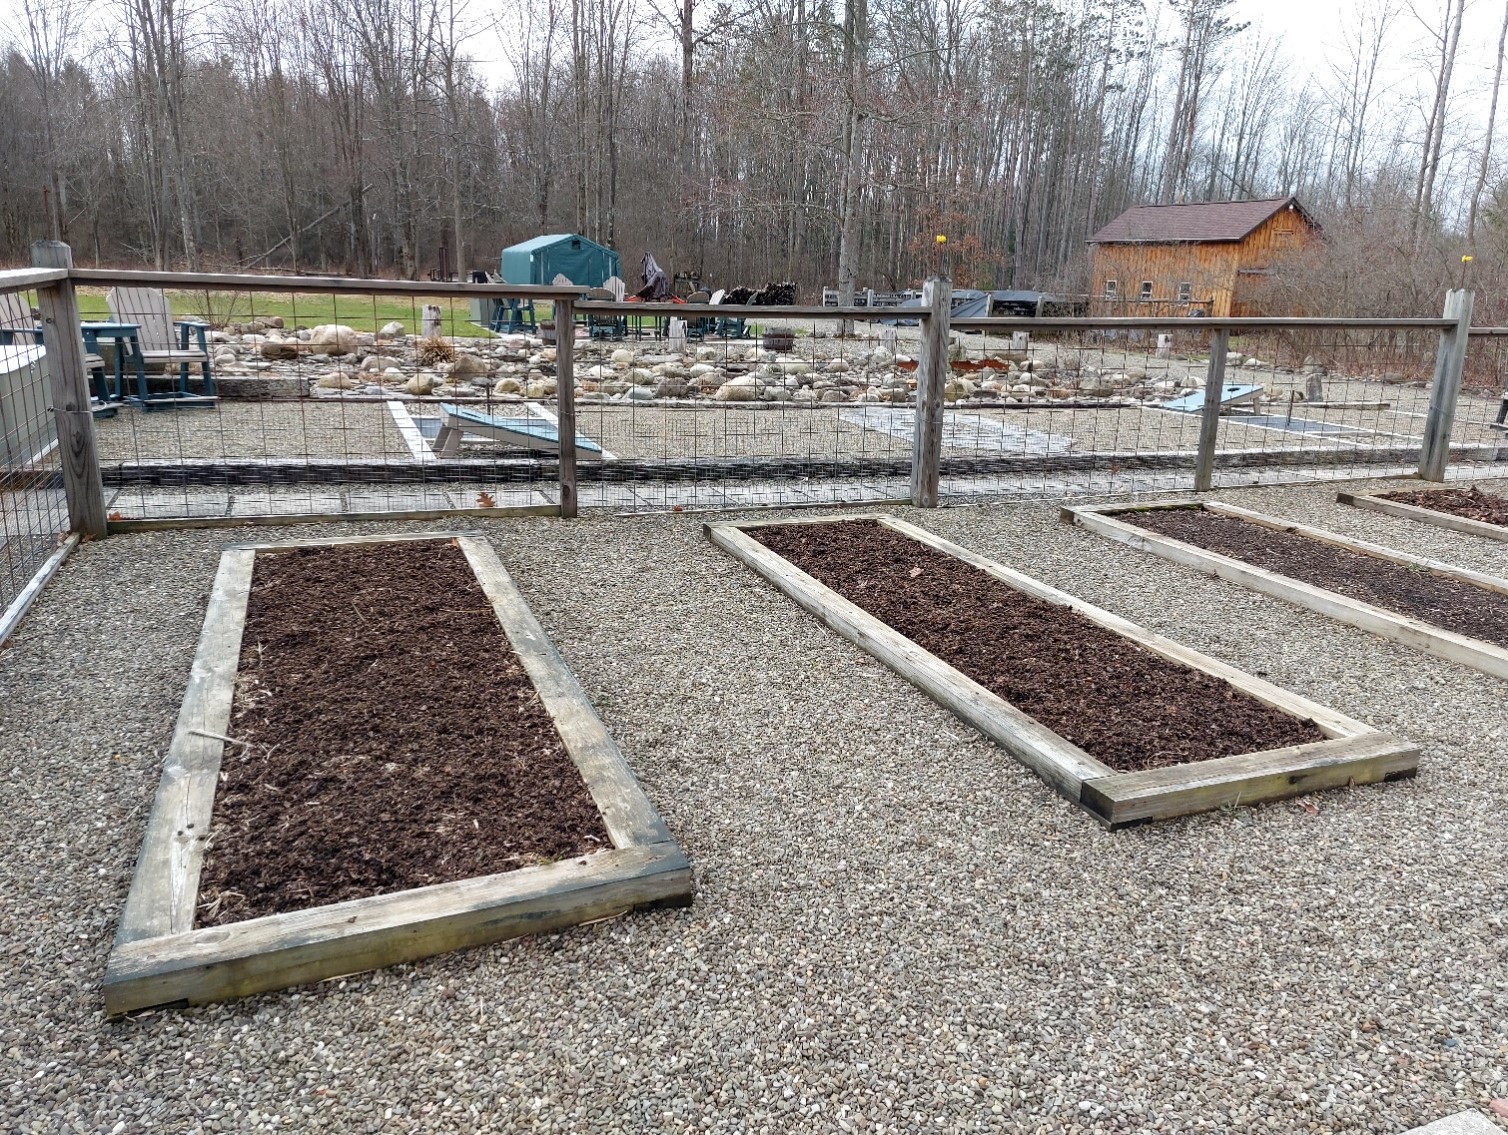
A tidy bed edged with 4"x 4" ties with gravel paths will cut down on
work and expense and be aesthetically pleasing

First and foremost, raised beds offer a longer growing season.  In the spring the improved drainage will ensure that your soil is warm and dry weeks if not months before everyone else’s.  And, you don’t have to wait for those windows of opportunity to haul out the tiller and/or tractor to prepare your soil.  When you clear your beds in the fall, you are preparing them for spring.  All you have to do is tip toe out there on some warm, sunny day and poke a few seeds in the ground.  It’s as easy as that!  And because you don’t have to get the tractor onto the sodden, muddy, frozen ground you also don’t have to worry about taking down or putting up any fencing like we used to do when we used the tractor to till.  The beds and their protection are permanent fixtures.

Tim brings the tiller out to the potato patch each spring and wonders
why it is not working as well as when we stored it away.  It never fails.

A very close second to the longer growing season is no paths to maintain.  Let’s face it.  In a traditional row style garden there is about 3 times as much space devoted to path than to row.  This means you are spending most of your time defending soil which is not working for you.  You plant two rows, and in between is 3 or 4 feet of trodden down, compacted, weedy, likely muddy, soil which has to be weeded all season, and then uncompacted for next year. 

Not only are my seedlings getting a good start, the weeds in the paths are flourishing

And why are all these weeds flourishing in the paths?  Because you are watering and fertilizing them.  That’s right, you are wasting time, effort, and money feeding your weeds and then pulling them back out!  Duh!  Having your plants rounded up into neat beds, and planted close together means you only have to maintain the soil right in and around your plants.  And that is where your water and fertilizers or soil amendments will be concentrated.  There is quite simply a fraction of the manual labor, cost and time spent on raised beds as opposed to traditional row cropping.

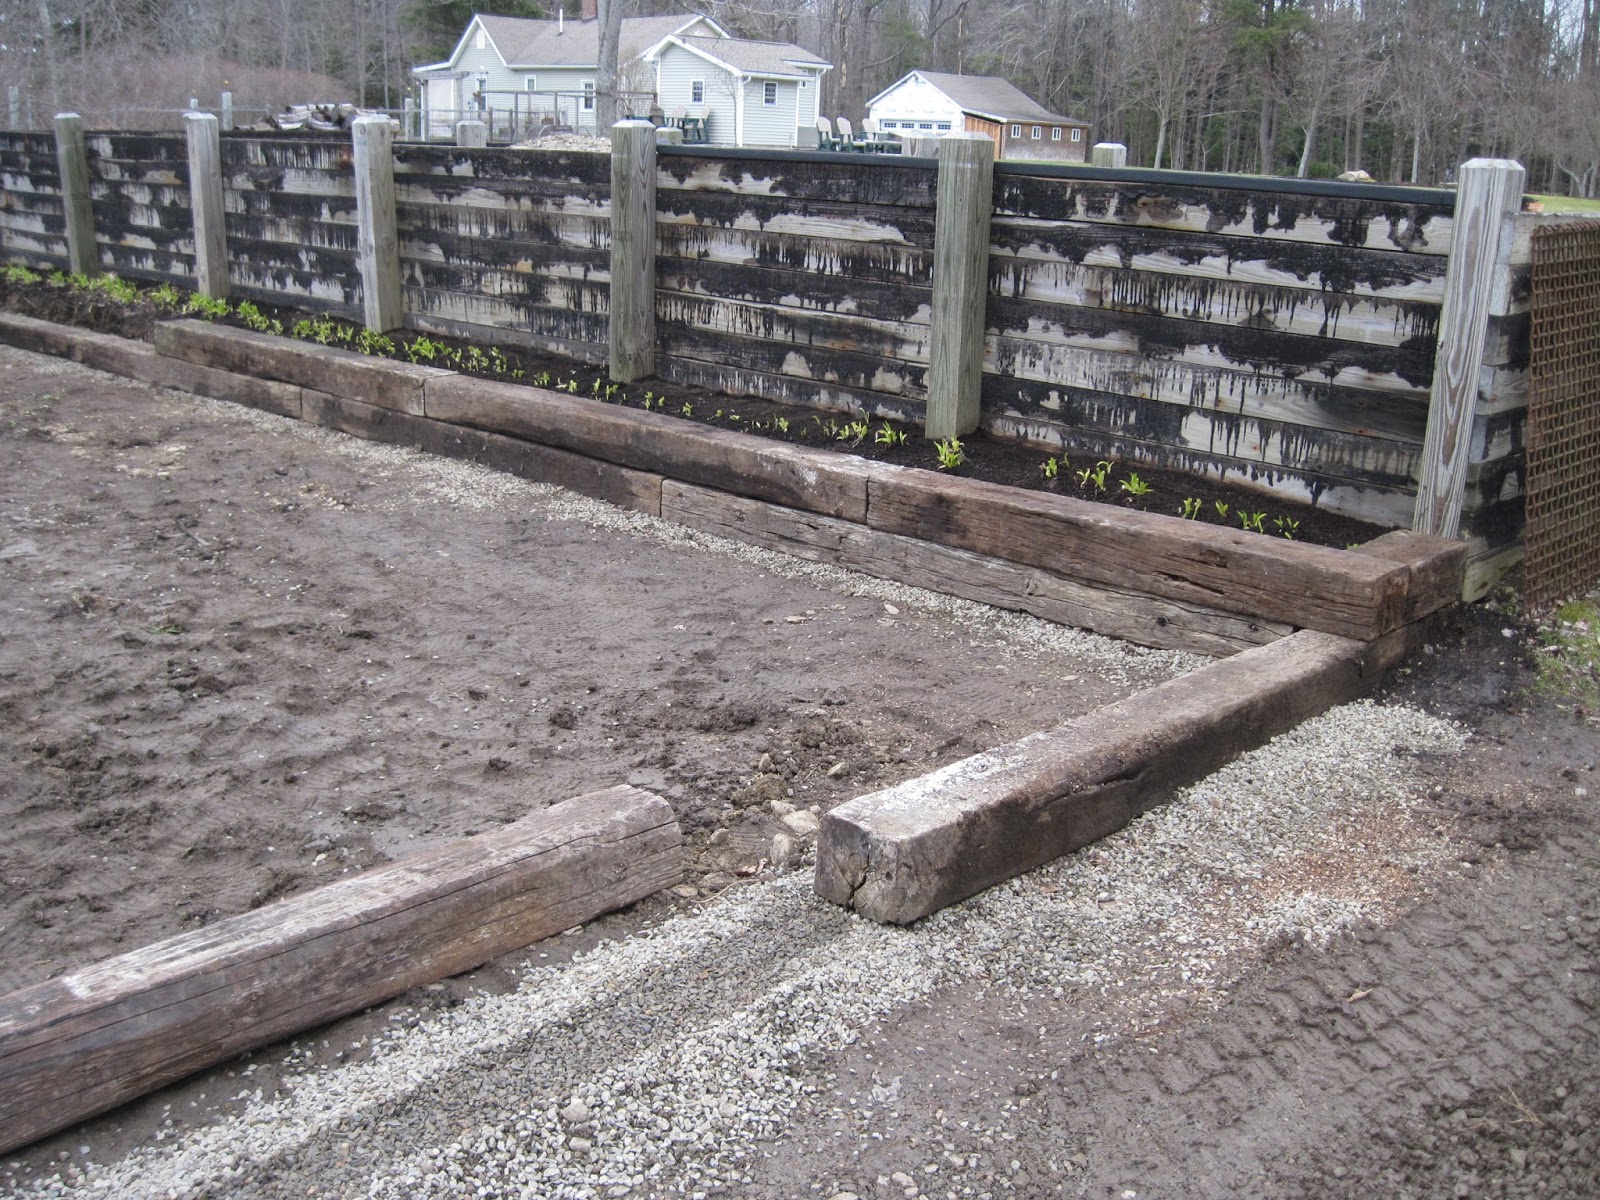
In the fall, a layer of chopped leaves is weighed down by a layer of composted horse manure.
New growth of garlic pokes through.

Another benefit of raised beds is the ease of lasagna gardening.  Because you are not walking on your soil, and fertilizing weeds growing in it, you never have to fluff the soil or grind up the weeds and turn them under.  This means that over time you will have fewer and fewer weeds.  And more and more earth worms (because you aren’t destroying their tunnels).  Because you never really have to turn your soil, you just keep adding layers of organic soil amendments, feeding your worms, blocking your weeds, and going on your merry way.  And because you are not continually tilling your soil, and you are rounding it up into structured beds, you get less erosion.  If you have to garden on a slope, you can lay out and construct tiers or terraces to work with the lay of the land and even turn a useless piece into a productive garden.

So those are the benefits.  What are the challenges?  Well. Permanence is your challenge.  Along with space limitations.  Plan poorly, and you have to live with it for awhile.  So it is very important to plan well.

#1.  How much space do you need?  This is where square foot gardening concepts come into play.  A 
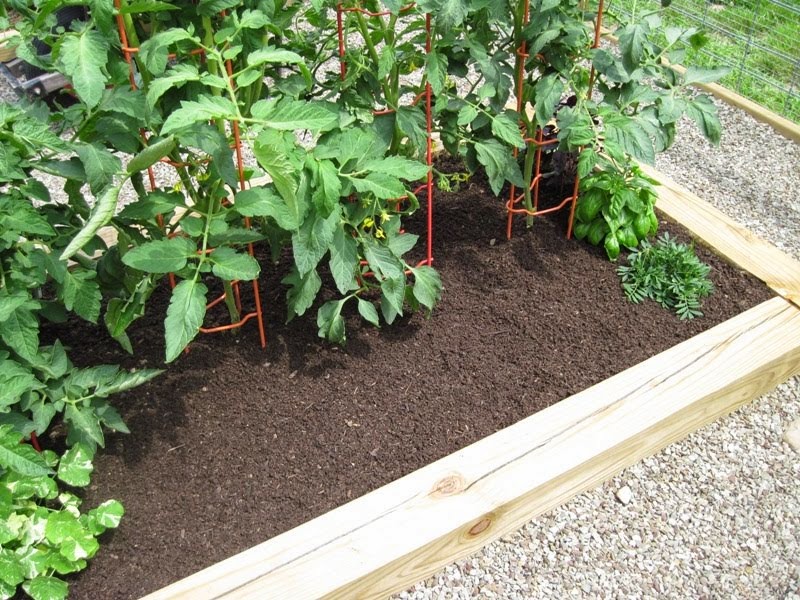
tomato plant requires at least one square foot of space.  However, if you plant indeterminate varieties one foot apart, you may find you have over crowded them.  A pepper plant requires one square foot of space.  Intersperse your tomatoes and peppers and the relative height of the plants reduces your crowding.  If you generally plant a 10 foot row of bush beans, remember that you can plant two or three "rows" 6 to 8 inches apart and get twice as many beans into the same length.


#2. What will your bed dimensions be?  Don’t make the beds any wider than twice the length of your reach.  This means about 4 feet.  But if you use 6” x 6” material, and you make your bed 4 feet wide, you will only get a 3 foot width of growing space.  Consider for a moment trying to hill potatoes in a 3 foot wide space.  Adding soil and then having to remove it again at harvest... Ahh!  See?  It sucks.

Careful mapping out of crop requirements allows you to maximize planting.
Here bean and cucumbers coexist peacefully
and later in the summer, the sunflowers in the center
have grown tall enough to support the climbing vines.

#3.  What will your rotation be?  To make crop rotation planning easier for the rest of your life, figure out how many crop types you will plant and then build beds in multiples of that number.  Vegetables are divided into 6 main families.  By avoiding planting the same family in the same spot two years in a row, you limit the establishment of diseases that destroy those crops, as well as avoid stripping your soil of whatever nutrients that crop uses most of.  I grow mainly Solanaceous (Eggplant, peppers, potatoes, tomatoes), Legumes (Beans and Peas) and Cucurbits (Cucumbers,melons, squash, pumpkins, watermelons).  So I need at least 3 beds, or 6 or 9. I grow two beds of each type, so my minimum is 6 beds. Additionally you should allow at least 4 years between repeating crops, not 3 like I usually get.  Ideally, I would have at least 8 beds allowing me to rest one bed a year, and keep up my rotation. 

Cucurbit
Cucumbers,melons, squash, pumpkins, watermelons
Legume
Beans, peas
Solanaceous
Eggplant, peppers, potatoes, tomatoes
Allium
Chive, garlic, leek, onion, shallot
Umbelliferae
Carrots, parsley, dill, fennel,coriander, parsnip
Crucifer
Broccoli, brussels sprouts, cabbage,cauliflower, kale, radishes, turnips

#4.  Are all of your beds really going to be equal?  To further complicate my rotation, not all of my beds get the same amount of sun.  Because of the placement of the garden shed on the east, and a partial tree line on the west, the southern row of beds gets about 2 hours a day less sun than the northern row of beds.  Hhhmmmmpppfff… 

Foliage color shows me that the blood meal added to the right side of the bed
should have been added to the left side as well.
And you will find “dead zones” in your soil.  No matter how carefully you amend, you will periodically find an area in your beds that isn’t producing as well as it should.  Or you might get a pest issue in one bed and need to spend a season solarizing it or resting it.  Plan more beds than you think you need!

Remember, not all of your beds have to be identical.  If I had a do-over I would build three different sizes of beds.  I would have a few half sized beds for herbs, or onions or cut flowers or just experiments.  Sure, you can plant half a bed, but having half sized beds appeals more to my planning and asthetics.  I would have double size beds for crops that require more space like potatoes or melons.  We have added two double size beds after the fact and they are outside of the garden fence.  This means we have to have alternate methods of deer/rabbit defense.  That is usually in the form of a crop cover.  Easy enough for low uniform height crops like beans or even potatoes, but not feasible for tall items like tomatoes or pole beans.  Which means the unprotected beds have their own rotation.

Tall hog panel fencing can be reinforced at the bottom with hardware cloth
which will keep out smaller pests like woodchucks and rabbits.
Speaking of fencing.  Fence the whole thing.  The bigger the better! Our garden shed is outside our fence.  Which isn’t a big deal, but when you leave the garden shed on the way back to the house, it would be easier to know you have just shut the garden gate behind you rather than remember if you shut the garden gate 10 minutes ago when you left the garden on the way to the shed.  And those nice pots of petunias by the shed door?  Not protected.  Cold frame?  Not protected.  You can’t leave the lid open during the heat of the day and be sure that Bambi isn’t going to wander by and stop for a snack.   Patio?  Not protected. I can’t leave a bunch of flats of seedlings in the partial shade of the patio because there could be hoof prints through them by tomorrow.  Apple trees?  Not protected.  You catch my drift.  Put a large perimeter fence around your entire gardening world.  You won’t regret it.

This 8' x 8' bed gives me the space and flexibility to more easily maintain crops
such as potatoes and melons, but since it is outside the fence it forces me to be creative protecting my
crops from deer and rabbits


So this is my Do-Over Raised Bed Planning list:
1.       Build a couple more beds than you think you will need.
2.       Don’t lock into one dimension, or even shape.  Give yourself some flexibility.
3.       Fence in as large an area as you can afford.

4.       Study you sun patterns very carefully and remember that any structures or plantings you add in the future may affect them.

      There are a few things I would do differently, now that I've lived with it for awhile, but one thing I will never do is go back to rottotilling and rows style gardening.  I'm a raised bed convert through and through.

Footnote: One thing I failed to mention is the material chosen for the walkways.  It probably deserves it's own blog.  We have landscape fabric covered in gravel.  It is clean and easy to maintain.  Weeds (and tomatoes... and cat nip... and pansies) do grow in it but they are easily removed one by one or en masse with a metal rake.  The gravel collects and holds heat which is great in a cooler climate like western NY, but may be too much in the deep south where added heat is not a benefit.

Friday, September 27, 2013

Raised Bed Maintenance


This is the end of the fourth season with the raised beds, and they have required virtually no maintenance.  But the gravel has settled and migrated leaving areas where the stabilization mat is showing through.  So today was gravel renewal day.  It sounded like a big job, but with three people it was done in a jiffy.


The gate was designed to be juuuust wide enough to drive the small tractor through.


Mike and I used shovels to direct the gravel into each wheelbarrow as Tim dumped the loader.


Then we wheeled it down each path dumping as we backed out, concentrating on low areas.


And raked it smooth. All Done.