This is the Christmas craft I have been brainstorming this week. I started out by setting aside any older handmade ornaments from past years and hot gluing and trimming and repairing... or just tossing. I cleaned out old boxes, faded cheapo ornaments with the paint flaking off. Working with my Christmas stash is part of my fun. I love to organize and tidy up.
A few years ago I purchased a set of these Victorian styled push pin ornaments. I hadn't put them out for a few years and I was looking forward to using them. These were a popular craft back in the sixties and seventies. We had some growing up. You can still buy some of the vintage kits and make your own, but in the past couple of years they seem to be more popular and there are new kits you can get (a bit pricey). Or you can purchase vintage ones. You can go back to the roots and make your own out of costume jewelry and corsage pins.
^This^ is one that I purchased online. It looks great on my tree.
There is a really wide range of styles and color schemes to be had. Some are way too prickly for my taste. They look like angry porcupines.
There are some that look too gaudy... Although I bet they look nice on a tree.
A couple of winters ago I was at lunch with a friend and we were discussing vintage ornaments. I described the push pin ornaments. "Oh I have some of those that a friend gave me. I'll go get them...."
They were in pretty good shape but my gold ornaments are more of a champagne, and these were reallygoldyellow. And there was a lot of satin showing. Not really my taste. I made some changes, replacing yellow ricrac hangers with ribbon. But still... I didn't love them.
This year as I was going through my decorations I thought "I need to make a decision about those." Either throw them out or use them. These were obviously hand made with costume jewelry and things that were on hand and I just couldn't bring myself to toss someone's creative effort. Not when I knew they could be nice with a little work. I dug out some old pins and sequins and stuff. Maybe some ribbon would help. Or upholstery trim.
I got up on Etsy and ordered an assortment of gimp trim. Amazon had some good champagne colored pearl headed pins. I dug around in my Christmas drawer for gold string and other whatnots. I watched a YouTube video for some constructions tips.
This one didn't need a whole lot of help. I had a vision. It just needed to be covered with some texture and color.
That's better. I may still swap the pearl pins for regular pins which will disappear.
It looks much nicer. It isn't easy to get the gimp straight all the way around, but there is a whole lot less yellow and a lot more subtle glimmer. And you don't really notice its flaws when it is on the tree.
Now this one.... this little cherry red one. I'm sorry but that white ricrac just has to go!
I pulled all of the pins out. I will break these down and save the components. A magnetic tray is a huge help, as is the black Velor work surface.
I wasn't as inspired by this one but after searching through internet photos I got some ideas for a starting point. I went through my sewing supplies for some green headed pins.
It needed the fuzzies singed off with a lighter and I replaced the red beads with some clear ones I had. I had to improvise on the hanger because I need to get some cap beads,
It looks so different now. I like it. It no longer resembles a fake cherry.
Now that I've picked up a few supplies, I need to figure out some improvements for the other two. Then I may make some more from scratch. You can buy satin covered foam balls in several sizes and a wide palette of more subtle colors.
I need to get some cap beads to finish off the tops and bottoms.
Some teardrop shaped pearls...
And I can add to my collection...
My tree this year ended up having sort of a raspberry palette. Not really red. Not really gold. I have pink and white and swirls. This is only the second time I can think of that I have used more than one color of glass balls (or more than two sizes) at a time.
Last year I found a set of "tonal red" ball ornaments which had some shades of pink and then I found this photo and I loved the many sizes and colors and the way the ornaments were hung so they created brushstrokes of color with no set pattern.
I stuck with the colors that I already had, but I dug through my bins of random ornaments and brought out anything that would coordinate. And all I used was glass balls and a couple of bead garlands.
So this is what it looks like this year. Every year it is quite different, and each year I think it is the best I've ever done. But that is just because it reflects my current inspiration. Next year it will be different.
They turned out nicely and held their color well. They have ended up in our living room because the colors are perfect there.
Today on Garden Answer's YouTube video, Laura is using Hydrangea blooms in one of her outdoor winter containers. They look fragile but remember, they would still be out on the bush hanging on with the elements. She touched them up with spray paint to make the color more intense. I have done this in the past with Sedum blooms using floral paint but she is just using plain ole Rustoleum. They look beautiful. Yet another use for dried Hydrangea.
I have often said that the chief joy that I have in decorating for Christmas and other holidays is in creating something new. I am not the kind of person who puts out the same decorations year after year with no variations. Of course I do keep my decorations and add to them each year but I am always using new themes or trying to highlight some new find.
For several years now I have had a table centerpiece with a pillar candle in a hurricane glass. I raise it up on a cake stand and I can change out the greenery each season. I have several rings made up that I can just swap out. The cake stand gets it up off the surface so it doesn't take up much room and I can grab the whole thing and move it off quickly and easily. I will probably put it back after Christmas. But for now I am tired of it. For one thing, pillar candles get harder and harder to light as they get older. I want tapers this year.
I collected up all of these brass candlesticks several years ago. I have used them a little, but not in a whole group. It's time to let them shine. First I cleaned them well and gave them a little polish. Now to figure out some greenery. You know, something simple like this...
This is a perfect spot for the rosehips. As a base for the candle ring, I am using a three inch macrame hoop. To keep the berries from spinning around it and to disguise the gold color, I wrapped it in floral tape. I am using a finer gauge of paddle wire, but I cut a length of it off the paddle and wound it up tight to make it easier to pass through the ring.
I snipped the ends of the rosehips off of the bramble with kitchen shears. The newspaper is to contain the mess. There are a lot of pieces of dried rose petals and old pollen that fall off as a fine dust and this will also help keep the thorns out of my sock feet.
You begin like any wreath. Take a little bunch of stems and wrap the wire securely around them.
There is an up and a down to each sprig.
They are really quite pretty.
Take two or three more little stems and lay them on top of the first ones, securing them with your thumb. Use your other hand to wrap the wire around and through the hoop. It doesn't have to be too tight. The floral tape really helps quite a bit.
Keep going...
It doesn't matter if it is a little irregular. You can make it as thick as you want as long as you have plenty of material. When you get back to the beginning, you may need to place a gob of hot glue in the empty space and just sort of weave a few last sprigs into the bare spot. Unlike a door wreath, you don't have a bow or anything to fill in where the end meets the beginning.
My big handful of hips made two matching rings. I think I want a smaller (sparser) one on the candlesticks at each end.
Time to go foraging again. Like last year I ordered a box of evergreens for making the wreath for our front fence so when that arrives I will lay some of that incense cedar or fir tips in and around the candlesticks. This won't be a very moveable arrangement, but it will be bright and cheery.
This blog entry was going to be titled "I am Tired of Trees" (more about that in a minute). I found something more fun to talk about.
Pip berries are a staple in Primitive or Country decorating. Really they are just artificial rose hips. I have occasionally purchased floral sprays of pip berries, but nowadays, I prefer to get them at home in season. That means clipping them off of the dreaded multiflora rose bushes. I have eradicated most of the multiflora up near the house so I am having to go a little further to get them. The other day I picked a few at the back of the property but I did not have a pruner with me. Today a good opportunity presented itself and I harvested some more.
Saturday night and all day yesterday we had high winds. Last evening the neighbor called and let us know that two border trees behind his barn had come down. Because we have a hunter going in there almost every day, and because we retrieve deer with the tractor, we needed to deal with these. They were blocking the trail. While my husband chain sawed enough to move these out of the way, I was clipping rose hips.
While I got a handful the other day, today I got a big bouquet of nice plump berries. You want to let these dry hanging upside down so the stems stiffen before the seed heads weigh them down and make them droop.
I have already started to tuck some of the first ones into my decor.
Once you get them in the house and laid out, the thorns are super easy to just pop off and you can trim the stems to length,
I plan to make some candle rings with my bountiful harvest. All that is needed is some paddle wire and some craft rings and I have both of those. Below is the look I am going for. When mine dry enough I will show you how they turn out. Mine will be fluffier and more realistic because.... they're real.
After a couple of snow free days, it is again dropping snowballs out there to the point where we may actually have to plow the driveway. Its very peaceful and cozy. The kind of day to light some scented candles, put on some wool socks and bum around the house with a warm drink.
For Thanksgiving yesterday, I just put a turkey breast in the slow cooker and we had quiet meal for two with stuffing, mashed potatoes and gravy and carrots freshly pulled from the garden. And pumpkin pie. Today we are having hot dogs and beans LOL! And pumpkin pie. We're tired of eating. And with Korv Day and Turkey Day pretty much back to back, my kitchen staff is tired of doing dishes.
Traditionally, Black Friday is the day I haul twenty Christmas tubs down from the attic and spend seven hours redecorating the house. For the second year in a row I am cutting back on decorating. Maybe next year I will get back to two trees and even some garlands. Since it started snowing fairly early this year, I have already been slowly changing over from fall to winter. A table runner here, some pinecones there.
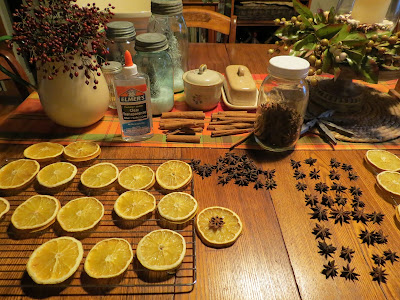
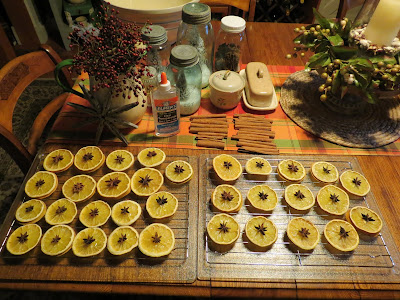
Years past I have had a few orange slice ornaments. I might sacrifice an orange or two, but this year my husband bought oranges that he was dissatisfied with so all of a sudden I had a whole bag of oranges that nobody wanted! I sliced them all up and put them in the dehydrator. Lots of orange slices!
The star anise, cinnamon sticks and raffia I already had on hand. I am just waiting for my Amazon Day delivery for some more red and natural jute twine to make the hangers.
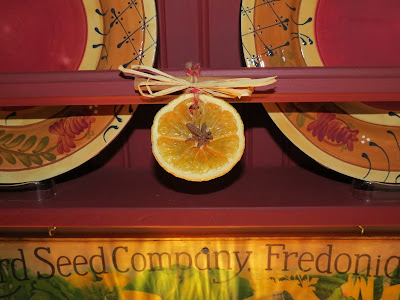
I already had a little of the correct twine on hand so some of the oranges are already finding their way into my decorating.
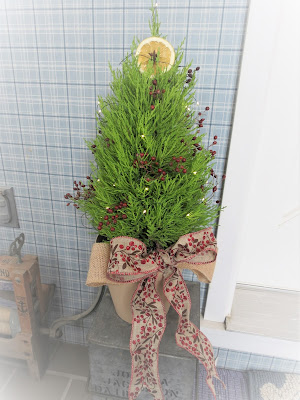
This little cedar welcomes people to the side porch.
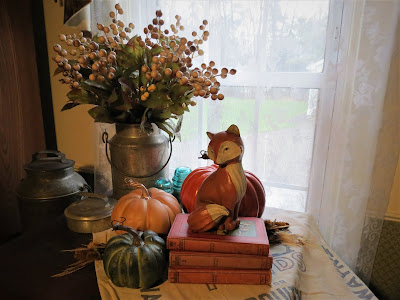
Some of my decorating still has a fall and winter mix.
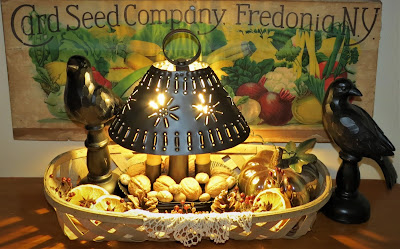
The crows and a pumpkin are still out
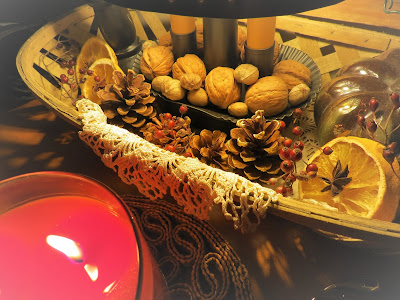
but now we also have pine cones, rose hips and orange slices.
At this point I am still just rounding up elements that I want to enjoy this season and putting away collectibles that I'm not going to use. The actual construction of each arrangement is yet to come. This is where I realize that I am one tin grater short for what I want to do and have to shop for one on Etsy.
Plus, I don't have enough fairy lights which should be here with the red striped twine.
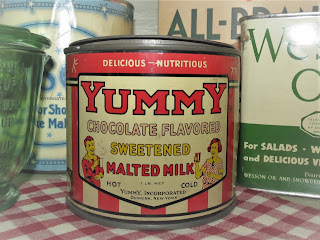
I recently found this fun, local, candy striped malted milk can from the 1930s while out antiquing. I still have to pry the lid off, then I think it would make a fun base for a little Christmas tree.
For now some of my other fall decor can stay while I get my ideas together.


.webp)