You know those things you've ignored for twenty years.... when you are retired, you kind of run out of excuses. I've always got a list going of projects that need to be done and I've been working through them lately as winter is sure to be over soon and gardening will consume most of my time. The dining room drapes was a big one, but there are always more. Wash the sheers, clean the oven, dust the ceiling fixtures. One thing that gets done once a year is I put all of the dining chairs up on the table and wipe down the rungs. They don't get too dusty but they could always use a little oil.
Our dining table was here in the house when we got here. It was the previous owners' mother's. I date it to at least 1910 or older depending on whether she got it new or used. It is American Chestnut, with a variety of leaf widths from a few inches to over a foot wide. Its covered in character marks like burns and knife slips and I absolutely love it.
The chairs are walnut with a burl inlay and date maybe as far back as 1890. They are a common Victorian style and I run into very similar ones all the time when antiquing and once saw a complete set of eight which were dead ringers for these chairs. For one hundred (or 130!) year old chairs they are extremely well preserved. They creak and groan a bit but they are sturdy and all of their joints are tight. However one of them has a dirty little secret.
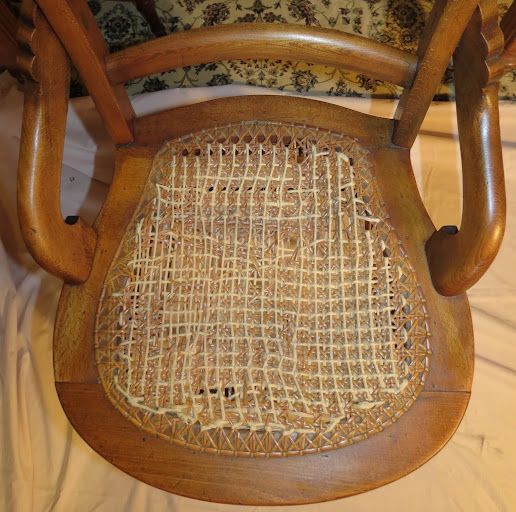
All of the chairs have seat pads to protect them, but this one also had a piece of cardboard under the pad. We always kept it on the far end which is hard to squeeze into and if we get that many people at our table, either my husband or I would sit in it mostly to protect it from further harm. When we arrived twenty years ago, he took the time to weave it together with string and did a very fine job. And guess what? We have another one just like it stashed in the attic.
 |
|
A couple of weeks ago when I cleaned and oiled the chairs I noted that two more are beginning to tear. I made mention of this at the dinner table and my husband asked me "What are you going to do about it?" Well, what I had planned to do was nothing. I figure they've lasted this long they'll probably outlast me, and with seat cushions you don't actually notice the condition of the seats. Years ago I got a quote on how much it would cost to have someone else recane them for me. Back then it was a dollar a drilled hole plus materials. Now that doesn't sound like much until you start counting. 72 holes. A quick Google trip through caning websites tells me the going rate is now between $2 and $4 a hole. Plus materials. Let's call it a 150 bucks a chair on the low side. But I'm retired now and when you are retired you are supposed to pick up new hobbies right? Like hand caning chair seats. Hmmm. What if I just fixed them myself?
Now there are at least two kinds of caned chairs. There is the kind where you buy a sheet of woven cane, cut it to size, and wedge it into a channel and secure it with a spline. These are not that kind. These are "hand caned". Sort of like basket weaving in a tight space. How do you even do that? Inquiring minds want to know. I turned to my usual How-To information source: YouTube. There were some very informative videos with links to online stores. Before the day was over I had made up my mind and a simple caning starter kit for one chair was on its way.
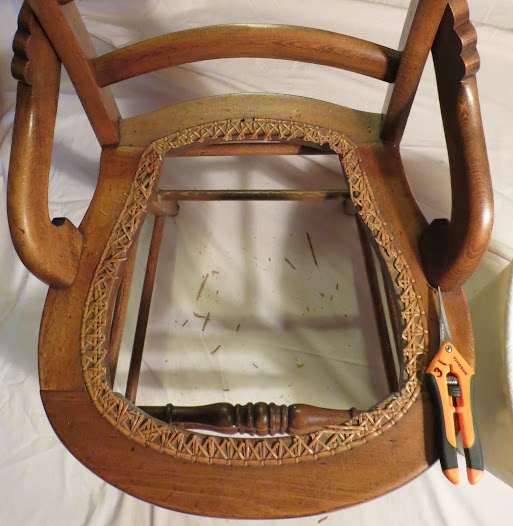 |
| My garden snips come in handy |
That's a scary first step - cutting out the old seat.
Now we are past the point of no return.
 |
It doesn't look it, but that's a long reach way down inside those legs.
|
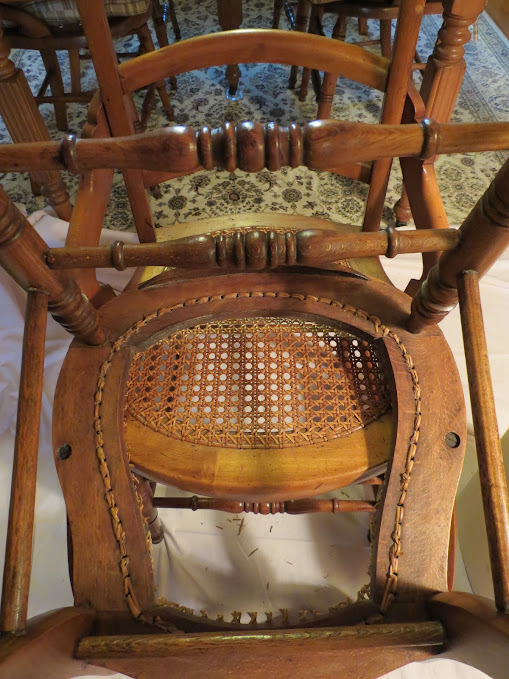
Another chair lends a hand propping up my work and using an awl, I break through each loop of cane. Just this level of inspection shows me that these chair seats were works of art.
 |
| Again with the awl, I pry the old finishing strip up and the remaining cane comes out easily |
 |
A rat-tailed file cleans the holes out
There is a hundred years of dirt and mildew in there. |
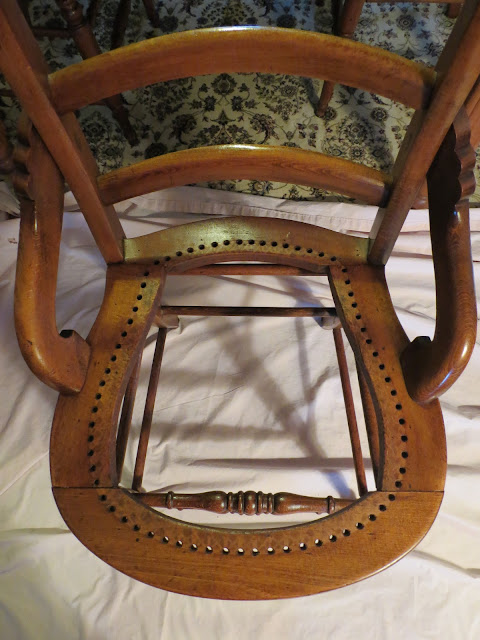 |
All cleaned and oiled and ready for a new seat.
One hour in... |
The chair already looks better. These really are pretty little chairs. They weren't really built for the modern day person's frame but they sure are well made. They have withstood the test of time.
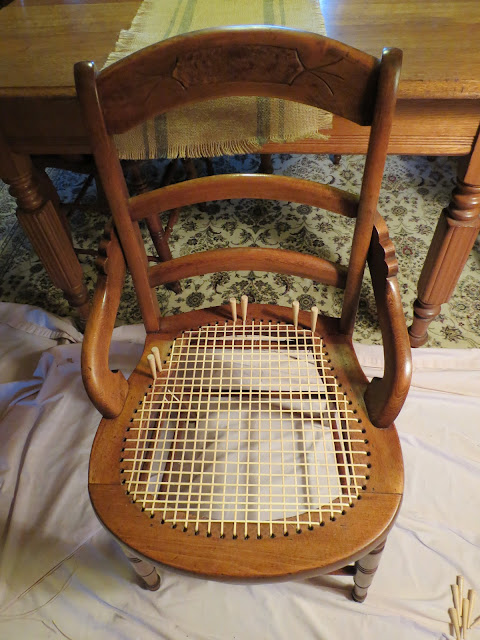 |
| Steps one and two are easy and fun. Step three involves just laying down one more layer with no weaving involved. The pegs hold the loose ends and train them into the hole. I could do this all day! |
The first three steps just involve lacing the cane across and minding your holes so everything is evenly spaced. It is sort of like those sewing cards I had as a kid. It took a couple of hours of crouching over the chair. I started to get tired and my lower back spasmed. About six rows into the fourth layer, which involves actual weaving in and out of two closely spaced layers, my cane snapped and so did my patience. Shit just got real. There are obvious stopping points in this project where you need to regroup and compose your thoughts. I had just found the first one.
I moved everything from the dining room out to our workshop and took a day off to rest my back and organize my brain. Returning refreshed, I worked through the next eleven rows in about half the time that the first six rows took. Since that day I have found a caning needle made of spring steel which should make the intense step four much less painful.
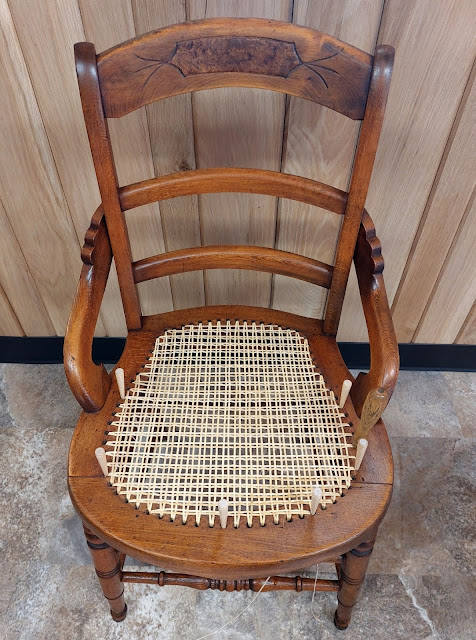 |
Step 4 involves weaving through steps two and three.
My fourth layer is not as flat as I would like it to be.
|
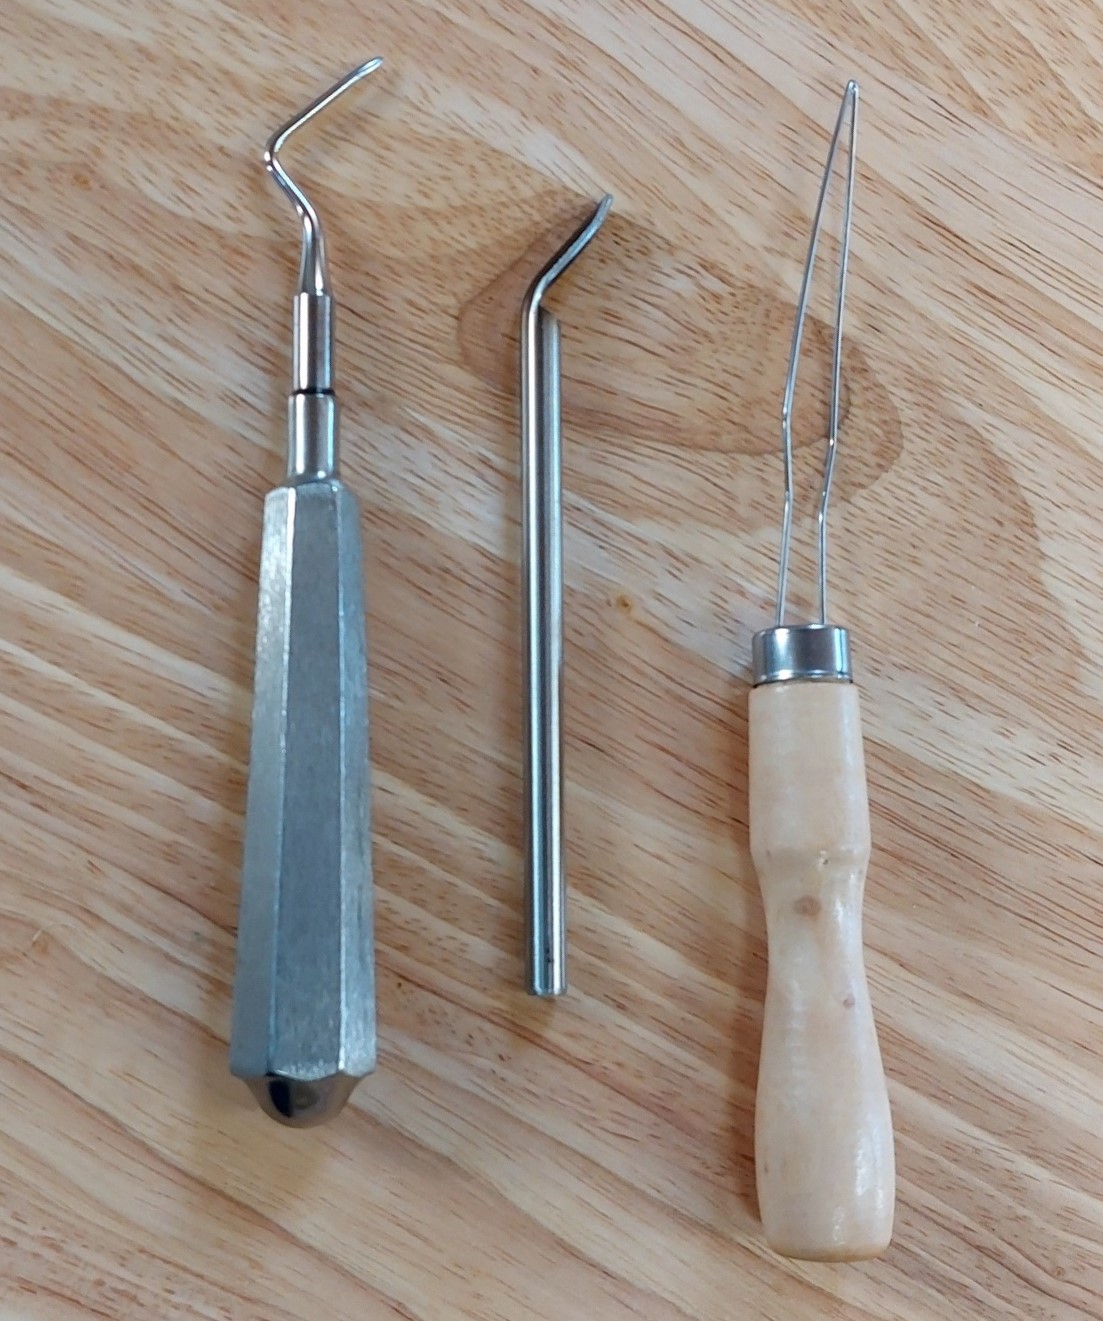
The day after step four I took another break. This could not possibly be the way factory workers mass produced these chairs! There had to be some tricks. I began digging deeper into YouTube videos and caning websites. Turns out there is more than one way to skin a cat. I ordered some tools and waited for them to arrive.  |
| Dental pick, Shell Bodkin and a wire caning tool |
The new tools made a BIG difference. The first videos I watched taught you to weave in a very basic way using only an awl and your fingernail. Other caners whip through it with needles and picks, with reckless abandon even breaking and replacing canes in the process (not my sort of thing). And they soaked their canes for a much shorter time. Armed with my simple yet revolutionary wire caning tool, a shell bodkin and a dental pick from my husband's tool stash, I set aside my simple awl and the needle nose pliers I had resorted to, and started on my first diagonal quicker and with less frustration but still carefully and methodically.
 |
Its not perfect. I can see my shortcomings,
but I catch my actual errors before they are irreversibly woven in.
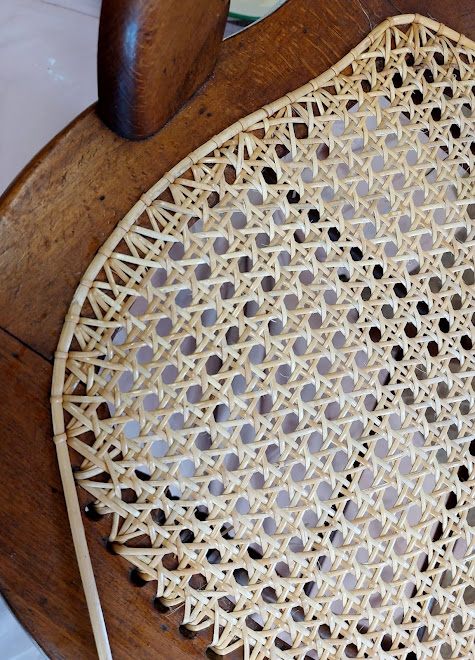
Close up after step 5
Still a ways to go before those holes become octagons. |
At some point you start to wonder how you can get any more cane into the pattern. The edge holes must fill up sometime. The seat gets stiffer with each layer. But the cane is flat and lays in with only a little wriggling and fighting. The canes, like any natural substance, have variations. Now and then you will get one that wants to shatter or twist or shred, others are pliable, smooth cane that goes in like a dream and you feel like you are flying through it.
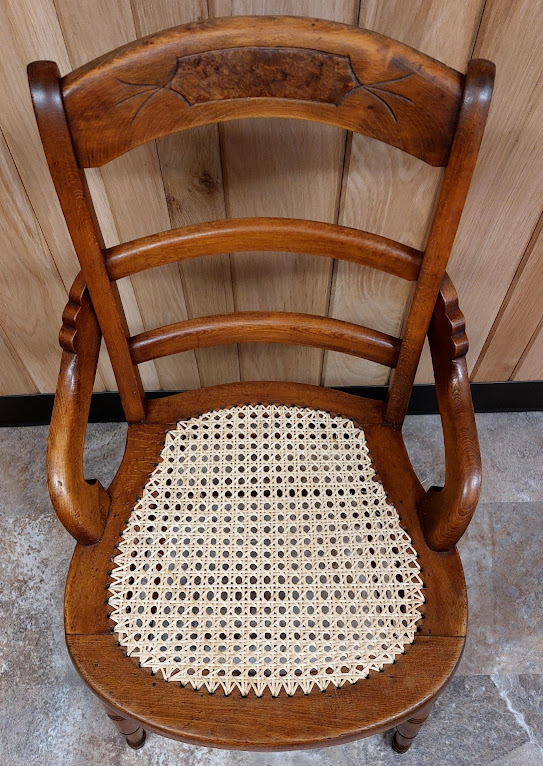 |
Step 6 complete. Twelve hours of weaving.
Ready for binding (to cover the holes) and tying off. |
Nice little octagons.
Much like needlepoint, of which my MaMaw taught me a little when I was a child, you have to be mindful of what is going on underneath and try to make that look just as tidy as the top work. This is where I know my lack of experience shows. My one remaining error is under here in a loose loop. I had a lot of ends to tie. I have been cutting the 15 foot strands of cane in half which makes it easier to weave, but gives you twice as many ends to tie off. There is a way to hide many of your ends without knots and I plan to try that method on the next chair.
 |
A wider strand is sewn over the holes to finish it.
This looked a lot easier on YouTube. I was right to think the holes were filling up. |
This has been the most instantly gratifying and useful skill I have ever taught myself. Even more so than the time YouTube helped me rebuild the carburetor on our 1930 Ford. I have two more chairs at the table that need to be done and the totally ruined one that is stashed in the attic that I have a spot for. I am eager to start the next one so I can do even better than I did on my first chair. I have spent fifteen hours over three weeks only working on it on days when I could set aside four hours to get into the project.
When people have asked what I've been up to lately, it is so satisfying to show them a photo on my phone and have them say "where did you learn to do that?" The chair looks pretty spiffy sitting at the end of the table in a place of honor, and it should be useful for another hundred years or so,
And finally..... I sat in it!


Wow!! Color me impressed!
ReplyDelete—Melanie
Thank you for sharing this with us! The chair is gorgeous and I am so impressed! Lori
ReplyDeleteI am glad you both enjoyed it. I had so much fun doing it. I'm halfway thru the attic chair now and find I have learned a little thing or two.
ReplyDeleteFirst of all, love the design and basic look of the table and chairs set. Well worth handling with care and repairing. Secondly, I nearly stopped reading when you talked of rebuilding the carburetor on your 1930 Ford. Good gawd, woman! You are amazing. Is there anything you can't do? Your caning job looks absolutely perfect to my eyes. Good thing it's a task you've enjoyed as with any project that is worthwhile, oh my, the hours spent! I say you go, girl, and I send my admiration. ;o)
ReplyDeleteThanks, the old Ford was a lot of fun. You know when you look at something and your brain goes "hey I understand how that works!" That's exciting. Especially at this age when we have had to accept that so much technology is beyond our comprehension.
DeleteJumping back in to add you could start your own business repairing old-timey furniture like this. This is definitely a long-lost art. You could do this, you know, in ALL the spare time you have now that you're retired. ;)
ReplyDelete--Melanie
I won't be starting a business rightaway, however I believe I will be looking at old chairs at antique malls and flea markets in a different way from now on.
DeleteWhat a fantastic post, Alex. You did a beautiful job! It's wonderful to extend the life on something so lovely.
ReplyDeleteOne word. WOW.
ReplyDelete