Monday, June 28, 2010

Mulching

I don’t know about other gardeners, but I have dreamt of having a garden that was so manageable in size and construction that I could experiment with the finer points of gardening rather than battling the elements. Which is to say, I’ve always thought how nice it would be to putter around with compost and pruning rather than spending my time and energies on tilling the walks, raking the rocks, pulling weeds by the bucket load, and surrendering to insects and blights. Well, thanks to the convenience of my new raised beds I have advanced to mulching!

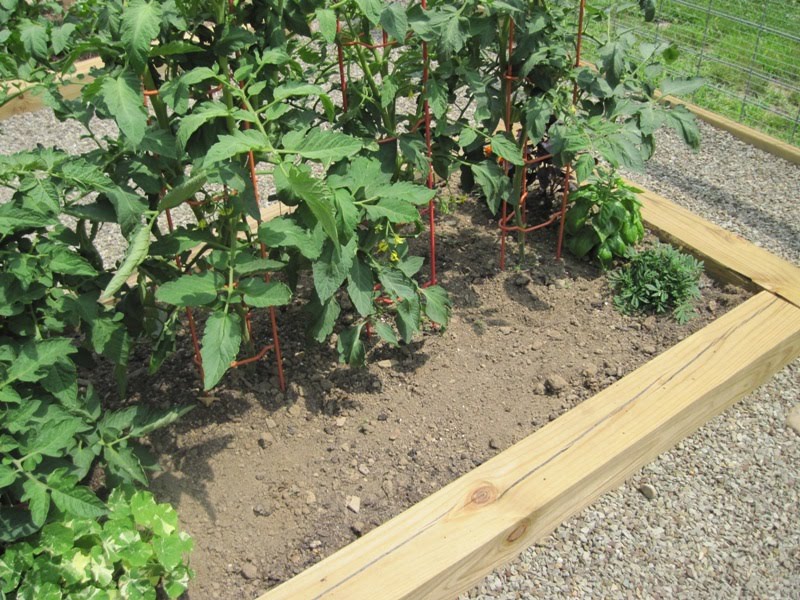
When we put in the beds, we put a thick layer of composted horse manure on top of the soil. Through transplanting and such, some of the beds ended up with most of the compost mixed in, and the soil on top. Those areas have been producing many more weeds than the areas which still have a thick layer of compost. So I have been mulching them. And it’s FUN! And it makes everything look like it has been freshly re-carpeted.

The benefits of mulching are to keep the weeds down, moderate soil temperature, and keeping the soil from drying out. Also, it prevents diseases that can be transferred from the soil when it splashes up onto the plants. Some of the benefits of compost are that it provides microbiotic nutrients often missing in synthetic fertilizers, and improves the soil structure. So, mulching with compost is the best of both worlds.

This is my routine. I head out to the compost pile with a wheelbarrow, a potato fork, and my handy dandy grain sifter. I put two scoops of compost into the sifter, and sift away, throwing whatever is left into a hole in the top of the pile to be composted further. This leaves me with lovely smooth compost to mulch with. This manure has been turned weekly for two months and has stopped working and is now cool and will not burn the plant stems.


The freshly weeded bed prior to mulching, with the bare soil exposed.


And the same spot 5 minutes later with a layer of compost freshly applied. Doesn't it look nice?


In the squash bed I also made use of some old hay. This hay has served many purposes. It was a late cutting taken off the fields to provide bales for the public to sit on during our local Apple Festival. My uncle said if we needed some mulch hay to have handy, would we be so kind as to swing by after the festival and pick this up. This batch was first used in the lawn to mulch grass seed where we dug up to put in the drain lines to the water tank. After being dried in the sun, and raked a few times, it has broken down into short pieces which were perfect for mulching around the summer squash.


I love this grain sifter. I could have built the same thing with some scrap lumber and a piece of hardware cloth. But, I remember there being a sifter just like this in the dirt room of the greenhouse that I grew up in. We were unable to find the sifter before the greenhouse was torn down, so I kept an eye out on Ebay and found this one which was picked out of a barn in the Pittsburgh, PA area. Whenever possible, I prefer to find useful gardening collectibles. It feels better.


Speaking of gardening collectibles, and the Greenhouse.... this little dibber board was one of my favorite items. As mentioned before, the greenhouse was torn down some 8 years ago. My husband and I had already picked through the vast mountains of Junque which the last owner had accumulated but I couldn't find the dibber. I looked, Tim looked, the owner looked. Even my mother went on several salvage missions and she couldn't find it either. Finally, on her last trip, the week the houses were to be demolished, she and the owner were making one last tour, and there sat the dibber on top of a pile, under a bench in the sales room. This dibber was from the days prior to individual cell packs, when the packs of annuals were planted in packs of 6, 9 or even 12 and had to be cut apart with a knife. This would be pressed into each pack providing holes to transplant the seedlings into. Although it was always hanging about on the front lines, everybody usually just poked holes with their fingers anyway. Still it was one of my favorite objects and it holds a special place in my garden collection.


My mother also has a large flat sized dibber board which is missing a lot of it's pegs. It must be a trendy sort of little item though, because Martha Stewart has one....

Sunday, June 27, 2010

What’s Growing ~ Ichiban Eggplant


The first veggie out of the garden this year is the Ichiban Eggplant. That’s pretty amazing. Usually, the eggplants take much longer, and the first food out would be summer squash or green beans. To be fair, the beans and squash were delayed by construction while the eggplants were thriving in gallon pots. Next year I’ll be able to plant a spring garden, so Ichiban had better enjoy its first place award this time because it won’t happen again!


And it looks like the second veggie out of the garden will be the White Lightening Eggplant.


Last year, when I did not have a garden, my Dad gave me some Ichibans out of his garden. He had gotten the transplants from a local greenhouse. I liked them so much that I ordered seeds for myself this year. I enjoy growing several different varieties of eggplant. They come in so many interesting shapes and sizes. I always think it’s a pity when I walk through the produce section of the super market and see trays full of uniform Black Beauty eggplants. The eggplant has so much more to offer even as an ornamental plant.

Round Mauve Eggplant


Ichiban is a Japanese hybrid. It produces long thin fruits (a bit larger than a banana and similarly shaped) and is suitable for cooler climates and containers. The plant is very vigorous and I had good luck with germination and growth, unlike some of the fussier eggplant varieties that seem to lack the will to live.

So what are my plans for these little eggplants? Usually I slice them, sweat them in salt in the refrigerator for a couple for hours, dust them with corn meal and fry them in oil. My mother made some wonderful Baba Ganoush not long ago. Baba Ganoush is a Middle Eastern food similar to hummus or guacamole.

Here’s Mom’s recipe:
Bake eggplant about 40 minutes at 400 (poke it like baking a potato)

cool & pull the peel

add sour cream, garlic powder or canned garlic, Hot Chili Sesame Oil (or Hoisin Sauce which the recipe originally called for)

put all in blender and blend

salt to taste

She served it to me on corn chips with lime flavoring so I think this recipe sounds like it would be really good too:

Chili Lime Baba Ganoush

Ingredients:
· 2 medium eggplants
· 3 cloves garlic
· 2 tbsp tahini (vegan sesame seed paste)
· 2 tbsp olive oil
· 2 tbsp lime juice
· 1 tsp chili powder
· 1/4 tsp salt
· 1/2 tsp cumin

Preparation:
Slice eggplant in half, and roast in 400 degree oven for approximately 45 minutes, or until soft.

Allow to cool slightly, and then scoop out inside of eggplant, leaving skin behind.
In a blender or food processor, combine eggplant and remaining ingredients until smooth.

Fun Eggplant Facts:


  • Eggplant is native to southern India and Sri Lanka.

  • It is part of the nightshade (Solanacene) family, which also includes tomatoes, potatoes, and chili peppers.

  • Like all other edible members of the nightshade family, the eggplant is a fruit.

  • Eggplant and other nightshade plants contain nicotine, though to a lesser extent than tobacco.

  • Eggplant and other members of the nightshade family may worsen the symptoms of arthritis.

  • According to a 5th century Chinese scroll, fashionable Chinese women used to make a dye out of the skin of purple eggplants and polish their teeth with it until they were a shiny gray.

  • An eggplant is almost 95% water.

  • It is called "eggplant" in the United States, Canada, and Australia because the first eggplants in those countries were purely ornamental and featured egg-shaped white and yellow fruit. Today this variety of eggplant is called "White Egg."
  • In Britain, it is called "aubergine," the same as in French.

  • The Italians call it "melanzane," which means "crazy apple."

  • The act of salting and rinsing eggplant to reduce bitterness is called "degorging." An old practice, it is not as necessary these days because modern eggplants are less bitter.

  • Salting eggplant will reduce the amount of oil absorbed in cooking.


The bumble bees are also enjoying the Ichiban.

Wednesday, June 23, 2010

Escar-go-away


There are only two garden "bugs" that I wage war against. One is the Japanese Beetle, and the other is the Slug. I have just been on a killing rampage. There are only two easy ways to kill slugs en masse. One is to drown them in shallow trays of beer, and the other is to melt them with common table salt. I've just melted about 200 slugs and boy does that feel good!
They live in the spike holes and cracks of the rail road ties that border our driveway. They ate my dahlias until I gave up growing dahlias. Then they started on the marigolds. But tonight I got revenge. We had a short rain around dinner time, and when I went out exploring this evening I noticed the slug exodus. They were everywhere! They were heading out for dinner in groups of 6 or more. And while I have given up on dahlias, and the marigolds are safely away form the railroad ties, I was bound and determined to put a sizeable dent in what appears to be a very healthy slug breeding program.
So I went in and got a salt shaker and I salted slugs until I ran out of salt. And slugs. I melted the first batch, then I retraced my steps and melted the EMTs who were helping the ones who received only third degree burns (or eating them ~ yuck). Then I retraced my steps again and melted the mourners. One thing I noticed is that I have at least three different varieties of slugs. And I also noticed that not all of them melt into a gooey yellow mess. Some of them melt into a gooey white mess. I wonder if this is based on species or amount of salt? Someone should do a study.

Monday, June 21, 2010

What’s Growing ~ Borage


The first blossom on my Borage is a brilliant sky blue

With the recent reduction in the honey bee population here in America, there has been a lot of buzz about pollinators. Of course, honey bees are a European import, and prior to the early 1600s, America did without them, making use of a host of our native pollinators, bees, wasps and other insect who don’t make honey, to pollinate the crops and wildflowers. But whether it is a honey bee, a wasp, or any old bug you want to pollinate your garden, you need to work on attracting them. This is especially important with cucurbits who do not self pollinate like the nightshade family. Squashes and Cucumbers especially depend on a pollinator to bring the pollen from the male flower to the female flower. So how do you attract the pollinators? You plant some really enticing flowers on the edges of your garden.


I’ve tried several different attractors in my garden ranging from Basil to Zinnias.


Red Rubin Basil is a colorful and useful addition to the garden.


Besides bringing in pollinators, Zinnias are excellent cut flowers


Some of my favorites are Nasturtium and Sunflower. This year I’m trying Borage. If you read up on Companion Planting, Borage will keep popping up. It is said to improve the growth of tomatoes and strawberries as well as make them taste better. It deters tomato hornworms and cabbage worms. It adds trace minerals to the soil and composts well. It increases the pest and disease resistance of almost anything it’s planted next to. And it attracts pollinators!

Borage (or Starflower) is a Middle Eastern herb originating in Syria. It is found naturalized all through out the Mediterranean region as well as Asia Minor, Europe, North Africa, and South America. The leaves have a cucumber like taste and are used in salads. The flowers are one of the few true blue edibles and are honey sweet. No wonder they attract bees.

So this year I have invited Borage into my squash beds. The plant grows two to three feet high and will probably self seed all over my garden. But it will be a welcome “pest”, and I hope it takes over the edges of the wood line and rougher parts of the lawn.

And just in case it takes over the garden, I’ve looked up a recipe for it:

Borage and Cucumbers
3 large cucumbers½ pint sour cream2 tablespoons rice vinegar½ teaspoon celery seed1/4 cup chopped green onion1 teaspoon sugarsalt and pepper to taste¼ cup fresh, young borage leaves (chopped finely)
Slice the cucumbers thinly. Salt lightly and set aside in a colander for 30 minutes, then rinse and pat dry with paper towels. Mix the remaining ingredients, add the cucumbers to the mixture, and toss lightly. Garnish with borage blossoms. Chill for one hour before serving.

Saturday, June 19, 2010

Happy Father's Day


Happy Father's Day to our proud new PaPa, Gentleman Jim the rooster.


My mother let three hens set, in an admittedly haphazard and disorganised sort of way, and now she has chicks coming out her ears. They started hatching Friday morning and they're still going. Mom was shocked to see two little yellow peeps peaking out from under Hen #1. I'm not sure exactly what she thought would happen.


You see, the problem is, she had three broody hens. Now she not only has to deal with one family of chicks, she has to find a spot for three families. So far she has been putting them in with Hen #1 as they hatch, but that's not completely fair. After all, Hen #2 and #3 did the work too. After enjoying the peeps for a bit, we went to check on Hen #2 and #3. She looked under this one, and groaned... "Oh no, there's another chick". When I reported this to step dad his reply was "pretty sure that's not my fault... I'm blaming the rooster."


When I left, she and her husband had rallied and were setting up more hen homes. This should be interesting. Mom was marching around lecturing herself... "I've had three weeks to think about this and I didn't think... well, I did think, but I didn't act..."

It's been a very long time since we raised chicks under a hen. Chicks are always fun, but they're even more fun when you get to watch them interact with a hen. Mom and I never tire of chicks. My husband got tired with the last batch. It seems he did not enjoy using the computer when the office was kept at a steady 90 degrees... in the summer. I have since been forbidden to raise chicks in the house. They will have to go in the chicken coop. Not a big sacrifice. I have one of the nicest chicken coops around and it will be just perfect for raising chicks. Unfortunately, since we've moved the coop, the chicken run is still in the planning stage. Mom's on her own on this one.

But she'll do just fine now that the initial shock is over. So, here's some footage so you can enjoy watching chicks too. I love it when the hen gets something good and she calls all the little ones to come see, and they stand around looking excited but still have no idea what to do. They're so innocent and new.


Tuesday, June 15, 2010

Lesbian Squash and Other Gardening Issues


I knew that title would get your attention. The neighbors' squash plants have a proliferation of blooms. But, we turned over all the leaves to examine them, and all the blossoms are female. Not a male among them. And this does not bode well for squash production, because you need at least one male flower in there to pollinate the female flowers. Without that all important male flower, you can't even practice forced flower sex with a Q-tip or paint brush. My husband, a gardening rookie was shocked to find that this was a concern. Ahhhh, the complicated and stressful life of a gardener. My squash plants are not to the point of flowering yet, so that is one worry I can put off.


But production has started. I have a half grown Ichiban eggplant.


A quarter sized Barlow Jap tomato.


Quite a few Sweet Pickle peppers.


And a bell pepper the size of a marble.


The Undead Tomato has been transplanted to a BIG pot, and has taken up residence in the garden. It's mate (which I snapped off during transplanting) is doing just as well and has set a teeny tiny tomato.


Of course there's lots more stuff growing in the garden. I just got my bean poles sanded and painted (thanks Honey, I would have gotten to it) and back up. These will support the Painted Lady pole beans from beans I saved for two years. I have red clover planted in the bed, and an artichoke in the center.


My own squash beds are doing fine, and the Borage I planted between them is just about ready to bloom and draw all sorts of beneficial pollinators to my wide expanse of gravel.


The cucumber and bush bean bed is lush and thriving.


And construction has progressed with the completion of the pergolas over the gates.


We even have benches to sit on which is really a necessity since we all end up congregating in the garden on evenings and weekends. We've looked at a lot of benches over the past two weeks, and settled on these for three reasons. They were very inexpensive, can be painted if they need a freshening up, and fold completely flat for winter storage. I plan to either get or make cushions for them, but right now, they are nice for setting down a wine glass.


Tim is working on attaching tight woven rabbit proof fence along the bottom 2 feet of the perimeter, and I have taken to worrying about early blight and bacterial speck. No sign of them yet, nor is there any powdery mildew. I've been pruning the tomato plants religiously, and got up early this morning to spray everything with a dilution of baking soda, oil, and castile soap.

I'm going completely organic this year. I've used some bone meal around the maters to ward off blossom end rot, and I've fertilized once with a fish and sea weed fertilizer. My next project it to run some compost through the sifter and dress the beds where digging has brought the bare soil to the top allowing weeds to grow. All in all, the weeds are still in check.

Wednesday, June 9, 2010

This Time Last Year

Actually, this time two years ago because last year I skipped the garden entirely in anticipation of the work and expense involved in building the raised beds. I think it was well worth it.


And two weeks later... the weeds have arrived.


And this is the garden from the same view point this evening


And, we have water! When I got home last night, the garden hose was stretched down the center of the garden, and Tim informed me that the pump was installed and fully operational. I took it for a spin. There is a switch inside the gate post for the pump, and a warning light to let you know if you have forgotten the pump on and walked away. Not that I need to water this week since our June rainfall has already beaten our monthly average.

Monday, June 7, 2010

The Garden is In!

Well my camera has been replaced, so I can catch up on garden progress.


We spent most of Memorial Day weekend working on one part or another. We got the pavers placed thanks to an ingenious device built by Neighbor Mike. These things are very heavy, and there is no way we could have placed them accurately without this lifter.


And accuracy was needed as Tim did the math and determined that the space between the pavers should be 6 and 5/16 inches. Yes, we are dealing with 16ths of inches!


As we were getting them placed, Tim had the wonderful inspiration to fill the gaps between with old road bricks we had stockpiled. This makes it much easier to walk on the path (no wide gaps) and adds some style.


I’ve spent a good deal of time worrying that the soil or the whole plan might somehow backfire, and this garden will disappoint me and not grow anything. I was pleased one morning when I came out and found a sign left by the Garden Fairies that things would grow just fine… volunteer mystery squash from the compost pile.


One thing to note is that with all of this gravel and the large (thick) pavers, the garden is a good 10 degrees warmer than the ambient temperature. And the deep gravel and drainage system is holding a lot of water which would normally end up in the drainage ditch, or puddle in the yard, so the humidity is good as well. My tomatoes think they are vacationing in the French Riviera.


So, for the past week, when I would normally be hoeing the paths between rows, and cursing the mud from the rain, I have been wandering around my garden, pulling the occasional weed (or compost volunteer) and wondering if this raised bed thing really is TOO easy. In fact Tim and I and one or more of the cats, have taken to spending a few minutes each evening just sitting in there admiring his work, and counting the sprouts. Which has prompted us to search for simple benches to put at the ends of some of the beds. We also have more cosmetic touches to finish such as caps on the posts, and pergolas over the gates. So stay tuned!