Wednesday, June 5, 2013
Stop! Thief!
We have NO idea where the other end of this tunnel is. But I can tell you who Enemy #1 is this week.
Saturday, June 1, 2013
Pestilence and the Barrier Method
Let me preface this post by saying... I Hate Sewing.
It takes a lot to get me to sew these days. I can't seem to get along with a sewing machine...
I never took Home Economics in high school. Instead I took Physics and Trigonometry and other brainiac classes. Obviously, looking back, I should have taken something more useful such as Home Ec, possibly photography and definitely a shop class or two. And I struggled through Physics and Trig, but not nearly as much as I struggled with cutting a square piece of nearly invisible, stretchy, green tulle fabric. I mean how is that supposed to happen? Maybe we should have covered it in Physics.
I've done my fair share of sewing. I grew up thinking that was natural. My grandmother was a wonderful seamstress, and so is my mother. They sewed their own clothes. They even sewed my riding habits which, for those who don't know, are the equivalent of a tuxedo with satin collars and ribbons up the outside seams. Obviously they were well schooled.
Mom taught me how to thread the machine and load the bobbin and sew a straight line. I haven't advanced much past that. One evening my sister came home to find me elbow deep in a pair of removable upholstery covers with tasseled edges for some large floor pillows. "I hate you. You know how to do everything." she griped. I replied, "No, all I know is how to thread the needle and the bobbin. The rest I'm just making up as I go." "Okay", she countered, "I hate that you believe you can make it up as you go along and it works."
Fine. Guilty as charged. The floor pillows came out incredibly well. You see, I have very particular tastes. I get an idea, and if I can't find it already made, I set about to make it myself. I've sewn countless window treatments on this premise, including some rather difficult roll shades with scalloped edges which garnered compliments from a friend with her own decorating business. I've found that when approaching a sewing project, the best start is to find some very forgiving fabric to work with. If it is striped or plaid, then I'm all set because I just follow the lines. I was not prepared to work with green tulle netting. But these are desperate times. You see... we have a plague. The plague is flea beetles and last year they decimated my eggplants.
I've dealt with flea beetles in some numbers from the very beginning. Below you can see some minor damage on the upper leaves of this Rosa Bianca eggplant which is a beautiful variety with jewel like, deep rose fruit. The damage just looks like little pin pricks with the sun shining through. It doesn't bother the plant much. The brown shingles in the background tell me it's from 2008 or earlier so that is at least 5 years of successful flea beetle breeding operations.
Below is a specimen of a Galine eggplant from last year's garden. How far we've come! The poor thing! I don't really remember getting a single eggplant last year, but photographic evidence proves that I got at least one before I pulled the miserable things out and humanely destroyed them.
It begins innocently enough, with a few beetles that look and behave exactly as their name suggests. You could easily mistake them for fleas. Diaotomaceous earth discourages them. Spray drives them off for five minutes or so, but the constant assault of chemicals (even innocent ones like soap) and leaf choking powder does more harm to the plant than the beetles do. Maybe.
The beetles also enjoy radishes and potatoes. They LOVE Mustard Greens. Organic gardeners suggest planting some as a "catch crop" where the flea beetles will happily munch away and perhaps, if you planted an acre or so of Mustard Greens, they may ignore a few eggplants nearby.
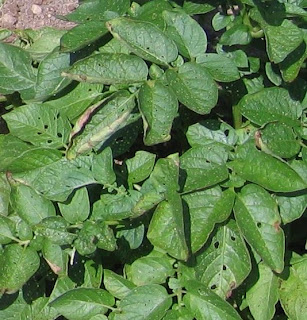
My garden is a haven where I hope to enjoy lush green, thriving plants. I do not enjoy looking at plants which resemble Lorraine Swiss Cheese. This just smacks of gardening failure and a black thumb.
I love to grow eggplants. They come in a veritable rainbow of sizes, colors and shapes and, to me, are as interesting as any rose bush or geranium . Prosperosa (above) and Round Mauve (below) are on opposite ends of the spectrum.
They even come in different shapes from round to long and narrow. The long and early Japanese variety Ichiban prospered in my 2010 garden with lush foliage ribbed by deep purple veins. Not a single flea beetle in sight. Exquisite.
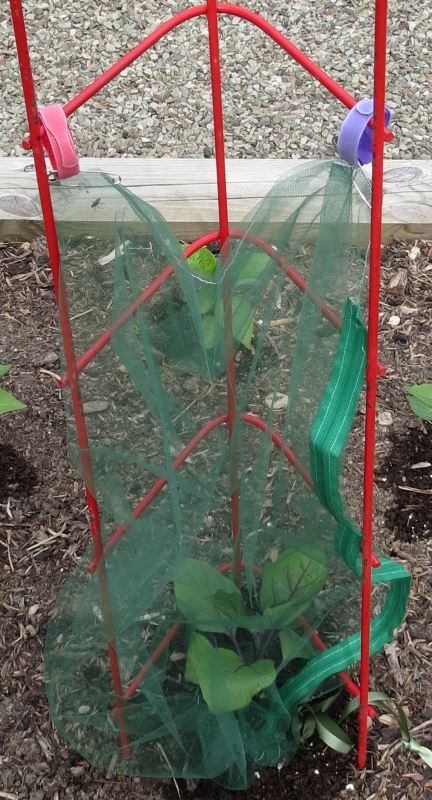
And sew I set out to make the invisible, green, tulle eggplant condoms with side zippers. They turned out pretty well. I pinned Velcro cord organizers to each corner to suspend them from the plant supports, and used pretty green satin ribbon as the drawstring, which probably won't be pretty and satiny or even green for long. The green tulle is sheer enough to allow air and sunlight in and allow visual inspection for other pest infestations. And speaking of other pest infestations, the barrier theory is adaptable to other pests as well. Take for instance slugs and cut worms in your cucurbits.
Another barrier is used stockings. This has the advantage of being long enough to protect a length of stem which may be lying along the ground. Here I have my zuchinni dressed with a toilet paper roll and a knee high stocking just waiting to be pulled up the stem. Again, FREE (more or less), a guaranteed constant supply, and they expand to fit. What more could you want?
This is one of those pauses in gardening. The seeds are sewn. The plants are transplanted. The peas, the flowers, the potatoes and the carefully coddled tomatoes. Everything is trimmed, weeded, edged, mulched, protected, mowed, hoed and hilled . Plans have been laid. Hopes are high. And now.... we wait.
It takes a lot to get me to sew these days. I can't seem to get along with a sewing machine...
I never took Home Economics in high school. Instead I took Physics and Trigonometry and other brainiac classes. Obviously, looking back, I should have taken something more useful such as Home Ec, possibly photography and definitely a shop class or two. And I struggled through Physics and Trig, but not nearly as much as I struggled with cutting a square piece of nearly invisible, stretchy, green tulle fabric. I mean how is that supposed to happen? Maybe we should have covered it in Physics.
I've done my fair share of sewing. I grew up thinking that was natural. My grandmother was a wonderful seamstress, and so is my mother. They sewed their own clothes. They even sewed my riding habits which, for those who don't know, are the equivalent of a tuxedo with satin collars and ribbons up the outside seams. Obviously they were well schooled.
Mom taught me how to thread the machine and load the bobbin and sew a straight line. I haven't advanced much past that. One evening my sister came home to find me elbow deep in a pair of removable upholstery covers with tasseled edges for some large floor pillows. "I hate you. You know how to do everything." she griped. I replied, "No, all I know is how to thread the needle and the bobbin. The rest I'm just making up as I go." "Okay", she countered, "I hate that you believe you can make it up as you go along and it works."
Fine. Guilty as charged. The floor pillows came out incredibly well. You see, I have very particular tastes. I get an idea, and if I can't find it already made, I set about to make it myself. I've sewn countless window treatments on this premise, including some rather difficult roll shades with scalloped edges which garnered compliments from a friend with her own decorating business. I've found that when approaching a sewing project, the best start is to find some very forgiving fabric to work with. If it is striped or plaid, then I'm all set because I just follow the lines. I was not prepared to work with green tulle netting. But these are desperate times. You see... we have a plague. The plague is flea beetles and last year they decimated my eggplants.
I've dealt with flea beetles in some numbers from the very beginning. Below you can see some minor damage on the upper leaves of this Rosa Bianca eggplant which is a beautiful variety with jewel like, deep rose fruit. The damage just looks like little pin pricks with the sun shining through. It doesn't bother the plant much. The brown shingles in the background tell me it's from 2008 or earlier so that is at least 5 years of successful flea beetle breeding operations.
It begins innocently enough, with a few beetles that look and behave exactly as their name suggests. You could easily mistake them for fleas. Diaotomaceous earth discourages them. Spray drives them off for five minutes or so, but the constant assault of chemicals (even innocent ones like soap) and leaf choking powder does more harm to the plant than the beetles do. Maybe.
The beetles also enjoy radishes and potatoes. They LOVE Mustard Greens. Organic gardeners suggest planting some as a "catch crop" where the flea beetles will happily munch away and perhaps, if you planted an acre or so of Mustard Greens, they may ignore a few eggplants nearby.
| 2012 potatoes with flea beetle damage |
My garden is a haven where I hope to enjoy lush green, thriving plants. I do not enjoy looking at plants which resemble Lorraine Swiss Cheese. This just smacks of gardening failure and a black thumb.
My personal favorite is White Lightening which is a bit smaller than the traditional American Black Beauty with a creamy white skin, smooth texture and a very mild tasting flesh. Just look at that huge velvety leaf! Soft as a Basset Hound's ear. See, I get a bit nutty about eggplants. They are second only to tomatoes in my garden. So, I take all this munching and destruction pretty personal.
This spring, in late April, on one of first really warm spring date, the flea beetles hatched. And it was a bumper crop. Alarming! I first noticed them sunning themselves on the ties that edge the beds. Thousands of them. Literally. Thousands. It looked like someone had spilled a pepper shaker down each tie. I went around and sprayed with some organic bug spray. This didn't seem to worry them. Next, I mixed up a super strong mixture of Clorox and water and made the rounds again. Still, no visible effect. A day or two later, as I was weeding the beds, I waved my hand over the soil and felt them jumping, by the millions, in a cloud against my hand, Ooooo this is not good. Visions of devoured eggplants flashed in front of my eyes. So, the plan is: Lock them out. Cover Everything.
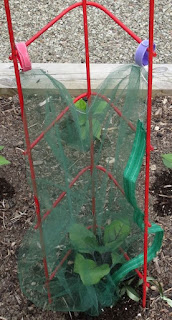
Since eggplants are self pollinators, and do not require bees to spread pollen from flower to flower, it is a viable alternative to bag them. Some people use floating row covers. I don't have rows of eggplants, and I wasn't too keen on the idea of billowy white bags over each plant like runaway pillow cases. When saving seeds for tomatoes and other self pollinators, I have used small, white, tulle drawstring bags which craft stores sell for putting in wedding favors. I decided to make giant versions of these. But how would I get the fruit out? Or hand pollinate them if need be? I couldn't be ripping the bag off each time and then stuffing the plant back in. The simple answer was to install a zipper down one side. Now I realize, these bags do not hermetically seal the plants. Some beetles will still get in. After several days I have found a couple of beetles on the leaves which I have squished. But, when you know for a fact you have a gozillion beetles jumping about, one per plant per day is a ratio I am comfortable dealing with.
And sew I set out to make the invisible, green, tulle eggplant condoms with side zippers. They turned out pretty well. I pinned Velcro cord organizers to each corner to suspend them from the plant supports, and used pretty green satin ribbon as the drawstring, which probably won't be pretty and satiny or even green for long. The green tulle is sheer enough to allow air and sunlight in and allow visual inspection for other pest infestations. And speaking of other pest infestations, the barrier theory is adaptable to other pests as well. Take for instance slugs and cut worms in your cucurbits.
Two years ago, my cucumber transplants began to mysteriously damp off. Or at least that was what I thought was happening. The conditions didn't make that seem possible. After several days of this, as I crawled along on my hands and knees peering under plants, I noticed baby slugs, so tiny that you could line two of them up end to end on a grain of rice, were gnawing away at the stems. Some of them survived as the stems scarred over. Applying Diatomaceous Earth at the base, and setting out trays of beer kept them under control.
Last year I had my first real trouble with squash vine borers. They chewed the heck out of this zuchini plant. Now, zuchini are tough. You can cut the invader out, cover the damage with soil and water well for a few days and the plant will probably survive. In fact, this one carried on with no intervention at all for many weeks. But again, I don't want to look at gnawed on plants anymore than I want to replace them. So, preventative measures were in order. We saved toilet paper rolls all winter.
Planting your cucurbits in toilet paper rolls will ward off slugs, cut worms, and squash vine borers because the little buggers crawl along the soil looking for an unattended stem to eat. If all they find is a cardboard wall, they will move on. Hopefully. Plants this size are easy to thread through the tube. If the tube comes unglued with water damage, or the leaves are too big, just cut down the side and place two over lapping tubes around the stem. And why, as my husband asked, use cardboard rolls which are sure to fall apart and not some sort of plastic collar? #1. They are organic and can be thrown in the compost #2. They are FREE (more or less) and #3. There is a guaranteed constant supply of them.
Another barrier is used stockings. This has the advantage of being long enough to protect a length of stem which may be lying along the ground. Here I have my zuchinni dressed with a toilet paper roll and a knee high stocking just waiting to be pulled up the stem. Again, FREE (more or less), a guaranteed constant supply, and they expand to fit. What more could you want?
This is one of those pauses in gardening. The seeds are sewn. The plants are transplanted. The peas, the flowers, the potatoes and the carefully coddled tomatoes. Everything is trimmed, weeded, edged, mulched, protected, mowed, hoed and hilled . Plans have been laid. Hopes are high. And now.... we wait.
Saturday, May 25, 2013
You Can't Always Get What You Want
You can't always get what you want
But if you try sometimes, well you might find,
You get what you need
~ The Rolling Stones
Spring is here and well underway. In fact, we've had several weeks that felt like full blown summer. We've been busy in the garden and landscaping. We've enjoyed daffodils and asparagus. The peas are growing wildly. Tim has removed 22 dead or dying ash trees, cut them up, burned the tops, pulled the stumps and graded the meadow. I've edged and mulched the first half of the landscaping. Yup. We've been busy.
| It was a banner year for daffodils |
Spring is the time of year when you begin to see what your gardening year is going to shape up like. The first surprise is finding out what did or did not winter well. Surprise, the Hollyhock which had been thriving and reseeding itself for several years under the dryer vent decided to die off. As did three Mums, two Veronica and a Butterfly Bush. Sometimes there is an easy explanation and sometimes not. As compensation, one clump of oriental Poppies has tripled in size (and now needs to be moved), another Bachelor Button decided to volunteer in a perfect spot, and all the finicky shade loving refugees that I put behind the mulch bunker are thriving in their preferred habitat. There are trade-offs in this hobby.
| The Hollyhock in better days |
Whether your dream garden is a cottage garden full of Hollyhocks, Lupines and antique Rose varieties, bushels of perfect tomatoes or neat and orderly rows of alternating red and green lettuces you are bound to suffer a disappointment now and then. You just never know what its going to be ahead of time. Ten years into my gardening career, I've learned not to take this too hard. There's probably next year. And a gal can get tired of eating eggplant anyway.
I start most of my own vegetables myself, especially the ones that are fussy and require the longest head start. I buy replacements for what fails. I've gotten to know what I can replace and what needs a special effort if I am going to enjoy it this season. This year my lettuce was a flop, but the Alaska Nasturtium took off like mad. Go figure. Either one of those is fairly easy to replace if you know where to look and get an early start on your shopping list.
| My rule is you can never have too much Alaska Nasturtium. It adds color to the predominately green pallet of my vegetable garden and it's a great edible garnish for salads too. |
I've gotten lazy about tomatoes. I no longer start the first of April with a "grow op" in the dining room, heat mats, lights on timers, and fans. It's just too much bother. Instead I start them the first of May in the cold frame and forget about them.
| My Jap tomato transplant Memorial Day 2012 |
When planting time comes they are just putting out their first true leaves and can barely see over the soil line, but not to worry. They catch up surprisingly fast. They won't set any records for early ripening dates, but I make sure to buy one regular sized transplant to hold me over. Last year it was the Paul Robeson.
My best and favorite source for fancy tomato varieties is my friend Mickey. She has similar growing tastes and operates a small and personalized little greenhouse (yes, just one greenhouse) where she starts her own plants for her own garden and produce stand, and sells the extra to the public. Also, she will sell you just one of anything, and at about a quarter of the price the large nurseries charge. She is the one who turned me on to the Paul Robeson, the Giant Pear paste tomato, and Ichiban eggplants. In return I give her some seeds I think she would like such as the Barlow Japs and the Absinthe.
![]() |
| A mouth wateringly delicious Absinthe |
This year I started the Japs (must supply the family), the yellow Dr. Wyche, black Paul Robeson and the green Absinthe. These are my absolute favorites and represent most of the color wheel. I was particularly looking forward to the Absinthes. All of them came up, except for the Absinthe. How frustrating! I could probably replace a yellow or black tomato, and the Brandywine, especially the pink strain, is a suitable substitute for the Barlow Jap and available almost everywhere now. But where in the world am I going to find another green tomato plant commercially?
My last stop in my greenhouse run is usually Mickey's. By coincidence, I landed there just as my mother was leaving with several flats of tomatoes and other vegetables including a cherry tomato variety she had supplied Mickey with seeds and had her custom grow. I found Mickey's list of tomato varieties in it's usual spot by a pole and began to look for a replacement variety, something new and unusual that I can fall in love with. Right at the top, second in line was Absinthe. "Absinthe! You have Absinthe! Do you have any left?"
"Sure. This is the first year I saved seeds from the ones you gave me." Mickey casually produces a pair of scissors and dives into a flat of Absinthe. "Do you prefer tall or stocky?" Like magic she removed a beautiful, stocky eight inch plant from the flat and handed it over to me. It was like Christmas morning! I almost jumped up and down with glee. I could barely concentrate as I asked her for a Sungold, two egg plants (one long Asian variety, and a standard) and some short and stocky basil plants.
I paid her my $2.50 (yes $2.50. That's 50 cents a plant) and left with my treasures thanking her profusely and declaring my undying devotion. At home I carefully watered and placed the new arrivals in the cold frame where they will give my plants something to look up to for another week while we wait for this cold snap to pass. I sorted through my empty pots of disappointment and dumped the dirt back in the bin, counting and organizing cucumbers, peppers, eggplants and tomatoes. Now the question remains. Do I have enough tomato plants or should I go back to Mickey's now that I've regained my senses and pick up another fun variety, or two, I remember seeing on her list.
The gardening season has begun and the survivors and I are soldiering on. No, in gardening, as in life, you can't always get what you want. But if you try sometimes, well you might find, you get what you need
Thursday, April 4, 2013
Potting Soil
![]() |
| My Dad and little sister transplant Coleus |
Some people, I’m sure, have decent luck just shoveling
regular old dirt from their garden into a pot but around here, with our clay
based soil, if you do that, by the end of the summer, what you end up with is a
pot shaped clay brick. You need to amend
the soil to lighten it to retain moisture and add nutrients to meet the demands
of the plants with their root base limited.
You also need to solarize or sterilize the soil to reduce soil born
disease which is the same reason why you should wash and bleach your pots every
year.
I’m reducing my large decorative combination pots by about
half this year because after last year’s extraordinarily long hot summer I’m
really tired of watering pots. Plus, the
raccoons can’t seem to resist playing in them. There are several “self-watering”
systems available that really do cut down on watering and I’ll show you my
results further down this blog. But
these require “soilless” potting mixes which is basically
peat moss or similar substance (that will wick water from a reservoir) amended
with nutrient additives. There are
several recipes available on the web.
Once you have established your wicking base, you need to add
nutrients to the soil. The recipe I use
contains Peat Moss, Perlite (used to improve drainage), Vermiculite (holds moisture), Gypsum (adjusts the pH), Blood Meal (nitrogen), Bone Meal (phosphorous) and
Greensand (potassium).
I love shopping for these ingredients and having them on my shelves in case I need them for a spot in the raised beds later on in the season. For instance, bone meal, scattered at the roots of tomato plants and watered in with Epson Salts seems to halt blossom end rot in its tracks. This satisfies the Mad Scientist in me. It will also earn you the respect of your local garden center workers. I choose organic brands and Non-Miracle brands whenever possible. It always takes me a while to collect everything. For instance, the only place I’ve found locally, which carries greensand, is Tractor Supply. So I buy a year ahead when I spot the hard to find items.
I mix my soil in the
loader of the tractor. I use cup
measures and cut up gallon milk jugs to measure and scoop my ingredients. I keep the garden hose handy to dampen the
ingredients to keep the dust down, use gloves, and avoid breathing the dust.
Then I fill all my planting containers, first making sure I have drilled holes in the bottoms of those which did not come predrilled. If you think that there is no possible way that a 20 gallon pot could ever fill up with rain and flood, you are sorely mistaken.
Now, about those self-watering systems. I bought the ones from Gardeners.com They consist of a reservoir with a fill spout and the reservoir has a grid lid which allows the water to overfill and wick from the bottom of the pot midway up your potting mix coaxing the roots downward and eventually straight into the reservoir itself.
The spout has a cap, but I ended up removing the cap by the end of the season. It’s hard enough to find the spout in a bushy pot of sweet potato vine. You don’t need to fiddle with the cap too. Make sure you leave the top of the tube far enough above the soil surface to make it easier to find. This looks awkward in the spring when the plants are small, but in a month, the pot will have filled in well enough to disguise the spout. Disguise it very well. The spout comes with a tube attached to a foam float which is supposed to tell you when you have filled the reservoir. Just get rid of that. You will know the reservoir is full when the water comes back out the top of the spout. Obviously…
My pots ended up being a bit too deep so to keep the spout high enough, I had to raise the reservoir up by placing used pots under it. You could also use packing peanuts (not the eco-friendly kind which dissolve in water) or other plastic scrap that won’t compress too easily. Don’t use gravel. Pots are heavy enough without it.
You also want to avoid filling the reservoir with soil. I used scraps of burlap to cover the grill. The soil did bypass the side flanges and fill around the edges of the reservoir and pots below.
Last year was a very dry summer. Through July I watered almost every
morning. The pots with the reservoir
were much less maintenance.
I would fill
the reservoir once or twice a week depending on how the plants looked. And I did not just fill the reservoir up and
walk away. I found if I waited 30
seconds or so, the dry soil would immediately wick the reservoir almost
dry. I kept filling until the soil
stopped wicking and the reservoir would take no more. On very dry days, especially early in the
season when the roots weren’t very deep, I also topped off the pot with some
water to restore anything that may have wilted in the afternoon sun. But overall I was very satisfied with the
difference the reservoirs made.
I was also curious as to what was going on in there. When I emptied the pots in the autumn, I found the roots had grown right into the reservoir and formed a thirsty mass. They also grew down around the pots underneath, carrying soil with them and utilizing the entire depth of the pot.At the end of the season, you may be left with a root bound
mass which appears to have devoured all available soil. Some pots will have virtually untouched soil
in the bottom. I may reuse this in my
pots the next season, or amend my beds with it.
The roots masses I generally throw into the compost pile. The soil which appears used up, I dump into
my raised beds. The high percentage of
peat and compost serve to lighten the dirt that I filled the beds with to begin
with. There will always be a “dead” spot
somewhere in your beds you think could use a little help. I dump the used soil there and cover with a
thick layer of compost so it will be ready to go in the spring.
Sunday, March 31, 2013
Happy Easter
![]() |
| Hope Springs Eternal |
Spring may actually be here. If not, we're carrying on anyway. These crocuses were waiting in the snow cover in the morning encouraged by a sunrise and promise of 50* temperatures.
By afternoon the snow was disappearing from all but the darkest corners and the wide puddles covering the lawn the day before had managed to soak into the already saturated ground. I got started on my To Do list labeled "March" (optimistically).
The first thing was to take some measures to protect my sprouting tulips from the now ravenous deer who are craving fresh fruits and vegetables as badly as I am. Then I straightened the pots stored in the cold frame and potted up some geraniums I saved over bare root from last year. They don't look too promising but I doubt they're all dead. I watered everything wintered over in the cold frame. It's now time to fill some flats and get lettuce and herbs seeded and make full use of the cold frame to start our season early.
Tim spent the afternoon on one of my wishes, a dibble board. On the right you can see the vintage one salvaged from the family greenhouse. Its missing many pegs and is cracked and repaired from years of use. The board would have made holes in 4 six plant peat packs so the seedlings could have been easily transplanted. My boards are intended for speed in planting beans, especially black beans, which, instead of rows, are planted in the whole bed, 2 inches apart in any direction. I don't need to tell you, that's time consuming! I can now poke 54 holes at once, and then lay the next board beside it and poke 54 more holes. If I need to alter the spacing, I can just skip a hole or a row of holes. The best part is that they were made entirely of scrap we had lying around. 2 hard maple plants, and some dowel rod and some handles that had been taken off of somethingorother. If you would like instructions on making your own dibble board, here is the blog that I followed Beekman 1802
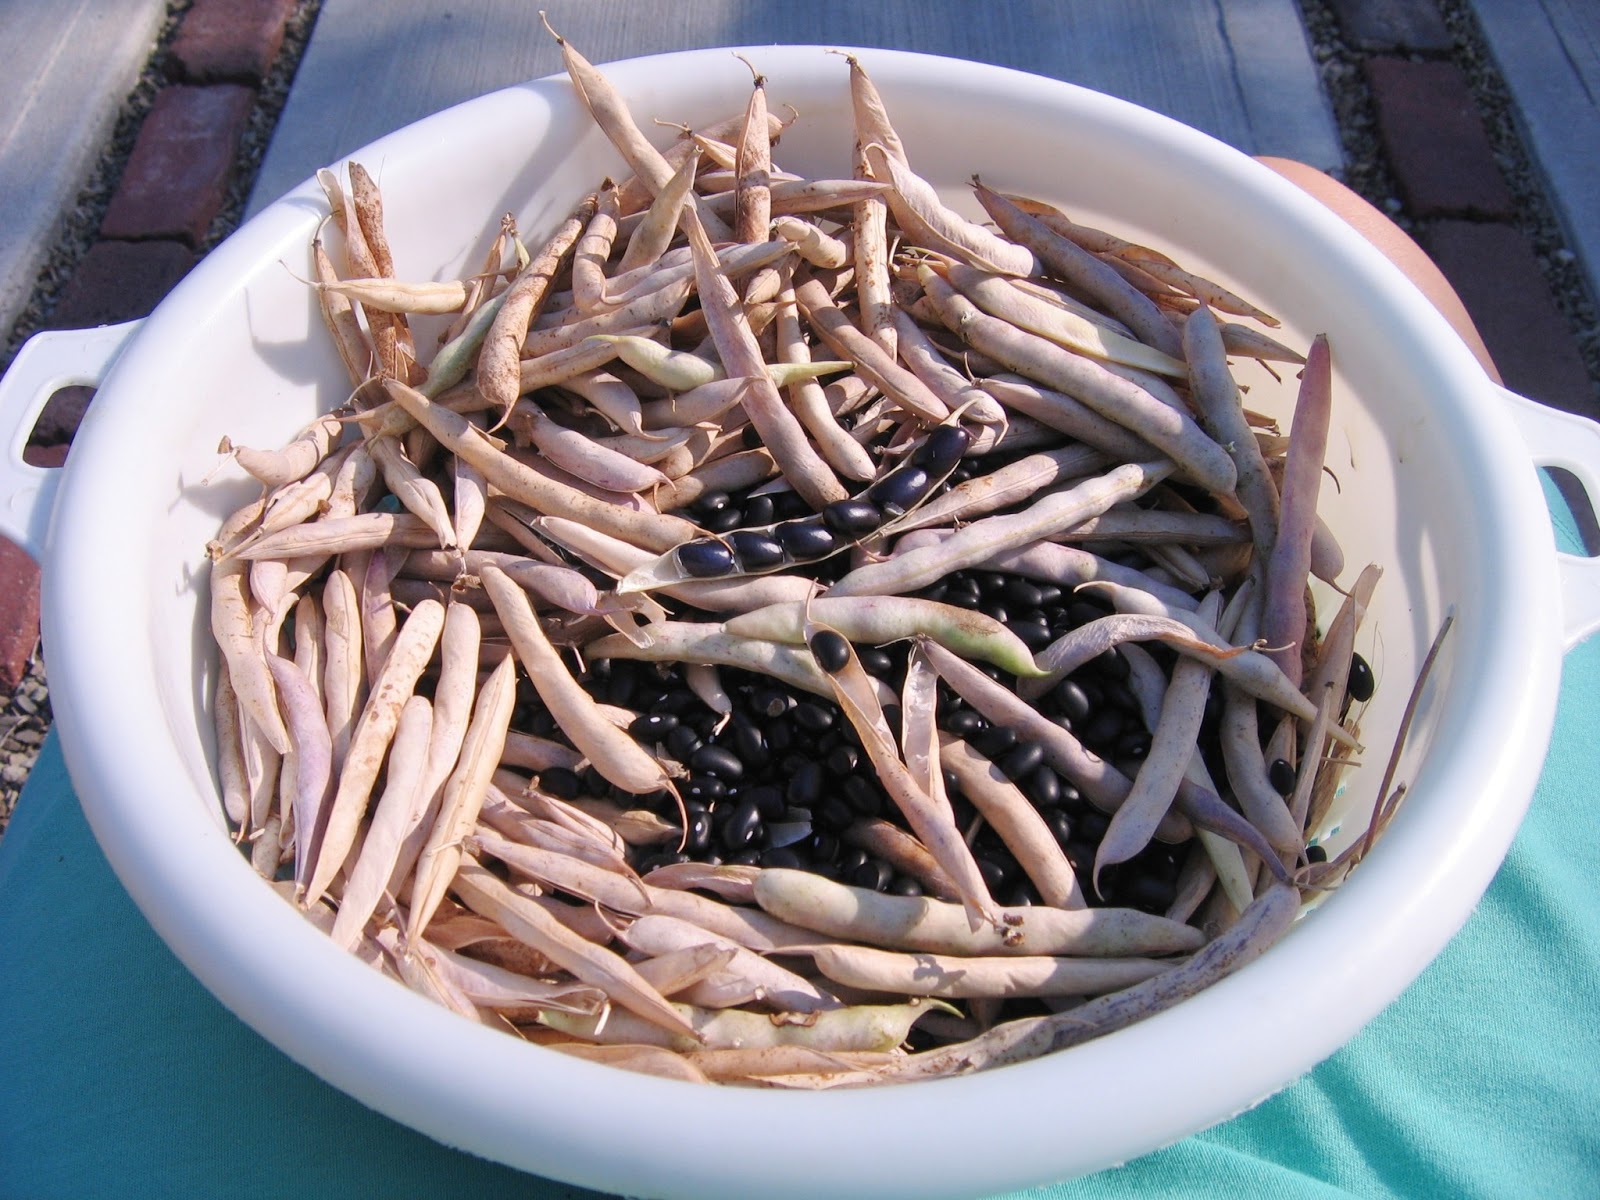
Black beans were my favorite crop last year. I still have a precious few left in a jar, and there is a batch simmering on the stove right now. After catching a Dr. Oz segment on homeopathic food and remedies this past week which included some of the fascinating benefits of black beans, Tim has agreed to try them :). So I'm making up some to serve on leftover rice for supper. You can find many versions of the recipe on the web, but tonight I'm going easy on Tim and not put anything fancy in them. I'm just going to flavor them with some onion salt, garlic powder and chili pepper (Tim loves hot chili con carne). I'll add some diced tomatoes over the top for me.
Saturday, March 23, 2013
Waiting For Spring
I could go on for paragraphs about the fact that this winter is of normal length where as last winter was very mild and short and my potatoes were already sprouting. But, those of you in the north are dealing with the same issue, and those of you in the south don't need to hear us whine about it...
This month's Country Living has a two page feature on collecting seed packets to tide us over.
This very rare Jamestown Baking box originally held "Honey Cart Wheels", or so says the label on the side, and comes from my hometown. I eyed it at the antique mall for well over a year until such time as a discount and cash in pocket tempted Tim and I beyond reason. It now sits on top of our office hutch.
![]() |
| www.CountryLiving.com |
I've already spoken at length about my passion for seed packets (and vintage seed catalogs, particularly those of the Three Seedswomen, and covers for magazines with garden themes). But I don't believe I've ever shared this relatively recent purchase with you.
This is the lid only of a seed store display box. It is from the Card Seed Company in nearby Fredonia, NY where I went to college. Card Seed packets are very easy to come by. A large, unused stock of them was found in a warehouse and has been widely circulated. Now and then I'll find an an example of an older version in an antique store. Those are more fun to come across. This lid hangs on the wall in my kitchen. I'm so glad someone, nearly a hundred years ago, pulled it off it's crate and hung it up to enjoy so that all these years later, I could do the same.
I love illustration art and lithographs. I am also a sucker for boxes and crates and such. Almost every tall piece of furniture in our house is topped with a lithographed advertising box. The Rush Park seed box below I got for a bargain on Ebay some years ago. It stays on top of the Pie Safe and hides my seed packets from year to year.
This Nabisco (Niagara Biscuit Company) cracker box my mother picked up at an auction long ago. It tops a chest of drawers and hides large salad bowls. Sadly, someone painted over the litho on the front but it doesn't hurt it's looks much.
This very rare Jamestown Baking box originally held "Honey Cart Wheels", or so says the label on the side, and comes from my hometown. I eyed it at the antique mall for well over a year until such time as a discount and cash in pocket tempted Tim and I beyond reason. It now sits on top of our office hutch.
Well, that's all the garden inspiration I can manage for this week. I just know my crocuses are up, buried under 10 inches of lake effect snow. Spring Cleaning has commenced although Spring itself seems a bit tardy. I am now off to order some Hollyhocks to cheer myself up.
Think Spring!
Saturday, February 9, 2013
Soups and Sledding
![]() |
| Black Bean Stoup |
![]() |
| My Black Turtle Beans from Johnny's Seeds |
I like Bean Soup. It only took me a few minutes to decide the logical thing would be to use my home grown Black Beans from last season. Sharing them with friends is the best way to enjoy them. I consulted Rachel Ray and chose her Black Bean Stoup. The dried black beans have to be soaked over night and boiled for about an hour before being added to this recipe. I also used my own onions (the last of them) garlic and canned tomatoes. I made it in the crock pot and served it with a topping choice of shredded Pepper jack Cheese or Sour Cream. Most people added both. There were no leftovers.
This sled spends the rest of the year mounted on a rack on the wall of the house on the wrap around porch doing double duty as a sideboard.
Then you all get on The Big Sled. Here we have Gary pushing Boots, myself and Myra.
If you get too many people on The Big Sled, you will need a second pusher.
Myra and Boots push Tim, Gary and a bunch of kids from Gary's brother-in-law's down the hill.
Then you sled away to the horizon. Midway down that hill there is quite a dip which you can't see in the picture. You can work up quite a bit of speed there, especially if you've waxed your runners. The hill levels off at the bottom giving you just enough space to stop the sled before crossing the county highway into the swamp.
If you get tired of waiting your turn for The Big Sled, there are several old fashioned runner sleds around to pass the time on. Even Myra's 80 year old mother "Boots" seen above in the blue pants pushing the sled, will do a belly flopper on the runner sleds. I don't recall runner sleds being this much fun!
Now comes the best part of Geriatric Sledding.
Someone will go down in the ATV to tow your butt back up the hill!
![]() |
| Ultimate Coconut Cake (aka Cardiac Cake) |
Labels:
Neighbor's,
Recipes,
Weather,
When we're not gardening,
Winter
Subscribe to:
Posts (Atom)