Sunday, August 29, 2021

Pickle Day 2021 - And Why the Turkey Fryer is a Superior Water Bath Canner

 It's Pickle Day.
Again.

This year I thought this day would never come because I had such a hard time growing cucumbers.  But they finally did grow.  And I finally had enough for a good batch of pickles.  The cucumbers will keep fine in the hydrator until you have enough built up.  I don't plan pickle day until I have almost a hydrator full.  Five or six pounds.


I like to blog pickle day because I do go back and study to get myself in the right frame of mind and form my plan.  Canning is not something you want to improvise.  And you don't want to get done and think "oh no did I....."

Previous Pickle Blogs:


I sometimes skip a pickle year.  We are beginning to become predictable as to how many pickles we use.  About 6 pints of dill and 3 or 4 pints of sweet per year.  You don't want to make much more than that.  I will sometimes make a quart of refrigerator pickle spears using another spice but that is for late season cucumbers, not the main plan.

With canning you have to make good use of space and materials.  The cucumbers can be sliced ahead of time.  I scrubbed the cucumbers last night and put them in a big bag.  When I am ready to slice I mix up a pan of ice water and pickling lime.  The slices can wait a few hours while you get everything else set.


Stove top space is where you run into trouble.  It is actually not easy to do water bath canning on a glass electric stove top.  It is not easy to get that much water to a rolling boil in a short time period.  This is why we like to use the turkey fryer out in the drive way.  I was going to make the pickles yesterday on the stove top because it was raining and I needed an indoor project but my husband wanted to wait until this morning and use the fryer.  You may wonder why that's important since you already have three pots of hot going on the stove.


Well the reason is - you already have three pots of hot going on the stove!

We're already running the air conditioner.  We don't need one more pot of boiling water.  The other thing is... well there are two things... The basket that comes with the fryer is much easier to deal with than your typical water bath canner insert.  The canner inserts don't work well for pints and even a quart jar will tip especially if you don't have a full load.  Secondly, you get almost unlimited depth of water.  There is no problem covering the jars with several inches of water.  You can use the fire ring for your standard canner, but the fryer pot is better in most cases.  Plus it has a spigot to drain the water.


I start hours before jotting my notes and assembling my tools.  Of course you need a jar funnel and a lifter and a ladle.  I also need a couple of baking dishes and dish gloves.  Another essential is a Ball Blue Book to flip through to refresh yourself on processing times and head room etc.


This time I wanted to make some spears so I chose a few cucumbers for that and after trimming the stem off, checked the size to make sure they won't be too long.


I use the Ball flex batch spices.    Sterilize the jars and rings, heat the lids, and get the pickle solution hot.  Then it comes to jar stuffing.  Stuffing pickles is a learned skill.  More will fit in!  Once the pickles are cooked they can rearrange themselves and show you that there really was more space.  This is where variation in slice size comes in handy.  You don't want your jars to cool too much while you are stuffing.  That's the easiest way to lose a jar.  If you let the jar cool then plunge it into a rolling boil you can crack a jar, especially if it already has an imperfection you missed  To avoid this, I use the baking dish, pull a jar out of the hot water, pour the hot water into the dish and set the jar in that.  Pull a second jar out, but leave the water back in the sterilization pot.  Bring two jars to the sink to stuff.


You can handle a hot jar with a dish glove.


Get the slices stuffed in and then take the baking pan back to the stove.  Pour in the brine using the baking dish to catch any spills.  Put on your lid and rings and then you can set your filled jar back in the hot sterilization water to wait.


The fryer basket will hold 7 pints.  I don't remember if it holds 6 or 7 quarts.
I only use quart jars for tomatoes.
So while I have been stuffing jars, the turkey fryer water has been brought up to a good rolling boil and I process pickles for 20 minutes because we are more than 1500 feet above sea level.


This basket really is so much better than those rickety wire canner baskets


When the jars are out of the water bath, I put them into a baking pan lined with a towel and bring them indoors to cool slowly.


When I was weighing out cucumbers, I used the instructions on the spice jar to figure I needed about six pounds.  Apparently I sliced them too carefully, because I ended up with way too many leftover slices.  While the first seven pints were in the water bath I turned the heat back up on the jar water and mixed up a second spice solution.  I only had four more pint jars available so I did a short batch of four pints.  I still had a few slices and spears left and of course brine.  So I grabbed a quart jar and a few more cucumbers from the garden.  I sliced the new ones into spears and shoved the whole batch of new and old slices into the quart jar, filled it with leftover brine and stuck it in the fridge.  It will be ready to eat in two weeks.


And that concludes Pickle Day 2021.  I, ooops, made 10 jars of slices not 6.
Plus my justforfun spears which I should have made more of,
We still have 6 jars left from last year.
We need to up our pickle consumption just a bit.


Next year we will need to make bread and butter pickles

Thursday, August 26, 2021

A Busy Day and Whatnot

Today our friend Bob brought his box scraper over and did an excellent job leveling the finished portion of the... I don't know what we call it... the meadow?  Its going to be a meadow I guess.


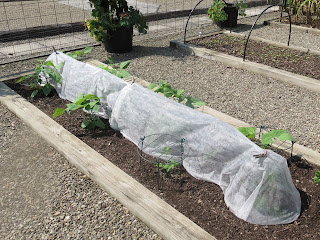
I relocated my hoop cover from the bed that had the cauliflower and now has buckwheat over to my fall garden bed with the bush beans and cabbage.  You can see in the background that the sweet corn has been run through the chipper shredder and been reapplied as mulch.  I never mentioned it again, but despite getting very few ears overall, both varieties ended up producing very tasty corn.  
As long as I picked on a hot day.


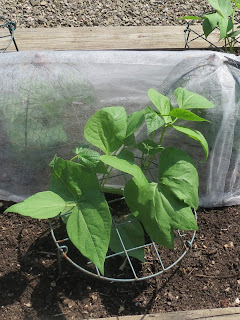
Looks like it is string bean season under there again.  The plants took three weeks off and are now producing as well or better than they did in July.  I pulled the scraggliest plants and they look pretty decent again.  We're having beans for supper along with our own russet baked potatoes.


The cucumber plants are fairly ugly but I haven't had to go in there with the shears again and they are producing fine.  In a few days I will have built up enough cucumbers for my main batch of dill slices.


The tomato plants had to be trimmed but they still look OK.  
This is the Carbon plant still producing nice big tomatoes.


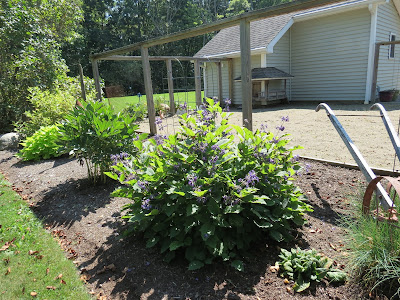
The blue Clematis Shrub is flowering


The Clematis Vine is looking nice and beginning to put out buds.


Today wasn't so awful hot and it was nice to putter around the garden.

Wednesday, August 25, 2021

The Journey of a Thousand Miles - Step # 1,325,844

 The journey of a thousand miles begins with one step.  We are on step # 1,325,844 and our feet are killing us. That is also the amount of money this has cost us (in pennies not dollars).


The first load of logs leaving to the Amish mill

A few days ago we went back to the beginning and finally
picked up the last of the first tree.

Then Larry the Tree Guy Senior a.k.a. Larry the Stump Guy
came to work on grinding stumps.

A lot has happened since the Dangerous Trees series: 

Dangerous Trees 2021 - Part 1

The Journey of a Thousand Miles....

 After the first round of cutting, we spent six days straight in the woods pulling out logs, cutting out damaged smaller trees and trying to restore order.  


Before - from the driveway
Cleanup Week 1 logs removed

It rained a little every day and the ground was rutted up, it was difficult to maneuver the tractor, and we were tripping over small stumps and getting hung up in poison ivy vine. That was Sunday through Friday.  On Tuesday of that week, a quick thunderstorm blew in one evening and took the top out of a remaining maple tree along the road and took out the power. Nice.

After (from the driveway)

Several days after that, when we were trying to fish that downed tree from the ditch where the power company had left it lying, the top came out of one of the neighboring trees got tangled in the power lines and took out the power. Again.  That was twice in one week.  The neighborhood wasn't happy, we weren't happy but the line crew was prosaic about it.  They're used to fixing lines.  We are not.  We were trying to PREVENT the trees from coming down on the power lines.  Not CAUSE it.  Now that the large barrier trees were removed, the inner trees were much more vulnerable to the wind so they had to be removed back to the point where the woods got thick again.

Dangerous Trees Part 5 - Round Two

Because of these two power outages, much earlier than originally planned, Larry the Tree Guy and crew returned for round two.  At this point in the summer I am beginning to lose track of the narrative on this whole process but suffice it to say: it is hot, it is muddy, it is buggy, we are tired and sweaty and we have all had poison ivy.  Even Larry.

The Big Yellow Birch Comes Down

By now, the difference is dramatic

Before

After

Before (from the road)

After

Before (from the lawn)

After


Not every log is salvageable.  If it can't go to the mill, and isn't suitable for firewood
it goes in the pile back in the woods.  This pile of decomposing wood is home to a red fox den
and mink and any number of other woodland critters.
This corner of the property was pretty crappy to begin with.  It sort of bothered me now and then.  Yes, there were some nice old trees and the undergrowth and sheer number of tree trunks screened the house from that section of road.  But it was full of dead and dying trees, mangled saplings, skunk cabbage, weeds and muck.  We don't ever want it to be lawn, we have enough lawn and the new wide open area is half an acre square.  But it might be nice as a wildflower meadow.  It is good that it is being cleaned up and it will look much nicer when we are done.

Burn Pile #2 in addition to what was chipped and
what was given away for firewood 

We will need to be able to brush-hog it so it has to be leveled and graded for drainage.  In order to do that, it needs more clean fill.  In order to do that the stumps have to come out.  In order to do that the stumps need to be accessible.  


Almost all of the debris has been removed.  The town is coming to clean the ditch.  After the ditch is cleaned we will put in a culvert pipe and access from the road.  Then we will bring in more fill and finish the grading.  And the good news is... when sitting on our deck the house is still screened from the road.


Monday, August 23, 2021

The Largest Tomato Sandwich - And How I Save Seeds

 Can you even see the bread under there?  This is the largest tomato I will have this year.  It is from the Pike County plant and it is a beauty. 


Naturally we want to save seeds from not only the earliest fruit but 
also the biggest and most impressive fruit.


This is my method for saving tomato seeds.  Some people will just squish them out onto a paper towel and let them dry and certainly that will work.  This method will give you a little cleaner seed without pulp attached.  Be aware that some people have trouble with seeds sprouting before they dry.  I don't know if you are aware, but tomato seeds will sprout inside a tomato.

Source

Some people recommend that you only ferment seeds for 2 days for this reason.  I ferment mine for as much as a week or more and have not had a problem.  I just put the seed gel into a small glass and add some water.  After a few days you will get a nice layer of icky mold on top.  This means that the gel is breaking down and releasing the seeds.


I give it a good blast of water to break it up


The good seeds will drop back to the bottom.  I carefully pour off the mold and dirty water.  Give it another little blast of water.  Repeat this pouring off the dirty water and bits of pulp until the water runs clean...


... and the clean seeds are left at the bottom.


Pour off as much water as you can then dump the seeds out onto a waxed paper plate.


The plate can be used all season.  As soon as the seeds are dry they can be scraped off and put into an envelope.


So what do you do with a giant tomato if you can' eat it all at once?  Just place it face down on a plate like I did above and it will keep for a day on the kitchen counter.  
You can have leftovers for lunch tomorrow.

Friday, August 20, 2021

We've Got no Time for Crappy Tomato Plants

Tropical Storm Fred was here for three days.  The outer bands gave us .1 and .3 inches Monday and Tuesday. Wednesday it settled in and rained steadily for a total of 2 inches. (sorry Mama Pea, I know you needed it worse then we did).

It did in a few plants.  The two Patio tomato plants were starting to blight out anyway.  Two inches of rain made them decided to drop leaves.  I picked them clean one by one and chopped them down.


This was my first year for the supposedly beautiful Pink Berkeley Tie Dye tomato.  It suffered the most from blossom end rot and I had yet to get a decent fruit for a fair taste test.  The plant was looking so crappy today I decided Screw It.  And chopped it down,


The more mature fruit were getting serious concentric rings on the shoulders and beginning to rot before they blushed, and many of the others were getting eaten up.  There were a lot of stink bugs, and a lot of frass, but I couldn't find a horn worm even when I took it apart piece by piece.  Either way, it was a hot mess.  I saved a few of the larger green tomatoes to see if they will ripen.
 

Elsewhere in the garden my little fall crop is coming along nicely.
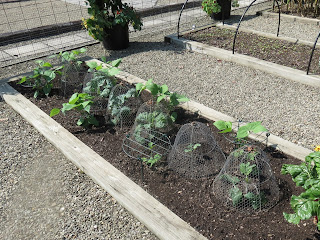
Cabbage (under the cloches) and string beans.


I have to keep the cabbage buttoned up tight.  One plant has sustained a lot of locust munching but the other plants are looking nice.


After the rough appearance of all of this year's bean plants, 
these fresh faces are a real treat.


I started some lettuce indoors under grow lights which makes them super leggy.  
These are hardening off and will be set out in a few weeks.


The Lima Beans have a lot of pods on them


The sweet potatoes are growing well.


I tried my hand at hummingbird photography.
This little gal considered my behavior highly suspicious.


She just couldn't eat and had to sit down and study me for awhile.


Parting Shot: a large Frittilary on the butterfly bush